Remote Ham Radio

The manual

Every help article, in reading order. This copy was generated on 13 Nov 2026; the latest version is always at www.remotehamradio.com/help.

To save it as a PDF, print this page and choose "Save as PDF". Back to the help center

Chapter 1

Getting started

Your account, your license, and your first QSO from a remote station.

1.1

Welcome to Remote Ham Radio

What RHR is, how membership and airtime fit together, and what you need to get on the air.

Remote Ham Radio (RHR) puts real contest stations in your browser. Big antenna stacks, kilowatt amplifiers and quiet rural locations, operated from wherever you are. This article explains how the pieces fit together and what you need to get started.

How it works

Each RHR station is a complete amateur radio installation: a radio, amplifier, antennas and often a rotor, with a small computer that connects it to RHR. You operate it through the console, a web application that runs in your browser. The console shows you the station's panadapter and waterfall, lets you tune, change modes and filters, key the transmitter, turn the antennas and log your contacts. Audio travels both ways in real time.

Nothing needs to be installed. Everything you need to operate is on the web. If you want to connect software on your own computer, such as WSJT-X or a logging program, a small optional helper called LocalMate does that.

Membership and airtime

Using RHR has two parts:

  • A PremiumDX membership, billed monthly or yearly. It opens every station on the network. See Membership and pricing.
  • Airtime, billed per minute while you are connected to a station. Each station shows its rate before you connect, and the rate is fixed for the whole connection whether you are transmitting or listening. See Airtime and rates.

New memberships include a one-time airtime credit, so your first sessions are already paid for. How billing works walks through the numbers with examples.

What you need

  • An amateur radio license. RHR is for licensed operators from the United States, and from CEPT countries when CEPT signups are open. You upload a copy of your license after signing up, and RHR staff verify it. See Verify your license.
  • A current browser. Chrome, Edge, Firefox or Safari on a computer, or Safari on an iPhone or iPad. See System requirements.
  • A microphone and speakers or a headset, for phone operation. You can operate CW and digital modes without a microphone.
  • A good internet connection. A wired connection is best; audio and the waterfall depend on low latency.

You are the control operator

When you connect to a station, you are its control operator and the contact goes out under your callsign. You are responsible for identifying correctly, staying within your license privileges and following the rules of the country the station is in. Identifying yourself on the air covers what RHR requires, including the prefixes used from stations outside the US.

Where to go next

  1. Create your account.
  2. Upload your license within seven days.
  3. Follow Your first QSO for a guided first session.

If you get stuck, the Help menu in the console has Contact Support, or see Contact us.
1.2

System requirements

The browsers, network and hardware the console needs, and what LocalMate requires.

The console runs in a web browser and needs nothing installed. This article lists what it depends on so you can rule out your setup before you connect.

Browsers

Use an up-to-date version of one of these:

  • Google Chrome
  • Microsoft Edge
  • Mozilla Firefox
  • Apple Safari, on macOS and iOS

The console relies on web audio and WebRTC. If your browser lacks them it shows This browser is not supported. You can dismiss the message and continue, but audio and the station connection may not work.

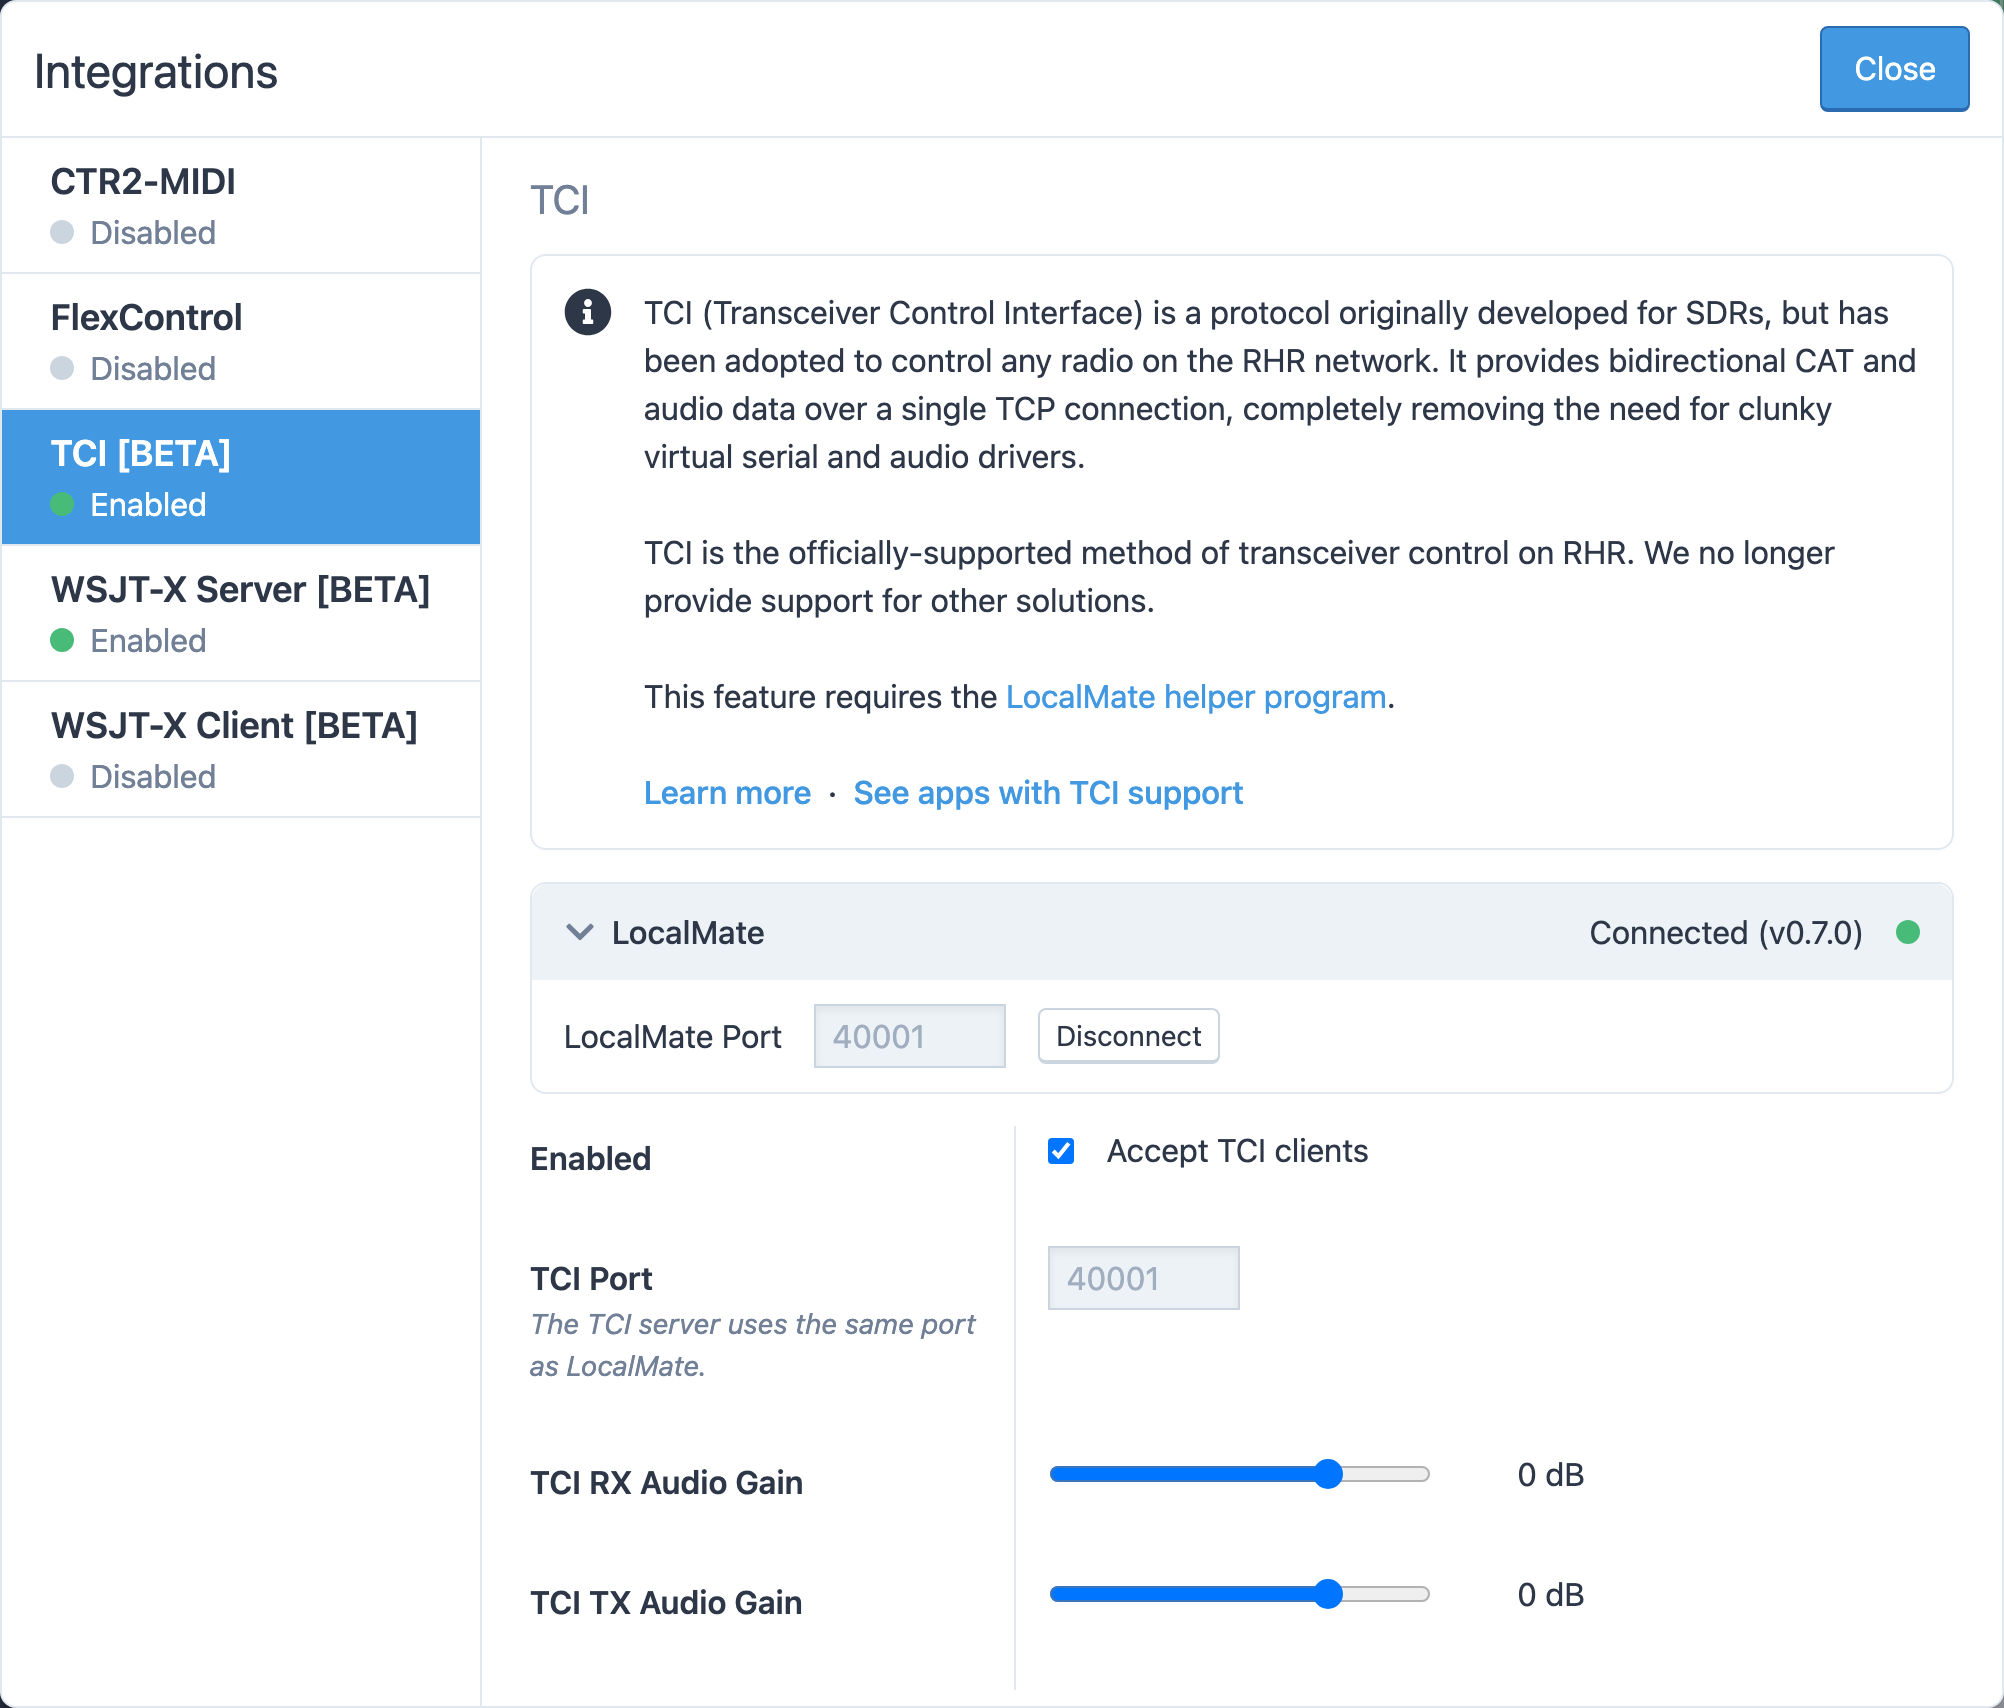
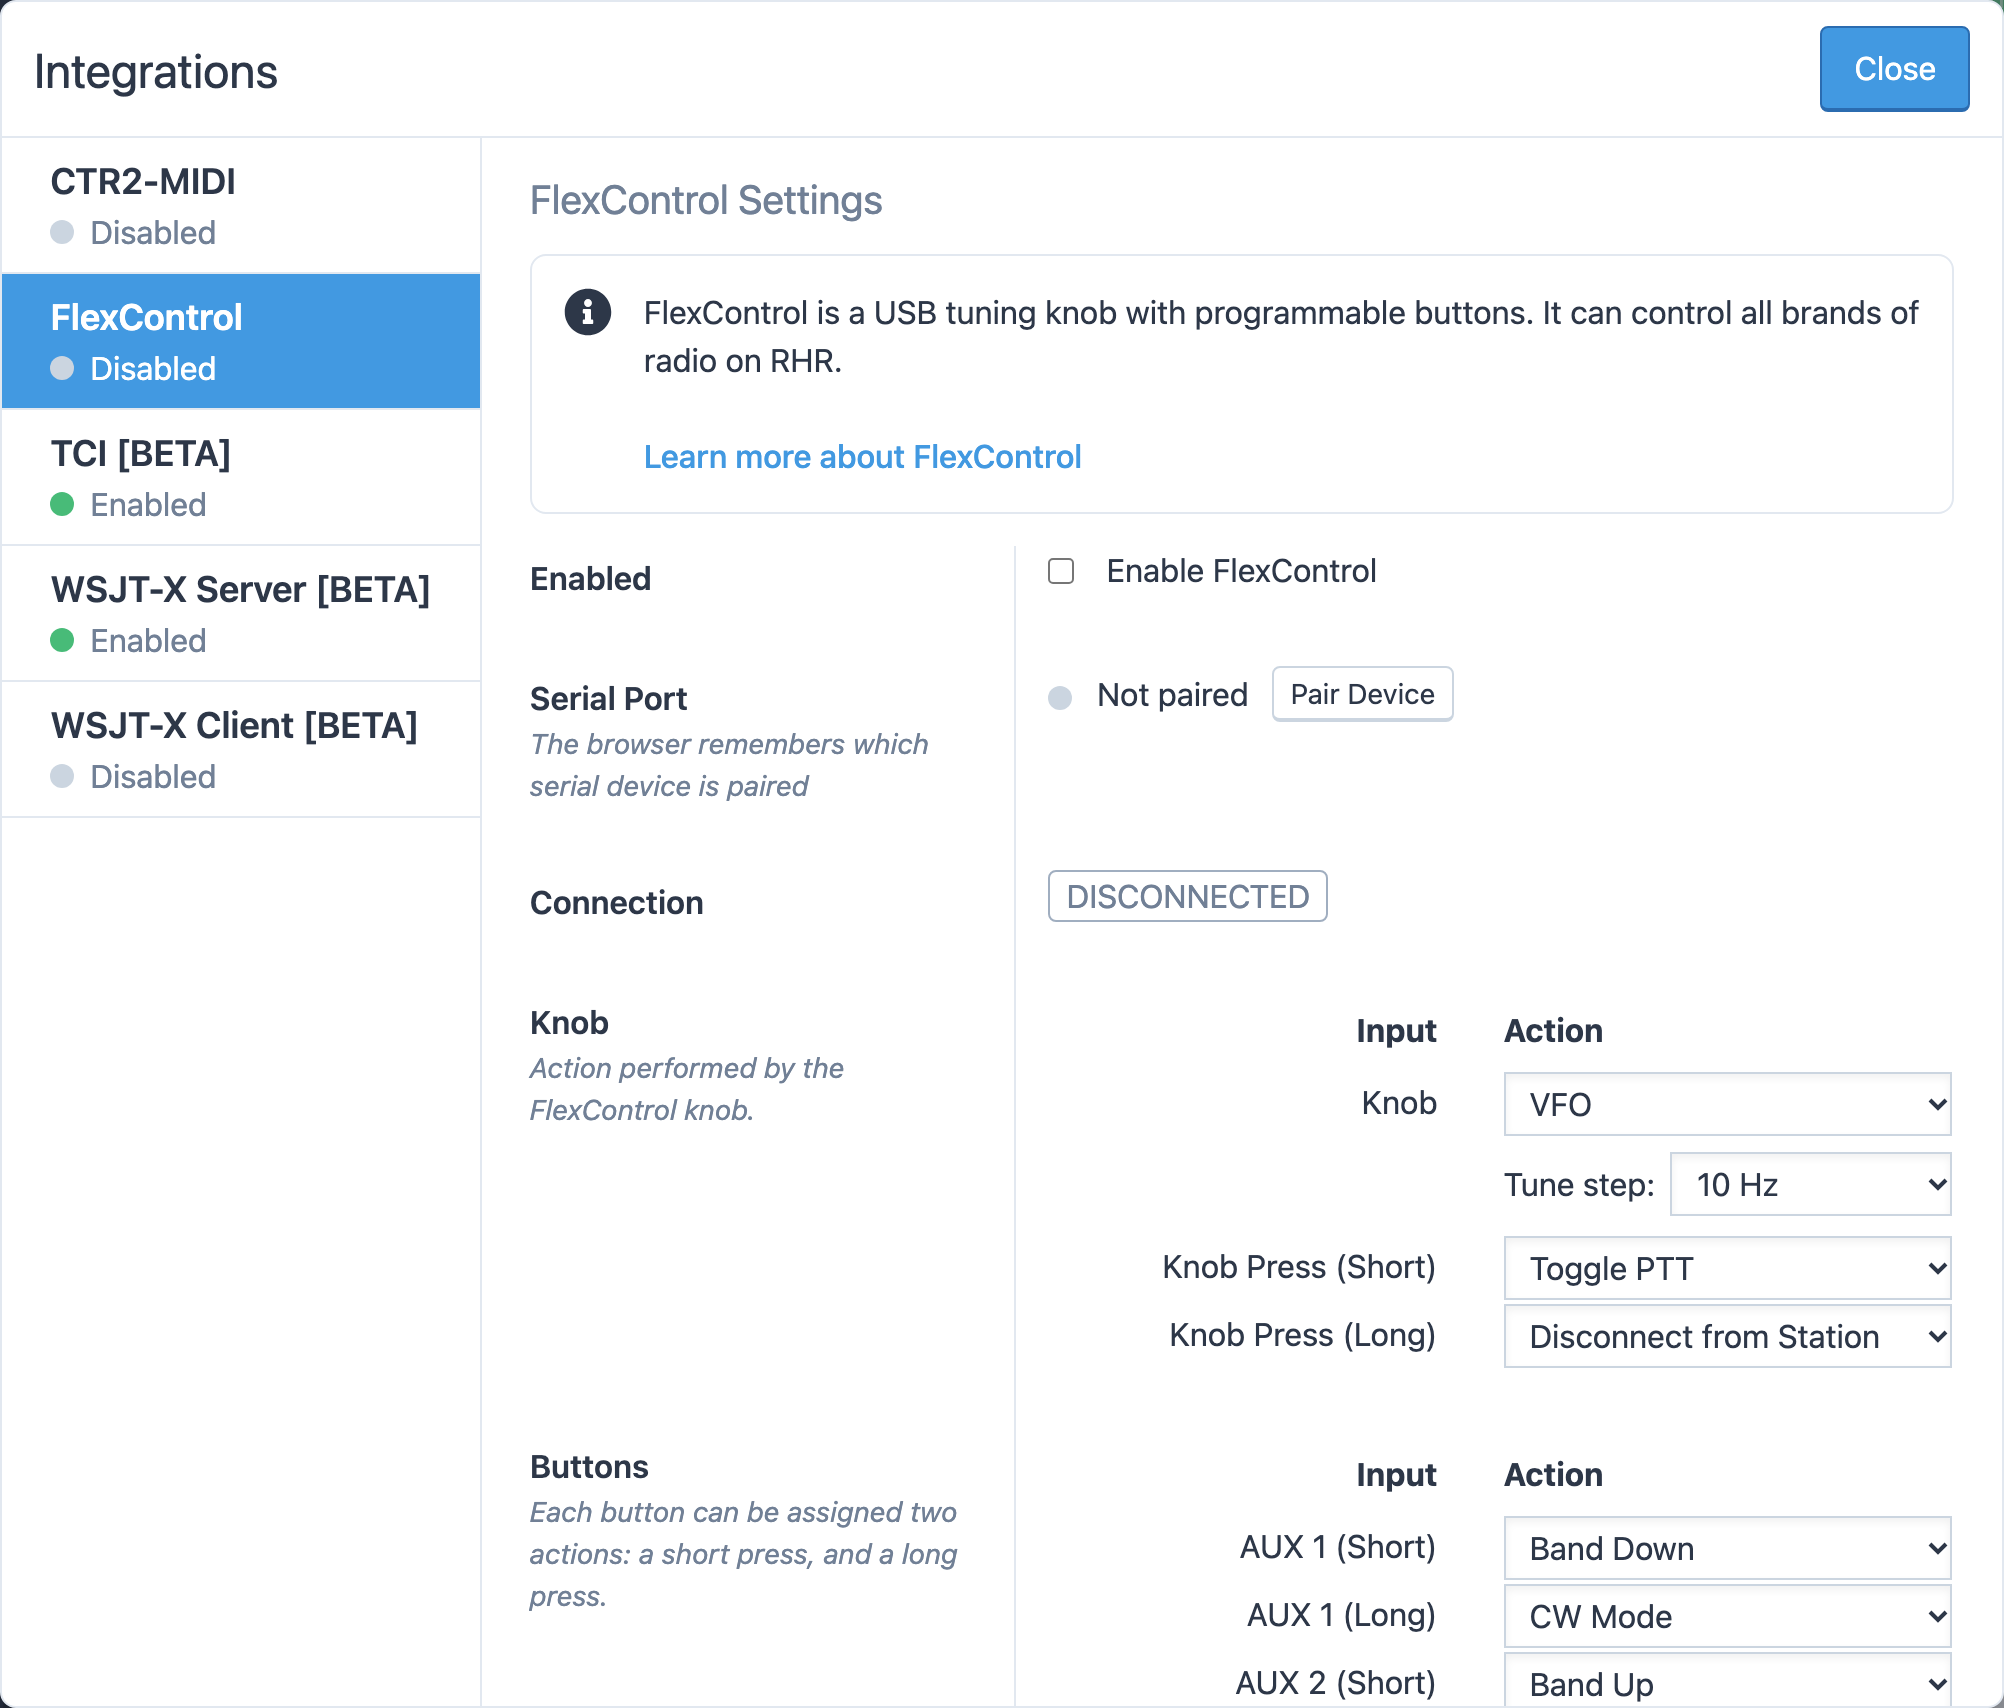
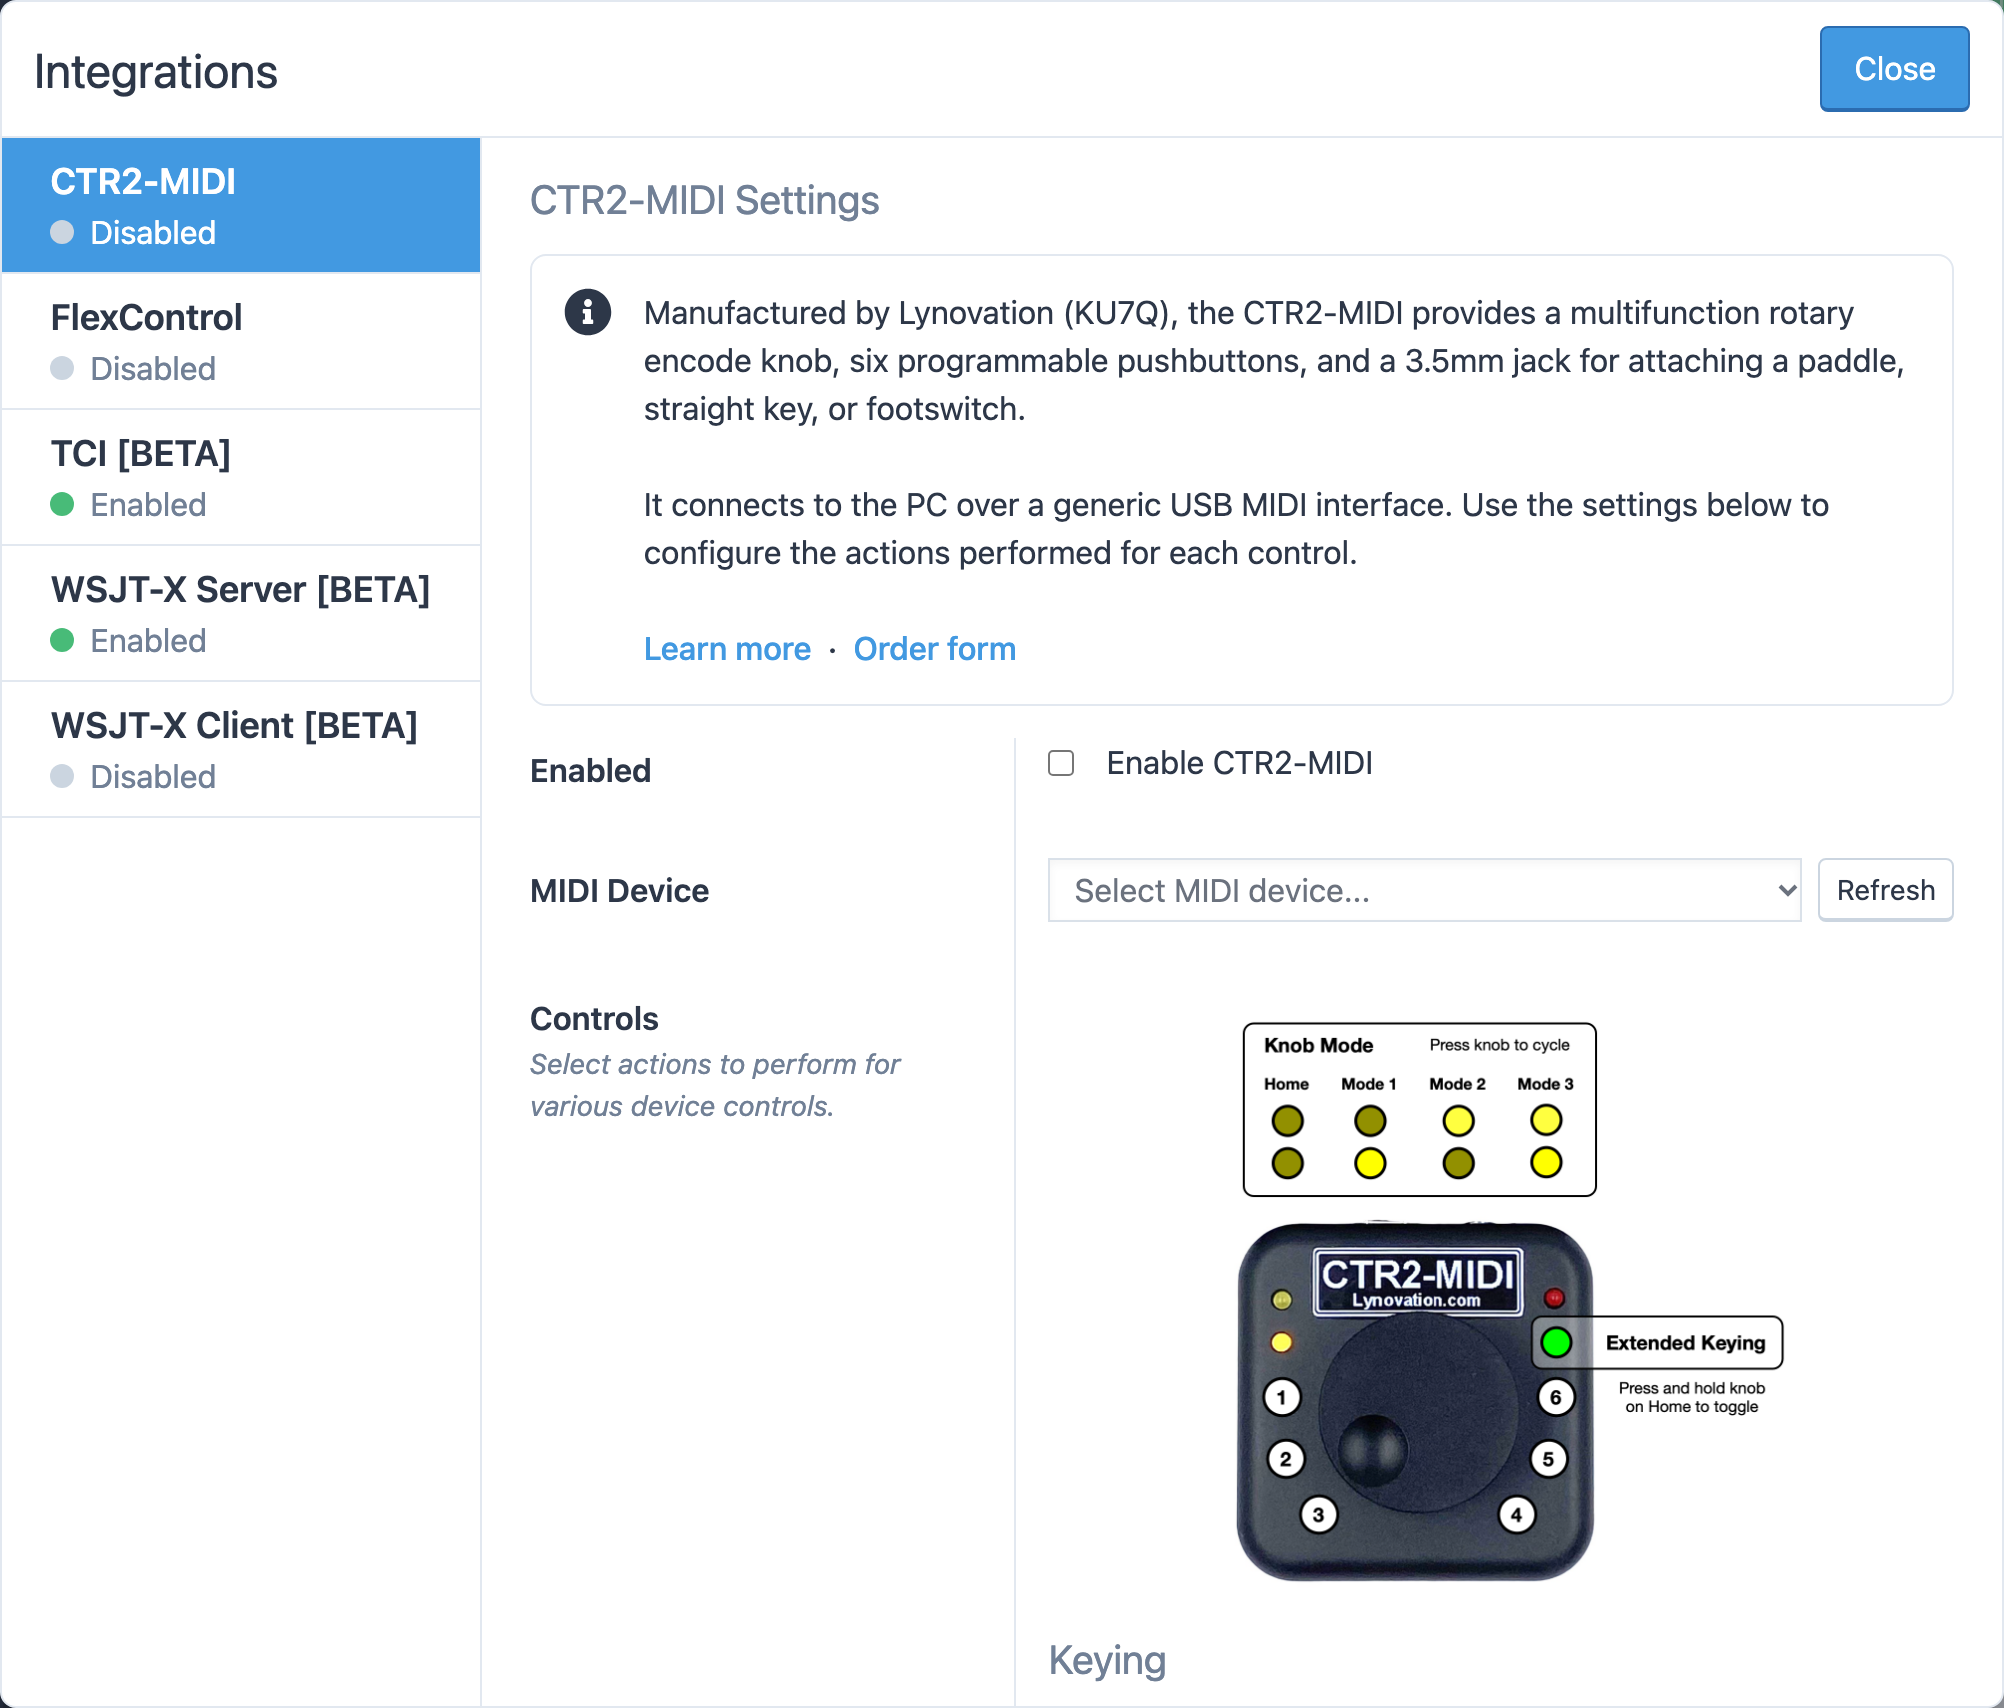
Some integrations need a particular browser. Devices that connect straight to the browser, such as a FlexControl knob or a CTR2-MIDI controller, use Web Serial and Web MIDI, which Safari does not provide. See LocalMate and integrations.

HTTPS and the microphone

Browsers only allow microphone access on secure pages. Always open the console from https://my.remotehamradio.com/console. The first time you set up audio, the browser asks for permission to use your microphone; the Audio Setup Wizard walks you through allowing it in each browser.

Network

  • Wired is best. Receive audio, transmit audio and the waterfall are all real time. A wired Ethernet connection gives the steadiest results. Wi-Fi works, but a weak signal shows up as choppy audio.
  • Latency matters more than bandwidth. While connected, the console shows the round-trip time to the station and whether the path is Direct (P2P) or Relayed (TURN). See Connection problems if audio breaks up.
  • VPNs and strict firewalls can force the audio through a relay or block it. Try without them if you have trouble.

Phones and tablets

The console works on phones and tablets in Safari or Chrome, with a tab bar instead of the desktop layout and an on-screen PTT button. See Using a phone or tablet.

Audio hardware

Any microphone and speakers or headset your computer can use will work; the console lets you choose which device to use for each. A headset avoids the speakers feeding your microphone. CW and digital modes need no microphone at all, and you can connect with Connect (No Mic).

LocalMate

LocalMate is optional. It links programs on your computer, such as WSJT-X or N1MM+, to the console. It runs on:

  • macOS 12 or later, as a universal app for Apple silicon and Intel Macs
  • Windows 10 or later, 64-bit

There is no Linux version. LocalMate needs internet access the first time it starts, to fetch its certificate.

1.3

Create your account

Sign up step by step, from your callsign to your first payment, and what happens next.

Signing up takes a few minutes. You need your callsign, an e-mail address you can read right away, and a credit card or PayPal account. Start at remotehamradio.com/join.

1. Callsign and e-mail

Enter your Callsign and E-mail address, confirm you are not a robot, and click Continue →.

Your callsign decides which signup you get. US callsigns, including territories such as Puerto Rico, go through the standard signup. Callsigns from CEPT countries can sign up when CEPT signups are open; see CEPT members. If RHR is not available for your country, the form says so and suggests contacting support.

If the callsign or the e-mail address already belongs to an account, RHR e-mails that account's owner instead of continuing, so a stranger cannot take over your callsign.

2. Verification code

RHR sends a six-digit code to the address you entered. Type it on the Enter verification code page. If you mistype it you see That code is incorrect.

3. Details

The details page has several sections:

  • Terms and Conditions. Read and tick every term. They cover the recurring membership fee and per-minute airtime, that the per-minute rate is fixed for a connection whether you transmit or receive, how to identify from stations outside the US, identifying as HH2AA from Haiti, and that improper identification means permanent removal. See Identifying yourself on the air.
  • Choose a Plan. PremiumDX monthly or yearly. Each card shows the price and any included one-time airtime credit. See Membership and pricing.
  • Account Information. Create a password of at least 8 characters with a lowercase letter, an uppercase letter and a digit.
  • Billing Address. Name, street, city, country and ZIP or postal code are required.
  • How did you hear about RemoteHamRadio? Optional.
  • Promo Code. Optional. If you followed a promo link the code is already filled in. See Promo codes.

4. Review and pay

Review Your Subscription shows your plan, account and billing address. Click Make Changes to go back, or enter your payment details.

Your card or PayPal account is kept on file for the subscription and for monthly airtime charges. You can change or remove it later, and cancel at any time; see Payment methods and receipts.

Click Subscribe Now for $…. If the payment fails nothing is created, and you can correct the payment details and try again.

After you sign up

  • You are signed in and land on your account page with Signup is complete – welcome!
  • Your membership starts today. Any airtime credit included with the plan is already in your account as New user credit.
  • You have access to the full network of stations, with airtime limited to your credit until your license is verified.
  • Upload your license within 7 days. Until RHR verifies it, you operate on airtime credit only. After the deadline, new connections are blocked until a license is on file. See Verify your license.
  • A welcome e-mail arrives with the next steps.

Next: Your first QSO.

1.4

Verify your license

Why RHR checks every member's license, what to upload, and what you can do while it is under review.

RHR stations transmit under your callsign, so RHR confirms that every member holds a valid license before charging airtime to their card. You have seven days from signing up to upload a copy. This article explains what to send, how review works and what the status messages mean.

What to upload

  1. Sign in and open Account → Settings.
  2. In the Licensing section, click to upload a new license. The page is titled Upload a New License.
  3. Enter the Callsign and choose the License Class: U.S. Technician, U.S. General, U.S. Extra or CEPT.
  4. Attach one file, up to 20 MB: .jpg, .jpeg, .png, .gif, .pdf or .heic.
  5. Click Submit for Review.

Submit official documentation only. A photo or scan of your paper license is fine. For a PDF from the FCC, download the Official Copy, not the Reference Copy, which anyone can generate and which RHR rejects. See Download an official FCC license copy.

Technician-class licensees are welcome; your transmit privileges still apply, so stay inside your allocations.

Review

RHR staff review uploads by hand. On your Settings page the license shows (Under review) until it is approved. You get an e-mail either way:

  • Approved: you are fully verified and airtime can be billed normally.
  • Rejected: the e-mail gives the reason and a link to upload again. A common reason is an FCC Reference Copy.

The seven-day window

Your account page shows a banner with your deadline, for example Please upload a copy of your license by {date}. Until we've verified it, you can operate only on airtime credit, and you have $… left.

StatusWhat it means
Before the deadline, nothing uploadedYou can operate, but only on your airtime credit. Nothing is charged to your card.
Uploaded, under reviewSame as above. The banner says We're reviewing your license and will e-mail you once it's approved.
Past the deadline, nothing verifiedNew connections are blocked until a license is verified. The banner says Please upload a copy of your license to restore station access.
VerifiedNo restrictions.

While you are limited to credit, the console refuses a connection that your remaining credit cannot cover, with Until your amateur license is verified, your account can operate only on airtime credit, and you don't have enough left to continue. Buying more airtime lets you keep operating; see Airtime credit and auto-reload.

After the deadline the console says Your license is required. Please visit your account and upload your license to continue.

Keeping your license current

Your licenses are listed under Licensing in Settings, where you can view or remove them. If you hold more than one callsign, upload each one you intend to use. See Licenses.

1.5

Your first QSO

A guided first session, from signing in to disconnecting, with a contact in the log.

This walkthrough takes you through a complete first session on a phone (SSB) station. Allow twenty minutes, and have your headset plugged in before you start. Every step links to the article that covers it in depth.

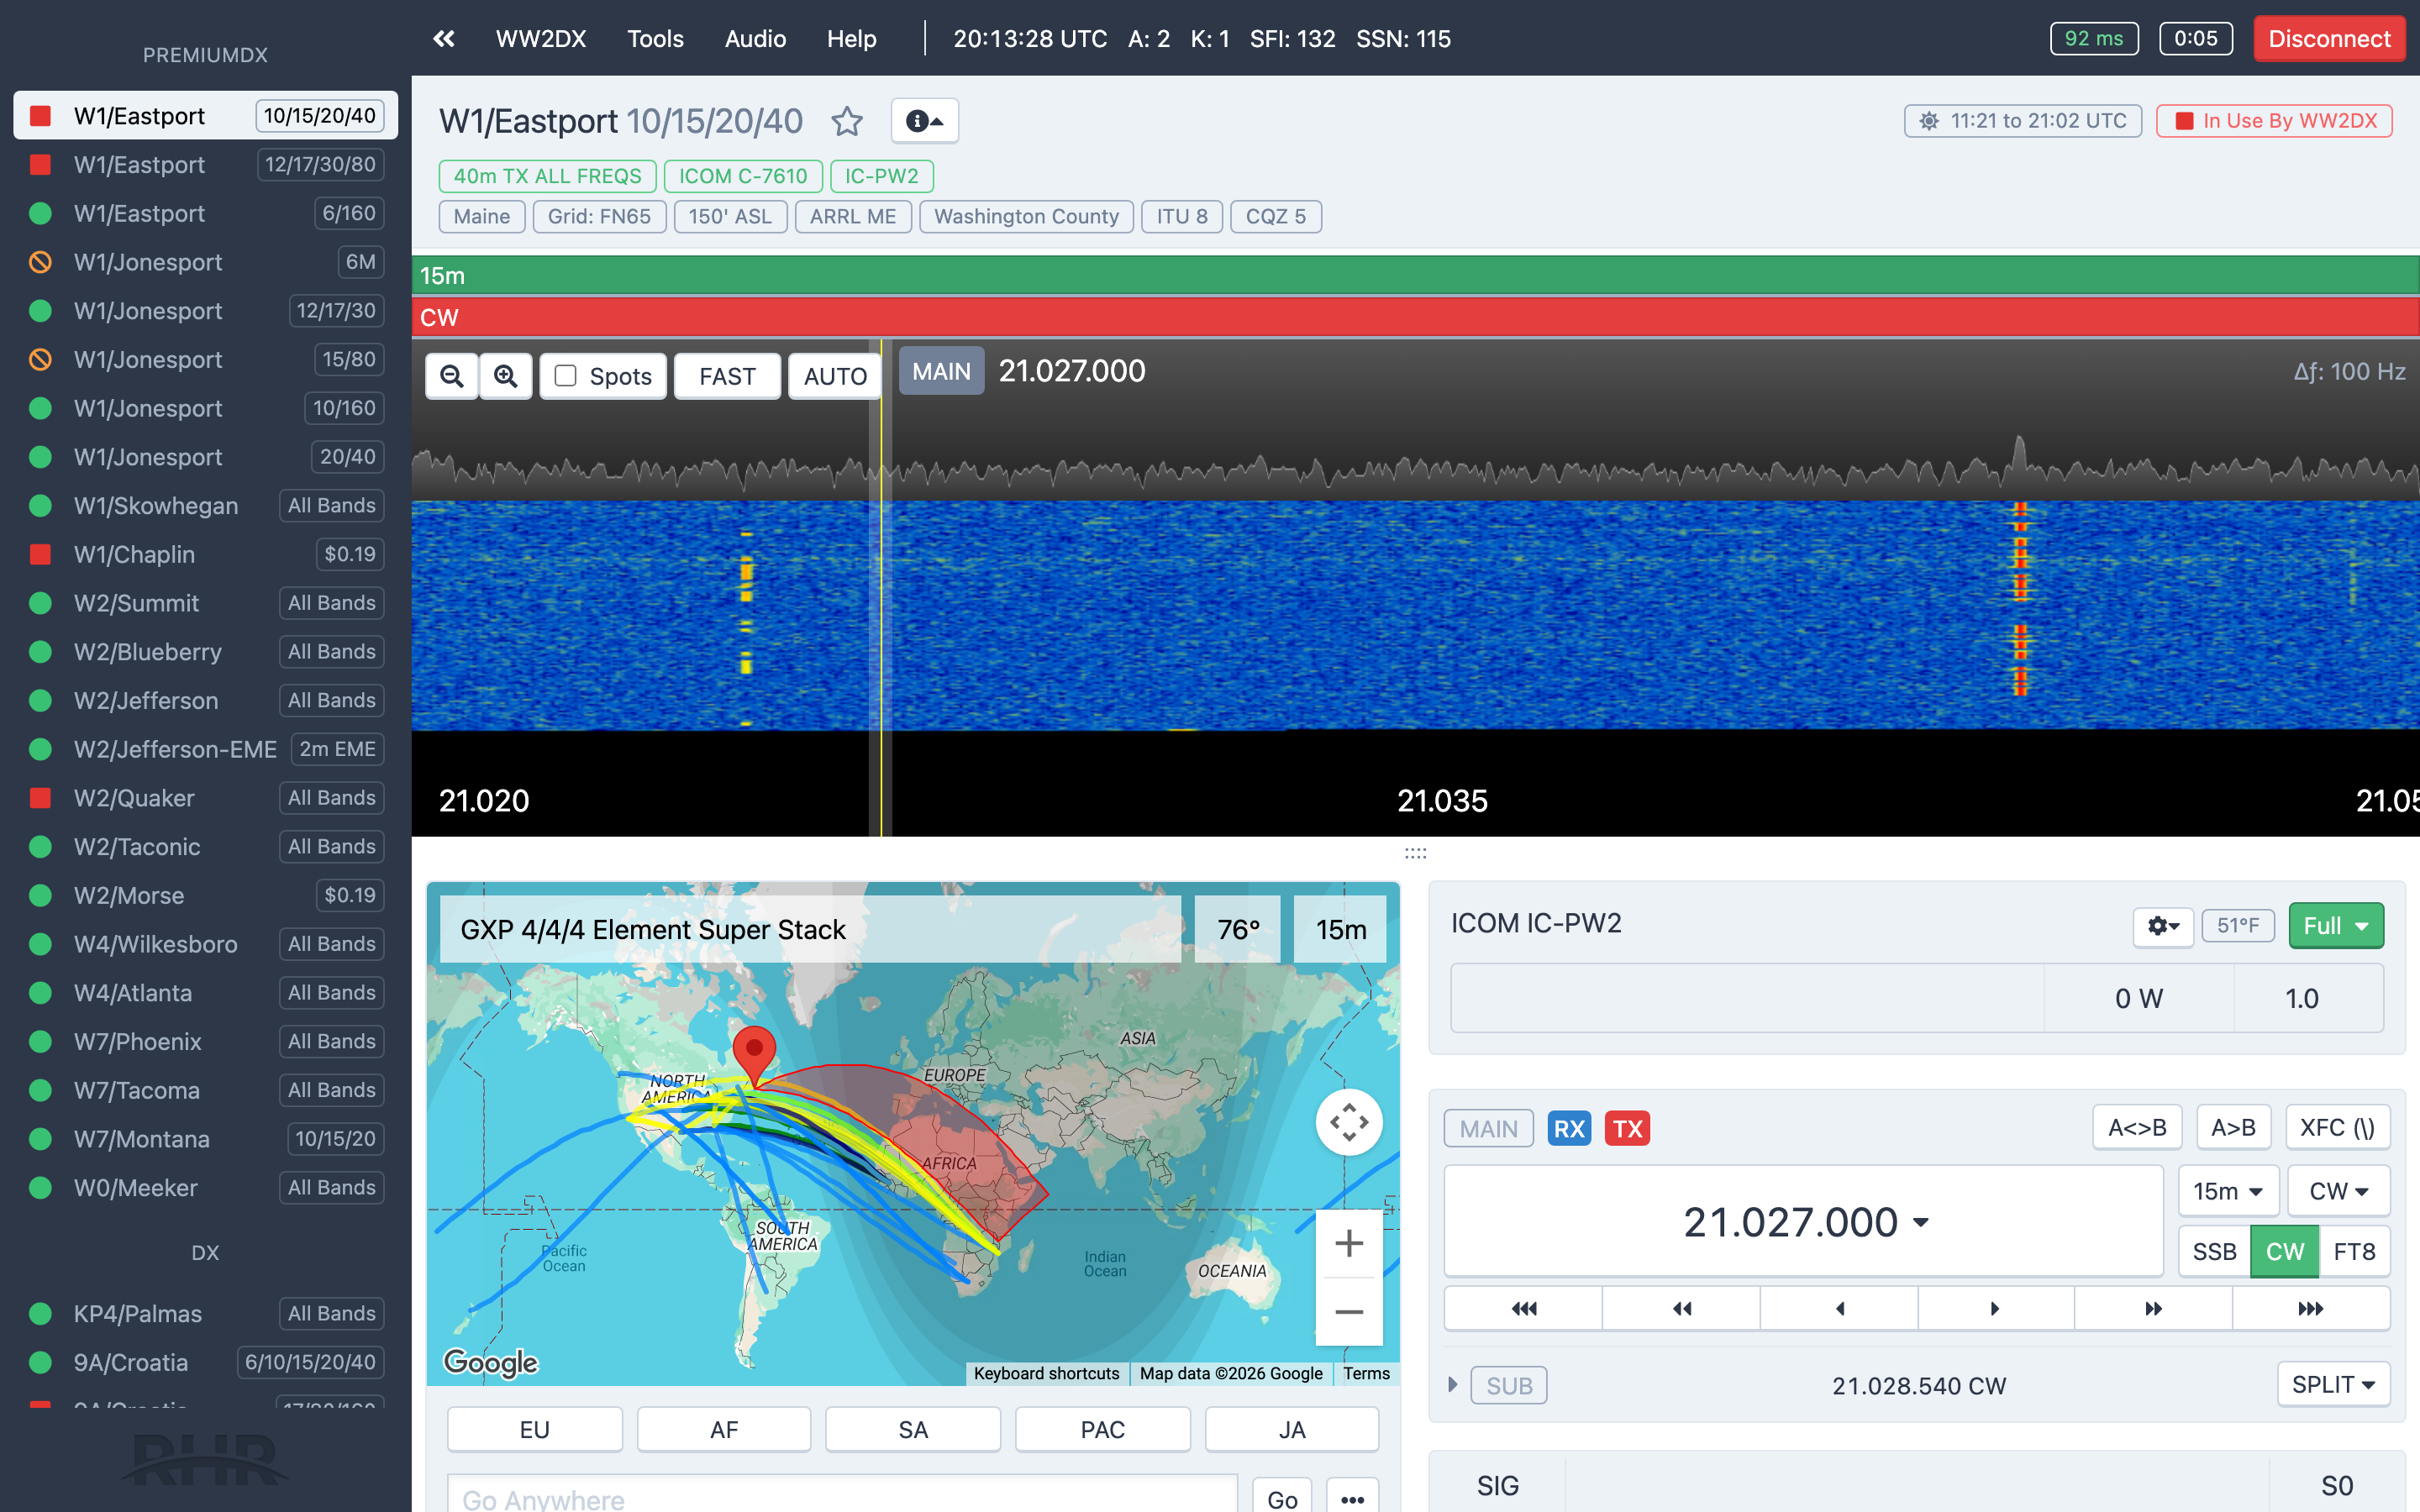
The console with a station connected: the panadapter on top, the radio and transmit panels below

1. Sign in and open the console

  1. Go to my.remotehamradio.com and sign in with your e-mail or callsign and password.
  2. Click Sign In to Console. You can also reach it from your account page with Launch Console.

The console opens with the station list on the left and the Audio menu in the header. See Console tour.

2. Set up audio

  1. Open the Audio menu and choose Audio Setup Wizard. It is highlighted in orange until you have run it.
  2. Step 1 asks you to allow microphone access. The browser shows its own permission prompt; click Allow.
  3. Step 2: pick your speakers or headset and click Play Test Sound.
  4. Step 3: pick your microphone, speak and watch the meter move, then click Done.

You can run the wizard again at any time. For details and browser-specific permission steps see Audio setup.

3. Pick a station

Each station in the list shows a status: Available, In Use or Standby, and Unavailable when it is offline. Click an Available station. Its header shows the name, the local sunrise and sunset, and the per-minute rate.

For your first session choose a 100 W station on a band that is open where the station is. The station's time of day matters more than yours.

4. Connect

  1. Click Connect - $…. If the station offers more than one rate, a Select a Rate menu opens; pick one. A rate marked Receive only cannot transmit.
  2. Watch the button step through Authorizing…, Connecting… and Configuring….
  3. Once connected, the header shows a timer and RTT, your round-trip time to the station.

Airtime starts now at the rate you chose, and the same rate applies whether you are transmitting or just listening. See Connect to a station.

Connecting to a station: choosing a rate, then the connected header with its timer

5. Tune around

  • Click a signal on the panadapter to tune to it.
  • Or click the big frequency display (Quick Tune), type a frequency in kHz or MHz and press Enter.
  • Change bands and modes from the menus next to the frequency, or click SSB, CW or FT8.

Adjust the receive filter and noise reduction from the Receive controls. See Tuning and the VFO and Panadapter and waterfall.

6. Make the contact

  1. Find a station calling CQ and listen for a moment to confirm the frequency is clear and inside your license privileges.
  2. Hold the PTT button, or hold the Ctrl key, and speak. Release to listen. The default PTT key can be changed in Console Settings.
  3. Identify with your own callsign. From a station outside the US, use the prefix shown for that station, for example 9A/ followed by your callsign. See Identifying yourself on the air.
  4. Watch the ALC, Power and SWR meters while you transmit, and keep your voice at a steady level.

See Transmitting for VOX, power and audio processing.

7. Log it

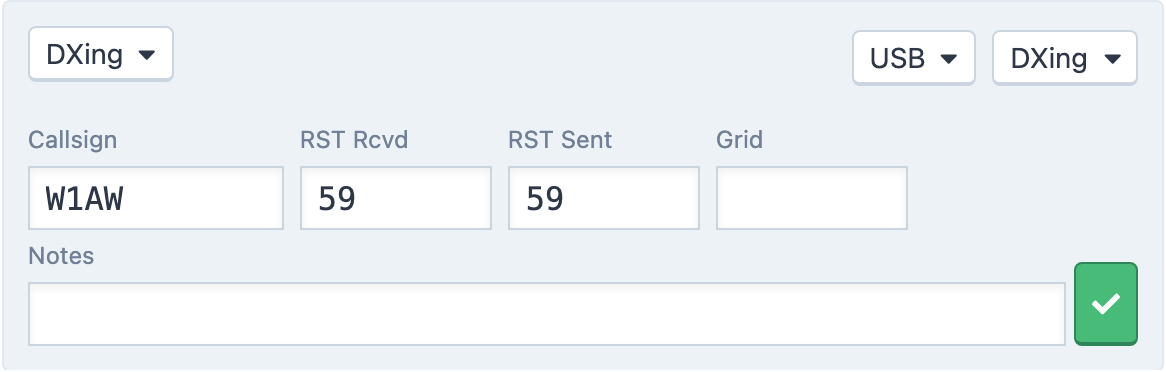
The Log Entry panel is already set to your logbook, the station, the frequency and the mode. Type the other station's callsign, the reports, and press Enter. The contact appears in the Log tab of the toolbox and in your logbook on the web. See Logging from the console.

8. Disconnect

Click the red Disconnect in the header when you are done. Airtime stops when the connection ends, not when you close the tab.

What to do next

1.6

How billing works

Membership plus per-minute airtime, with worked examples and when your card is actually charged.

RHR has two charges: a membership that renews monthly or yearly, and airtime billed by the minute while you are connected to a station. This article explains the model with examples. The account articles have the exact rules.

The two charges

Membership. PremiumDX is $20 a month or $99 a year, and the first period includes a one-time airtime credit ($10 monthly, $20 yearly). Current prices are always on the pricing page. The membership opens every station on the network; see Membership and pricing.

Airtime. Every station has one or more named rates, such as RX only, 100 W and QRO, each with a price per minute. You choose the rate when you connect and it stays fixed for that connection, whether you transmit or just listen. Published ranges are on the pricing page; the exact rate is shown on the station before you connect. See Airtime and rates.

Two examples

An evening of DXing. You connect to a station at its 100 W rate of $0.29 a minute and operate for one hour.

60 minutes × $0.29$17.40
Paid from your included credit firstup to the credit you have left
The restbilled to your card on your collection day

A contest weekend with the amplifier. You connect at a QRO rate of $0.99 a minute for six hours on Saturday and four on Sunday.

600 minutes × $0.99$594.00
Billedon your collection day, unless the usage cap below is reached first

Listening counts the same as transmitting at the rate you chose, so pick an RX only rate, where a station offers one, when you only want to listen.

When your card is charged

  • Membership is charged when you sign up and again at each renewal.
  • Airtime accumulates as you operate. Credit in your account covers it first. Whatever is left is charged to your card once a month on your collection day, the day of the month your subscription started. You can pay sooner with Pay Early on your account page.
  • The usage cap. New accounts have a $100 cap. When your balance plus unbilled airtime reaches it, the outstanding amount is charged right away rather than waiting for the collection day. The cap goes away once your lifetime payments reach $1,000.

Details, including failed payments and overdue accounts, are in Paying for airtime.

Credit and prepaying

Airtime credit is money already in your account. The included credit is added when you join, and you can buy more at any time from your account page, $5 or more. Members who prepay, including CEPT members, can turn on auto-reload to top up automatically. See Airtime credit and auto-reload.

Until your license is verified, your airtime has to stay within your credit; see Verify your license.

Where to see what you have used

  • Account → Airtime lists every month, and each month lists every connection with the station, power, duration, rate and cost.
  • Account → Payments is your billing history, with a receipt for each payment.
  • Your account overview shows Next Payment, the amount and date of the upcoming collection.
  • Statement e-mails can arrive daily, weekly or monthly; set that under Settings → Preferences. See Profile and preferences.

1.7

Identifying yourself on the air

The identification rules every member agrees to, including prefixes at stations outside the US and HH2AA.

When you connect to an RHR station you are its control operator, and everything it transmits is your responsibility. Correct identification is the one rule RHR enforces without exception. These are the terms you accepted when you signed up, explained.

Use your own callsign

Identify with the callsign on your RHR account and no other. Your account, your license and your logbook all carry that callsign, and RHR reviews what stations transmit on CW and digital modes for correct identification.

Stations outside the US

RHR has stations in several countries, and each one's name starts with the prefix to use there, for example 9A/Croatia or TI8/CostaRica. From any station whose name carries a prefix, identify with that prefix in front of your callsign:

StationIdentify as
9A/Croatia9A/ your callsign
E7/BosniaE7/ your callsign
TI8/CostaRicaTI8/ your callsign
KP4/Palmas (Puerto Rico)KP4/ your callsign
EA/Spain, TF/Iceland, IT9/Sicily and any other prefixed stationthat prefix, then your callsign

Stations named W0/… through W9/… are in the United States: use your own callsign with no prefix, whatever your call area.

If your own callsign is already from the station's country, no prefix is needed: a 9A call at a Croatian station, or a KP4, NP3 or WP4 call at the Puerto Rico station.

The console creates a logbook for each country whose stations you can use, with the matching callsign format, so a contact from Croatia is logged as 9A/ your callsign without you doing anything. See Logbook overview.

Stations with their own callsign

A few stations transmit under a callsign of their own rather than yours. Identify with the station's callsign exactly as its name shows it, and log contacts under it:

  • HH2AA in Haiti. Identify as HH2AA, never with your own callsign, and log every contact as HH2AA in the RHR logbook. Contacts made as HH2AA go to the HH2AA Club Log and LoTW accounts, not yours.
  • Special-event and expedition stations such as K4FPT/MM and KP5/NP3VI, when they are on the network.

CEPT members

Members who joined on a CEPT license may receive on any station but transmit only from stations in CEPT countries, and identify with that country's prefix. Remote operation of a US station by a CEPT licensee is not legal in the US, so CEPT members cannot transmit from US stations. See CEPT members.

Your license privileges still apply

Operating remotely does not change what your license allows. Stay within the frequencies, modes and power your class permits. RHR stations run high power; if your privileges are limited, choose a rate and band accordingly.

Under US rules (47 CFR Part 97) the control operator is responsible for the proper operation of the station, including identification and staying within the station's authorized privileges, wherever the operator is located. The same responsibility applies under the rules of the other countries RHR operates in.

No tolerance

If you are reported for improper identification, your membership is permanently removed. This is stated in the terms you accepted at signup and there are no warnings first. When in doubt, identify more often, not less.

Chapter 2

Account & billing

Membership, airtime, payments, licenses and your profile.

2.1

Membership and pricing

The PremiumDX plans, what they include, and the plans you may see but cannot buy.

One membership, PremiumDX, opens every station on the RHR network. You pay for it monthly or yearly, and pay for airtime by the minute on top. This article covers the plans; Airtime and rates covers the per-minute part.

PremiumDX

PlanPriceIncluded one-time airtime credit
PremiumDX (Monthly)$20 per month$10
PremiumDX (Yearly)$99 per year$20

The pricing page always shows the current prices; the plan cards at signup show the same.

Both plans include:

  • every station on the network, in the US and abroad
  • QRO stations up to 1,500 W
  • wire arrays, stacked Yagis and rotatable antennas
  • the browser console, with no software required
  • the logbook with LoTW and Club Log sync
  • SSB, CW and digital modes, including FT8, FT4 and Q65

The included credit is added to your account once, when you first join, as New user credit. It pays for airtime before anything is charged to your card. It does not renew with the subscription.

Switching between monthly and yearly

You can upgrade from monthly to yearly at any time from Account → Subscription. The unused part of your current month is credited against the yearly price. See Manage your subscription.

CEPT members

Members who join on a CEPT license get PremiumDX CEPT (Yearly), which is billed yearly and requires a prepaid airtime balance. See CEPT members.

Plans you cannot buy

You may see these plan names on an account, but they are assigned by RHR and cannot be chosen or changed from your account page:

  • U.S. Youth Program: free membership and airtime for licensed operators 21 and younger, ending on the member's 21st birthday. See Youth Network.
  • Friends and Family: a free membership RHR grants directly.

Promo codes

A promo code takes 20% off the first period of a new subscription. Codes work only at signup. See Promo codes.

What is not included

Airtime. Every minute connected to a station is billed at that station's rate, after your credit is used up. Stations show their rates before you connect; see Airtime and rates.

2.2

Airtime and rates

How airtime is measured and priced, what the named rates mean, and where to see what you have used.

Airtime is the time you spend connected to a station, billed by the minute at the rate you chose when you connected. This article explains how it is measured and where to see it.

The rate is per connection

Each station offers one or more named rates. When you click Connect, the console shows the rate, or a Select a Rate menu when there is more than one. Common names are:

RateWhat you get
RX onlyListen only. Offered on selected stations.
100 WTransmit barefoot, without the amplifier.
QROTransmit with the amplifier, 500 to 1,500 W depending on the station.

The rate you pick is fixed for the whole connection. It does not change when you transmit, when you stop transmitting, or when you change bands. Listening at a QRO rate costs the QRO rate, so connect at RX only or 100 W when you only want to listen, and disconnect and reconnect at QRO when you need the amplifier.

Published rate ranges are on the pricing page. The exact rate for each station is shown on the station in the console before you connect, and on its page under Stations.

How airtime is measured

  • The station reports your connection about every ten seconds, and the cost is seconds ÷ 60 × the per-minute rate. You are not rounded up to whole minutes.
  • A connection that runs across UTC midnight is recorded as two usages, one per day.
  • Airtime runs until you click Disconnect, the idle timeout disconnects you, or the connection drops. Closing the tab does not end it immediately, so always disconnect first.

Your airtime pages

Account → Airtime lists every month with its total time and cost. Open a month to see each connection:

ColumnMeaning
SiteThe station.
PowerThe rate you connected at.
DurationHow long the connection lasted.
RateThe per-minute price.
DueWhat the connection cost.
BilledWhether it has been collected yet.

Each usage also carries a category. Most are Paid. You may also see Free - Owner or Friend at a station you own or whose owner has granted you free use, Free - Youth on the Youth Network, and occasionally Free - Promotional or Free - Other when RHR has waived a charge.

When airtime is charged

Credit in your account pays first. The rest is charged to your card monthly on your collection day, or sooner if you reach the usage cap. See Paying for airtime.

2.3

Paying for airtime

When airtime is collected, the usage cap on new accounts, early payments, statements, and what happens when a payment fails.

Airtime accumulates while you operate and is collected once a month, with two exceptions: new accounts have a usage cap, and you can pay early whenever you like. This article covers the schedule and what happens when a payment does not go through.

Credit first, then your card

Any airtime credit in your account pays for airtime first. Only what the credit does not cover becomes an amount due, shown as Next Payment on your account overview. See Airtime credit and auto-reload.

Your collection day

Unbilled airtime is charged to your card once a month on your collection day: the day of the month your subscription started. The overview shows the amount and the date it will be charged on.

Pay Early

You can settle the amount due at any time with Pay Early on the overview, which opens Make an Early Payment. It charges the outstanding airtime right now. There is no obligation to do this; the monthly collection happens either way.

The usage cap on new accounts

New accounts have a $100 usage cap. When your unpaid balance plus unbilled airtime reaches $100, the outstanding amount is charged to your card immediately instead of waiting for the collection day. This protects you from a surprise at the end of the month and RHR from unpaid airtime.

The cap is removed automatically once your lifetime payments to RHR reach $1,000.

Statement e-mails

A statement lists your unbilled airtime, the amount, the collection date and your remaining credit. Under Settings → Preferences, set Statement E-mails to Never, Daily, Weekly or Monthly. Bills are always sent monthly regardless of this setting.

When a payment fails

If the monthly charge is declined, RHR e-mails you and your overview shows a banner: A payment attempt on {date} for $… was unsuccessful, with the reason when the card issuer gave one. Update your card under Settings; see Payment methods and receipts. RHR retries the collection.

While a payment is failing, the console refuses new connections with Your latest payment has failed. Please visit your account page to update your payment information.

Overdue accounts

A balance that stays unpaid for 30 days makes the account overdue. New station connections are blocked, the overview shows Your account is overdue. Please pay your outstanding balance to regain station access. with a Make a Payment button, and the console says Your account is overdue. Please visit your account page to pay off your balance. Paying the balance restores access right away.

If you remove your payment method

Removing your card or PayPal account charges any unbilled airtime and outstanding balance immediately, turns off subscription renewal and disables auto-reload. See Payment methods and receipts.

2.4

Airtime credit and auto-reload

Your airtime balance, buying airtime in advance, and letting auto-reload top it up.

Airtime credit is money already in your account, used before anything is charged to your card. Everyone starts with the credit included in their plan. Some members prepay all of their airtime, and auto-reload keeps a prepaid balance from running out mid-session.

Your balance

Airtime Balance Remaining on the account overview shows what is left. Click History for the Airtime Balance page, which lists every change:

DescriptionMeaning
New user creditThe credit included with your plan when you joined.
Airtime credit purchasedAirtime you bought.
Airtime auto-reloadA top-up made by auto-reload.
Upcoming airtime balance deductionAirtime used this month that the balance will cover at collection.
Airtime balance deductionAirtime the balance paid for.

Buying airtime

On the overview, under Reload Airtime, enter an amount of $5 or more and click Buy Now. It is charged to your payment method on file; if you have none, the panel offers Add a payment method instead. The credit is available immediately with Airtime purchased for $… – thank you!

Reload Airtime is shown to members who prepay and to anyone who already has a balance.

Who prepays

  • CEPT members must keep a balance that covers their airtime; their airtime is never charged to their card after the fact. See CEPT members.
  • New members whose license is not yet verified can only operate within their credit until it is. Buying airtime lets you keep operating while your license is under review. See Verify your license.
  • Anyone else may buy airtime ahead of time if they prefer; it simply reduces the monthly collection.

Auto-reload

Auto-reload applies to members who prepay. When your expected balance falls to $2.00 or less, it buys the amount you chose so a session is not interrupted.

  1. Open Account → Settings and find Auto-Reload in the Billing section, or go to Change Auto-Reload Amount.
  2. Choose Disabled, $20, $50, $100, $200 or $500.
  3. Click Save Changes.

If an auto-reload charge is declined, the console refuses the connection with Auto-reload failed. Please visit your account and verify payment information to continue. With auto-reload disabled and no balance left you see Please purchase additional airtime to continue.

Removing your payment method disables auto-reload.

Refunds

Your balance belongs to you. Contact support to have an unused prepaid balance refunded.

2.5

Payment methods and receipts

Changing or removing the card or PayPal account on file, and finding your billing history and receipts.

RHR keeps one payment method on file, a credit card or a PayPal account, and charges it for your subscription and your monthly airtime. This article covers changing it, what removing it does, and where your receipts are.

Change your payment method

  1. Open Account → Settings. The Billing section shows the card or account on file.
  2. Click through to Change Payment Method.
  3. Enter a card, or choose PayPal and approve it there.
  4. Click Save Payment Method. The page confirms Payment method was updated.

When a card is close to its expiry date the Settings page shows Card expiring soon! Update it before the next collection to avoid a failed payment.

Remove your payment method

The Remove Payment Method panel on the same page takes the card or account off your account. Before you do, know what happens:

  • Any unbilled airtime and outstanding balance is charged immediately.
  • Your subscription stops renewing. It runs to the end of the current period and then ends.
  • Auto-reload is disabled.

The page confirms Payment method was successfully removed. Add a payment method again at any time to resume renewal.

Billing history

Account → Payments shows:

  • Amount Due Now, with Make a Payment to pay it immediately.
  • Billing History: every payment with its date, description, transaction ID, amount and the running balance, and a Receipt link.
  • Freshbooks Billing History, for long-standing members whose older invoices were issued through Freshbooks.

Receipts

Click Receipt next to a payment for a Payment Receipt page with the date, time, customer, account, transaction ID, description and total. Print it or save it as a PDF from your browser.

The monthly airtime collection and subscription renewals also produce an e-mail when they succeed or fail.

Airtime detail

Receipts show what was charged; the per-connection detail behind an airtime charge is under Account → Airtime. See Airtime and rates.

2.6

Manage your subscription

Renewal, the grace period, upgrading from monthly to yearly, cancelling, and closing your account.

Your subscription is managed from Account → Subscription, reached from the Manage Subscription button in Settings. This article covers renewal, upgrades and cancelling.

The Current Subscription panel

The panel shows your plan and either Renews on {date} for $… or Expires after {date}, depending on your renewal preference. If you are on the monthly plan it also offers Upgrade To….

If there is no valid payment method on file you see Your subscription will not automatically renew without a valid payment method on file.

Renewal

Under Change Renewal Preference:

  • Automatically Renew: the plan is charged again when the period ends.
  • Don't Renew: the subscription ends after the date shown and nothing more is charged.

Click Save Preference. You can switch back and forth until the period ends.

Seven days before a paid subscription ends, RHR e-mails you that it is about to renew or to expire.

The grace period

If a renewal charge fails, you keep access for a seven-day grace period while RHR retries the charge each night and e-mails you about each attempt. Fix the payment method within those seven days and the subscription continues without a gap. After the grace period the subscription ends, and you can buy a new one at any time.

Upgrade from monthly to yearly

From the monthly plan, click Upgrade To… and then Upgrade to PremiumDX (Yearly). The page shows:

  • the yearly price and the date the new subscription will expire
  • You will be credited $… for the remaining portion of your PremiumDX (Monthly) subscription, the unused part of the month you have already paid for, counting today as used

Click Upgrade Now for $… to pay the yearly price less that credit. The yearly plan starts today, and the page confirms Your plan was upgraded! Now go work some DX!

Only monthly to yearly is offered. There is no self-service change from yearly to monthly; contact support if you need that.

Buying a new subscription

If your subscription has ended, the Subscription page shows Select a Plan. Choose one to see Purchasing a new … subscription, which begins today, and click Purchase Now — $…. You can turn renewal off at any time afterwards.

Cancelling

To cancel, set Don't Renew. Your access continues until the end of the period you have paid for, and the subscription then ends. Subscriptions are not refunded for the unused part of a period. Airtime you have used is still collected on your collection day.

Closing your account

There is no self-service account deletion. Set Don't Renew, pay any outstanding airtime, and contact support to close the account. Your logbook export is available at any time from the Logbook; see Export ADIF and CSV.

2.7

Licenses

The Licensing section of your settings: adding a license, checking its status, and removing one.

Your licenses live in the Licensing section of Account → Settings. Each one lists its callsign and class, and whether RHR has verified it. For why RHR verifies licenses and what happens before yours is approved, see Verify your license.

Add a license

  1. In Licensing, choose to upload a new license. The page is Upload a New License.
  2. Enter the Callsign exactly as it appears on the license.
  3. Choose the License Class: U.S. Technician, U.S. General, U.S. Extra or CEPT.
  4. Attach a .jpg, .jpeg, .png, .gif, .pdf or .heic file up to 20 MB. If you forget, the page says Please select an image or PDF to upload.
  5. Click Submit for Review. The page confirms License was submitted for review by RHR admins – thanks!

Submit official documentation only: a photo or scan of the paper license, or the FCC's Official Copy PDF. See Download an official FCC license copy.

Status

A license shows (Under review) until RHR staff approve it. You are e-mailed when it is approved, or when it is rejected with the reason and a link to upload again. A rejected license is removed from the list.

Click View image to see the file you uploaded.

More than one callsign

Upload each callsign you hold and intend to operate with. A club callsign you are the trustee of can be added the same way.

Remove a license

Click Remove next to a license. You are asked Are you sure you want to delete this license? You may lose transmit privileges. If you are replacing a license, upload the new one first and remove the old one after it is approved.

When your license is renewed or upgraded

The FCC and other administrations issue a new document when a license is renewed or upgraded. Upload the new copy so your account reflects your current privileges.

2.8

Download an official FCC license copy

Reference Copy versus Official Copy, and how to download the one RHR accepts from the FCC License Manager.

The FCC's Universal Licensing System produces two kinds of license PDF. RHR accepts only one of them. This article explains the difference and how to download the right one.

Reference Copy versus Official Copy

  • A Reference Copy can be generated by anyone from the public license search. It has "Reference Copy" printed across the page. Because it does not prove you are the licensee, RHR rejects it.
  • An Official Copy can only be downloaded by the license holder after signing in to the License Manager with their FRN. It has "Official Copy" printed across the page. This is what to upload.

If you submit a Reference Copy, your upload is rejected with a note explaining this, and you are asked to upload again.

Download the Official Copy

  1. Go to the FCC License Manager at https://wireless2.fcc.gov/UlsEntry/licManager/login.jsp and sign in with your FRN and password. If you have forgotten them, use the links on that page; the FCC's CORES system manages FRNs and passwords.
  2. In the menu, choose Download Electronic Authorizations.
  3. Under My Authorizations, select your callsign and click ADD to move it to the download list.
  4. Click DOWNLOAD. The PDF is your Official Copy.
  5. Upload the PDF under Licensing in Account → Settings. See Licenses.

No FRN access?

If you cannot sign in to the FCC system, a clear photo or scan of a paper license you hold is also accepted.

2.9

Profile and preferences

Changing your e-mail address, password and billing address, your chat name, and statement e-mails.

Account → Settings gathers your login details, profile and billing settings. Sign Out is in the account menu at the top of every page, and in the console under your callsign.

E-mail address

  1. In the Login section, click Change E-mail.
  2. Enter the new address. A message is sent to it to confirm the change, and the page says Check your new e-mail address for the confirmation link.
  3. Open the link in that message. Your address is changed and the page confirms Your e-mail address has been changed.

Until you click the link, RHR keeps using your old address.

If RHR's e-mails to you bounce, your account page shows a banner that your address appears to be inactive and asks you to change it. Billing and license e-mails are not delivered until you do.

Password

Click Change Password for Update Account Password. Enter the new password twice and click Update Password. Passwords are 8 to 128 characters and must include a lowercase letter, an uppercase letter and a digit.

If you have forgotten your password, use Reset password on the sign-in page. The e-mailed link is valid for six hours.

Billing address

Click Change Address in the Profile section, edit the fields and click Update Address.

Preferences

Click Change Preferences:

  • Chat Name: the name shown next to your callsign when you join the console chat. See Chat, news and the DX calendar.
  • Statement E-mails: Never, Daily, Weekly or Monthly. A statement lists your unbilled airtime and when it will be collected. Bills are always sent monthly regardless. See Paying for airtime.

Staying signed in

Stay signed in on the sign-in page keeps you signed in on that browser for 14 days. Leave it unticked on a shared computer.

2.10

Promo codes

How a promo code or link gives 20% off a new subscription, and why existing members cannot redeem one.

RHR promo codes take 20% off the first period of a new PremiumDX subscription. They are for new members only.

Using a code at signup

  • If you followed a promo link, the code is already filled in when you reach the Promo Code field during signup. The link remembers the code in your browser, so you can come back later and it is still applied.
  • Otherwise, type the code into Promo Code (Optional) on the details page.

The review page shows Promo code applied and the discounted price for the first month or year. After that, the subscription renews at the normal price. A code can be used once per member.

An unknown or expired code shows Invalid promo code; check the spelling or continue without it.

The Redeem page

remotehamradio.com/redeem offers two paths:

  • I am a new member → Sign Up to Redeem takes you to signup, where the code applies as above.
  • I am already a member → Log In to Redeem opens Redeem a Code in your account.

Because every current promotion applies only to new subscriptions, the account form answers Sorry, this promotion only applies to new subscriptions, and a code you already used says Sorry, you have already participated in this promotion. The page is there for promotions that may apply to existing members in the future.

2.11

Youth Network

Free, unlimited station access for licensed operators 21 and younger: who qualifies, how to apply, and how the account works.

The RHR Youth Network is a set of stations dedicated to young operators, with free, unlimited access. Youth members have no membership fee and pay no airtime on Youth Network stations.

Who can join

  • Operators 21 or younger, with permission from a parent or guardian.
  • Holding a valid amateur radio license. Operators outside the US can get licensed through the VEA.
  • Ready to operate and work the world.

How to apply

  1. Go to the Youth Network page and click Apply to join.
  2. Fill in your Name, Callsign, Birthday, Email, and a Parent or guardian's email.
  3. Tell us Why do you want to join?
  4. Attach your License and a Proof of age (JPG, PNG or PDF, up to 10 MB each).
  5. Confirm you are not a robot and click Apply.

You see Thanks for applying! We'll be in touch by email once we've reviewed your application. A person at RHR reviews it. An applicant older than 21 sees must be 21 or younger to join.

When you are accepted

RHR creates your account and e-mails you a Finish Account Setup link. Open it, check your callsign and e-mail, choose a password and click Create Account. If the link has expired, the page tells you to check your e-mail for a newer one or to sign in if you already finished.

Your account has:

  • the U.S. Youth Program plan at no cost, which does not renew and ends on your 21st birthday
  • the Youth Network console, which lists the Youth Network stations
  • unlimited airtime on those stations, shown as Unlimited for Youth Network members on their station pages

The license from your application is added to your account when it is created, so there is normally nothing further to upload.

At 21

The Youth plan ends on your 21st birthday. To keep operating, buy a PremiumDX subscription from Account → Subscription; see Membership and pricing.

Donating a station

Youth Network stations are maintained by young operators or donated by elmers. If you have a station to offer, use the Donate your station form; see Offer a station.

2.12

Station owners

What a member who owns a station on the network sees: health, usage, payout and analytics.

Members who host a station on the RHR network see extra panels and pages in their account. This article explains them. To put a station on the network, see Offer a station.

The station panel on your overview

Your account overview shows a panel for each station you own, with:

  • View usage and More analytics links.
  • Health indicators: Heartbeat, Online and VPN, with how long the station has been in that state.
  • Resource gauges: Memory, Storage, CPU and CPU Temp. of the station computer.
  • Last 30 days: a summary of the station's time on the air.

The console's account menu also lists {Station} Usage for each station you own.

Monthly usage and payout

View usage opens the station's airtime for a month, with a month picker. The summary table breaks the month into Airtime, Billable, Unbillable and Payout. Below it, each connection is listed as on your own airtime pages, without the operators' identities.

Your payout is the station's share of the airtime billed to members, at the percentage agreed when the station joined the network. Unbillable time, such as free categories and your own use, earns no payout.

Analytics

More analytics shows the station's time on the air per day, by band and by mode, over a period you choose from 7 to 365 days. The analytics are totals only: they never identify operators.

Operating your own station

Airtime you use on your own station is recorded as Free - Owner or Friend and is not charged. The same category applies to members you have asked RHR to grant free use of your station.

Looking after the station

The station panel's health indicators are the quickest way to see that the station is reachable. If Heartbeat or Online is red, check the station's power and internet connection first. Members RHR has made administrators of a station also get a Site tab in the console toolbox, with controls to restart the station software or reboot the station computer.

2.13

CEPT members

Joining with a CEPT license: where you can transmit, the prepaid airtime balance, and the terms you accept.

RHR accepts members from countries with a CEPT agreement when CEPT signups are open. The sign-up page says so at the top when they are. CEPT accounts work a little differently from US accounts; this article explains how.

Where you can operate

CEPT members can receive on every station on the network but transmit only from stations in CEPT countries. Remote operation of a US station by a CEPT licensee is not permitted under US rules, and CEPT accounts are not given transmit permission at US stations. The CEPT stations currently on the network are in Croatia; stations in other CEPT countries appear with their prefix in the station name when they are available.

Signing up

The flow is the same as for US members (Create your account), with these differences:

  • Your callsign must be from a CEPT country. If RHR cannot determine your country from the callsign, or your country is not covered, the form says so and asks you to contact support.
  • The Terms and Conditions include confirming that your national license includes the CEPT Radio Amateur Licence (T/R 61-01) or the CEPT Novice Amateur Radio Licence ((05)06), that you will not transmit from any US station, and that you will always identify with the station's prefix.
  • The plan is PremiumDX CEPT (Yearly), billed yearly, with a one-time airtime credit.
  • The review page has an Auto-Reload section, because CEPT accounts prepay their airtime.

Prepaid airtime

CEPT accounts must keep an airtime balance that covers their usage. Airtime is deducted from the balance, never charged to your card afterwards. When the balance runs out, the console refuses new connections with Please purchase additional airtime to continue.

To avoid interruptions, set Auto-Reload to $20, $50, $100, $200 or $500. When your expected balance falls to $2.00 or less, that amount is bought automatically. You can also buy airtime at any time with Reload Airtime on your account overview. Your balance always belongs to you and is refunded on request. See Airtime credit and auto-reload.

Identification

From a CEPT station, identify with the station's prefix in front of your callsign, for example 9A/ your callsign from Croatia, unless your own callsign is already from that country. See Identifying yourself on the air.

License verification

Upload your national license within seven days of joining, like every member; choose CEPT as the license class. See Verify your license.

Chapter 3

Operating the console

Connecting, tuning, transmitting, antennas, amplifiers, spots and settings.

3.1

A tour of the console

Where everything is in the console — the header menus, the station list, the control panels and the toolbox.

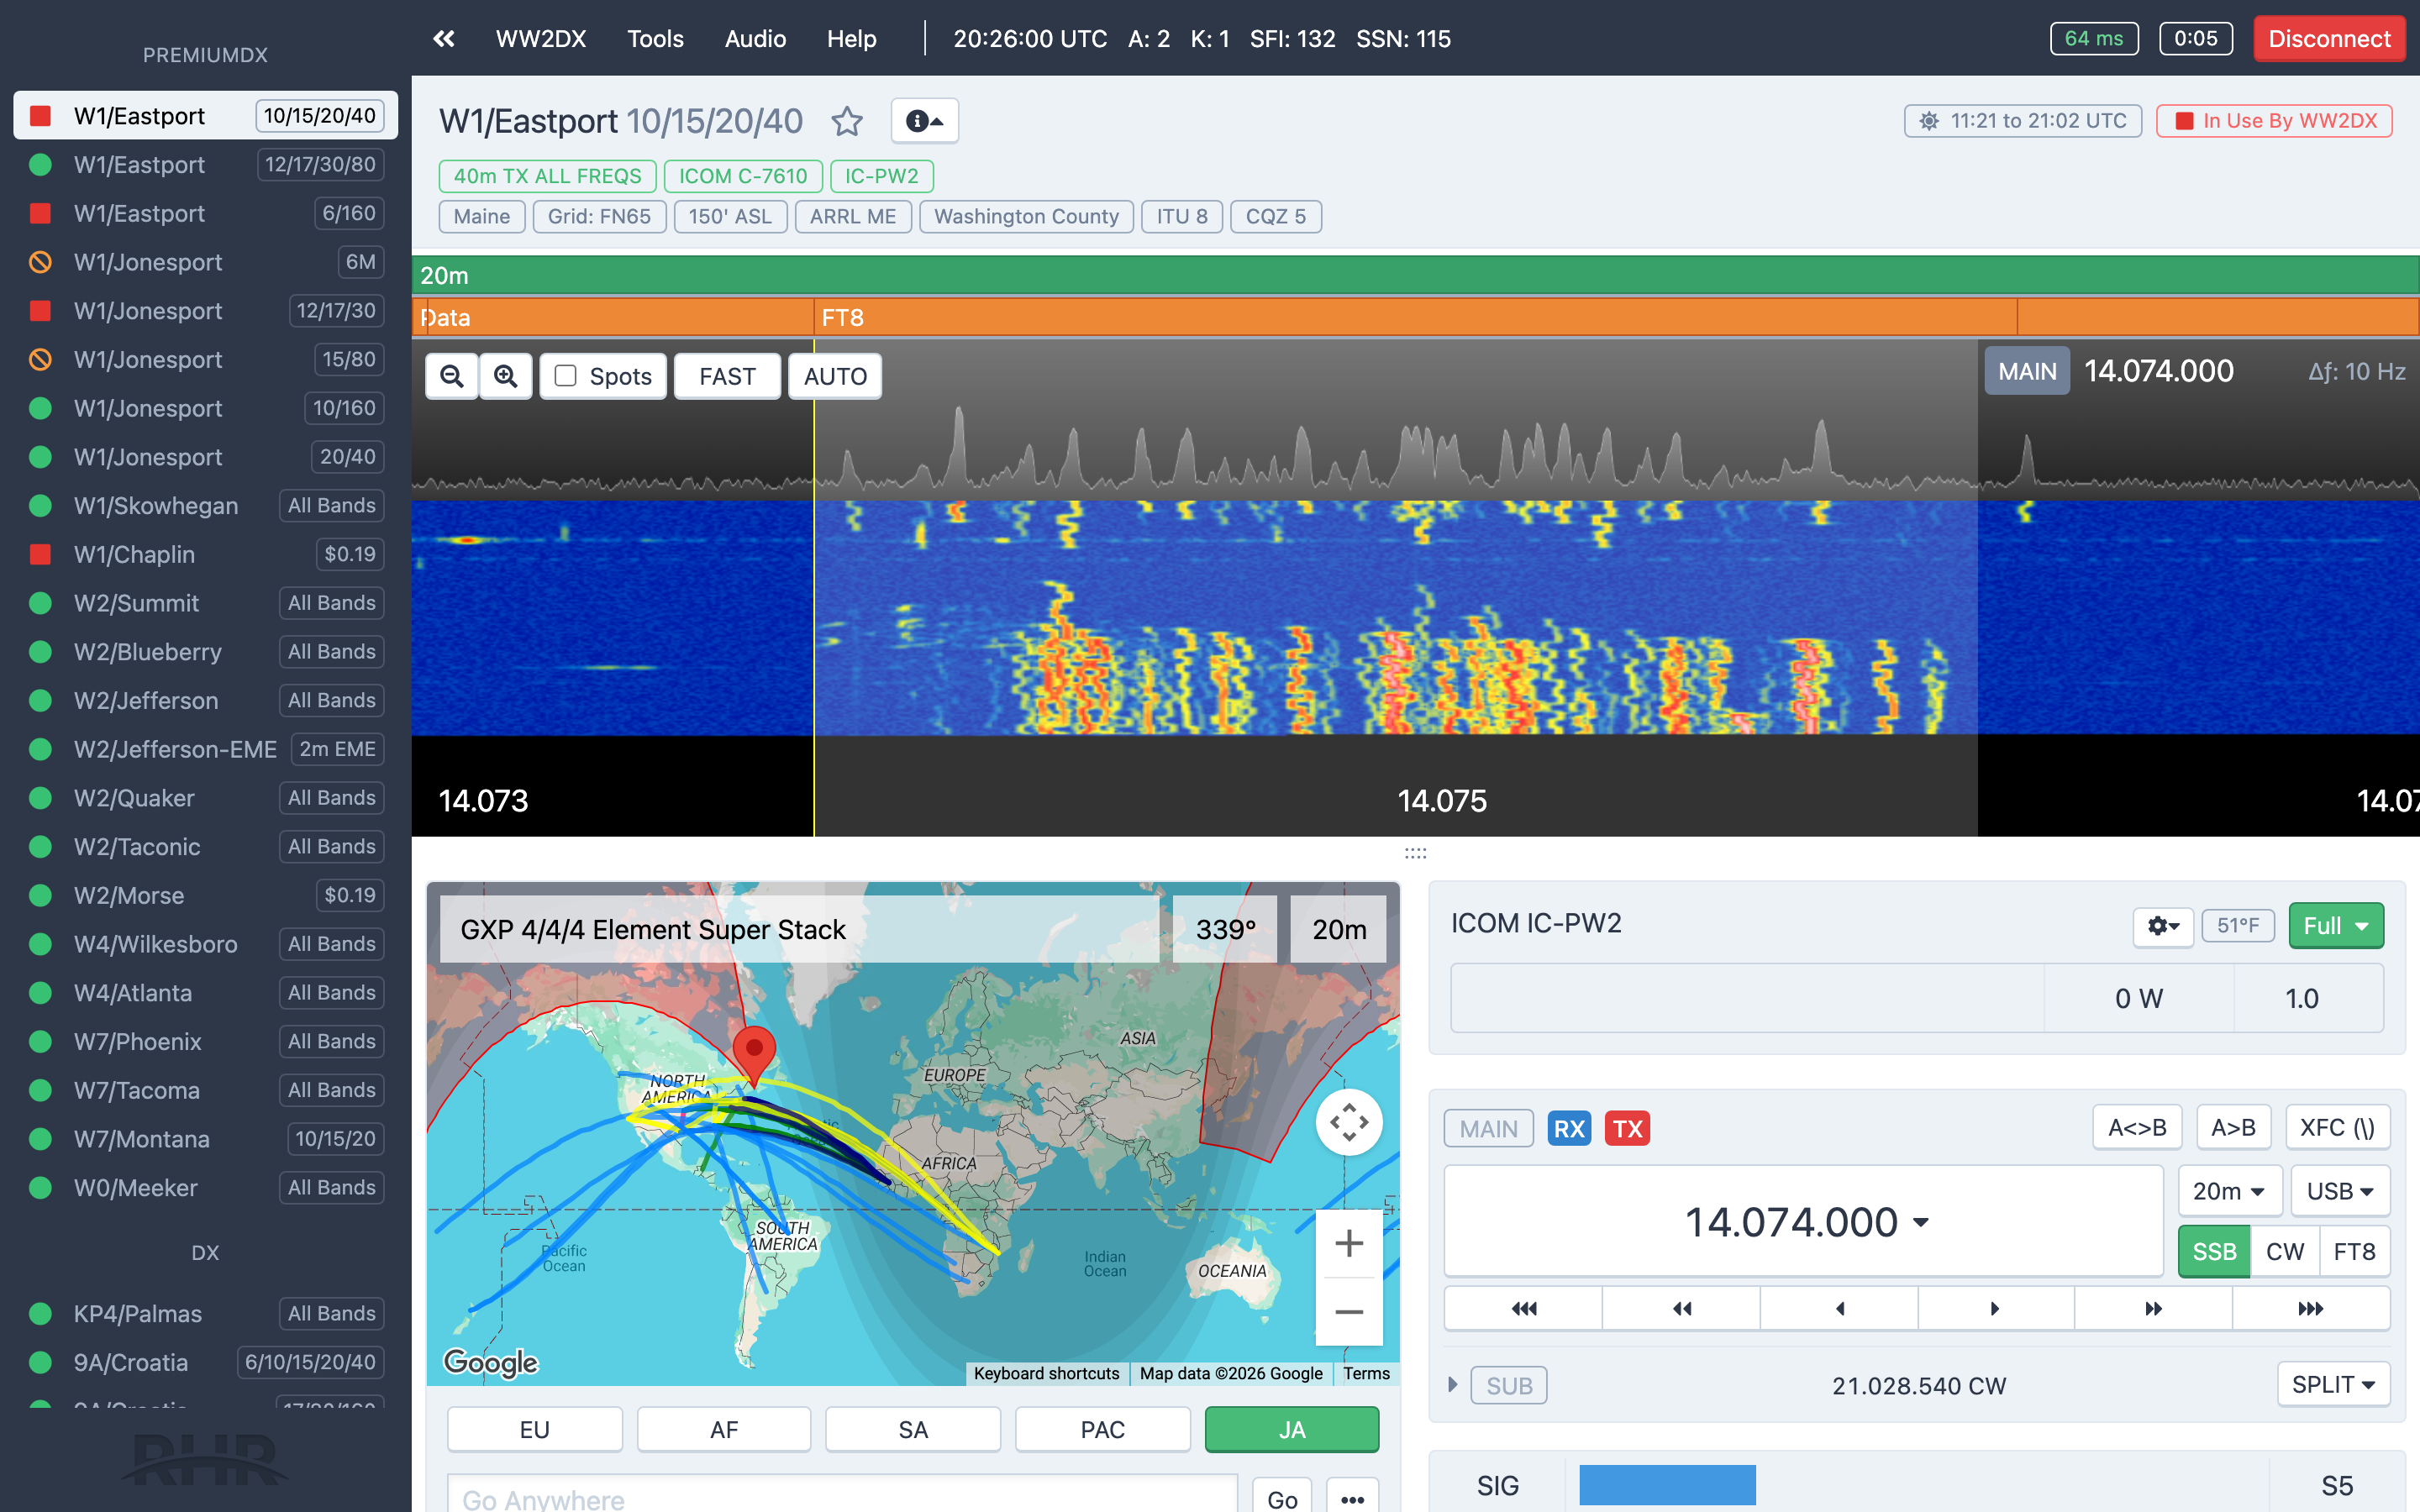
The console is the web page you operate from, at /console. It runs in your browser, with nothing to install. This article walks around the screen once so you know where to look; the other articles in this section go into each part.

The console with a station selected: header, station list, control panels and the toolbox

The header

The dark bar across the top is the main menu.

  • Show Station List / Hide Station List — the double-arrow button at the far left collapses the station list to give the panels more room. When the list is hidden, a Stations menu appears in its place so you can still pick a station.
  • Your callsign — the account menu: My Account, My Logbook, usage pages for any station you own, your Other Consoles if you belong to more than one, and Sign Out.
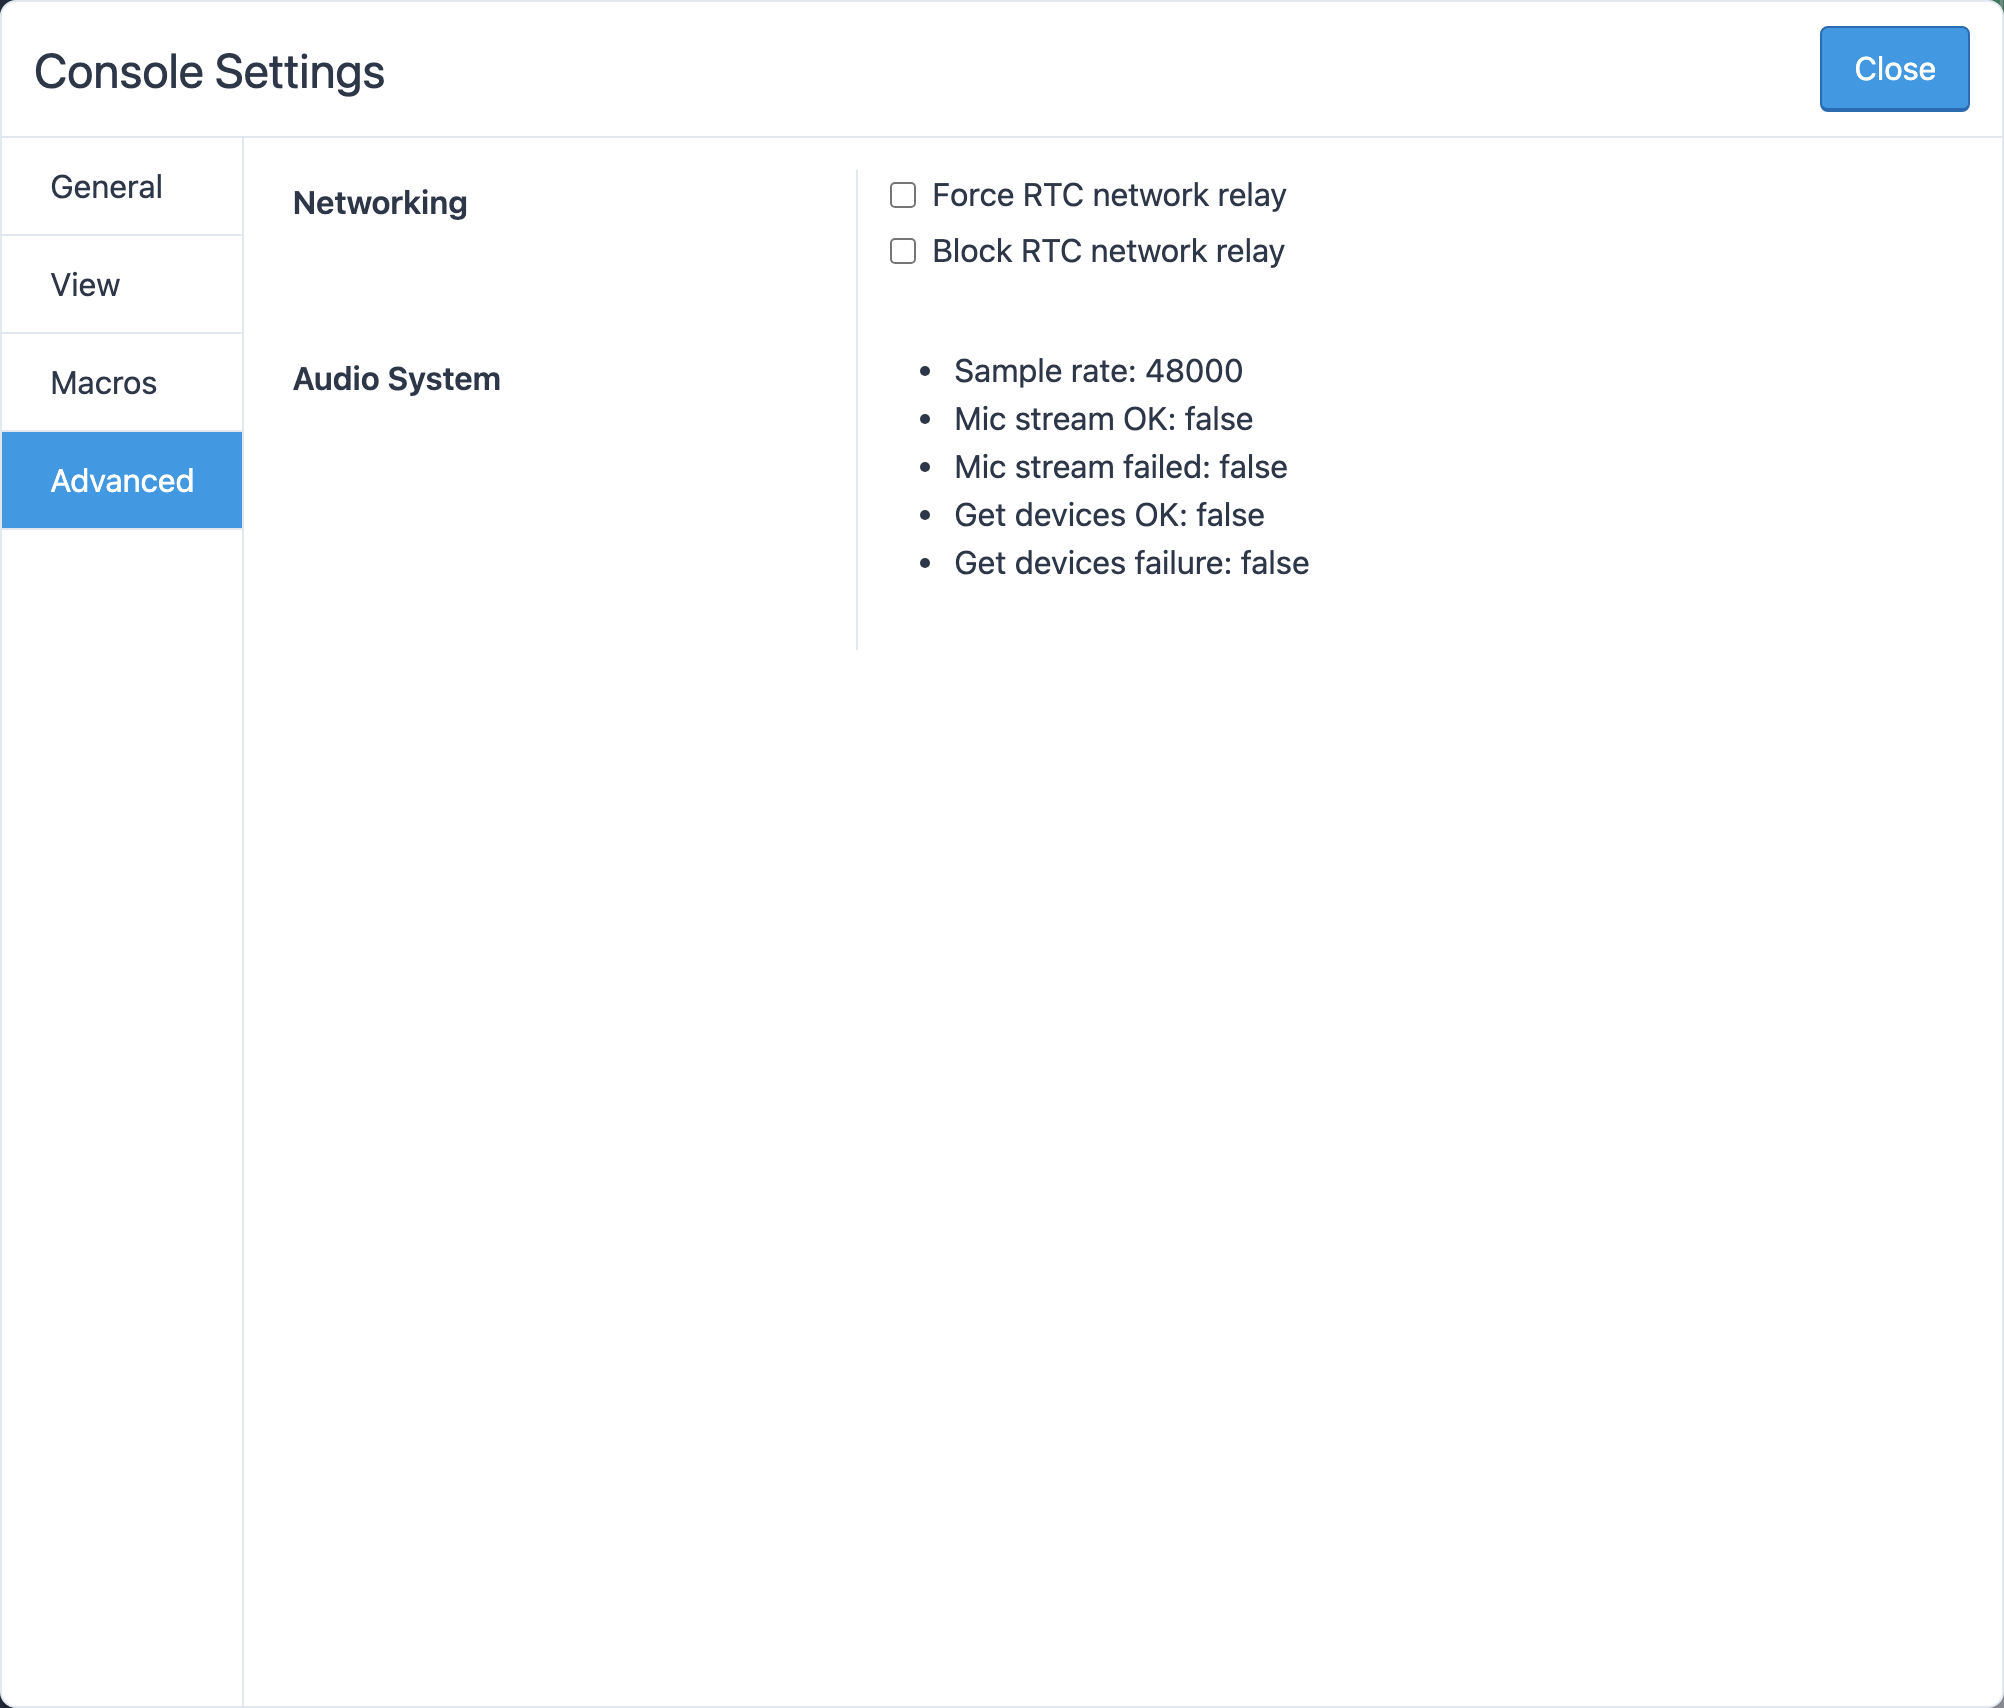
  • Tools — Console Settings, Operating Profiles, Integrations, and links to the FT8 Skimmer and its Telnet feed. See Console settings and the FT8 skimmer.
  • Audio — the Audio Setup Wizard, Master Volume, your Microphone and Speaker. See Audio setup.
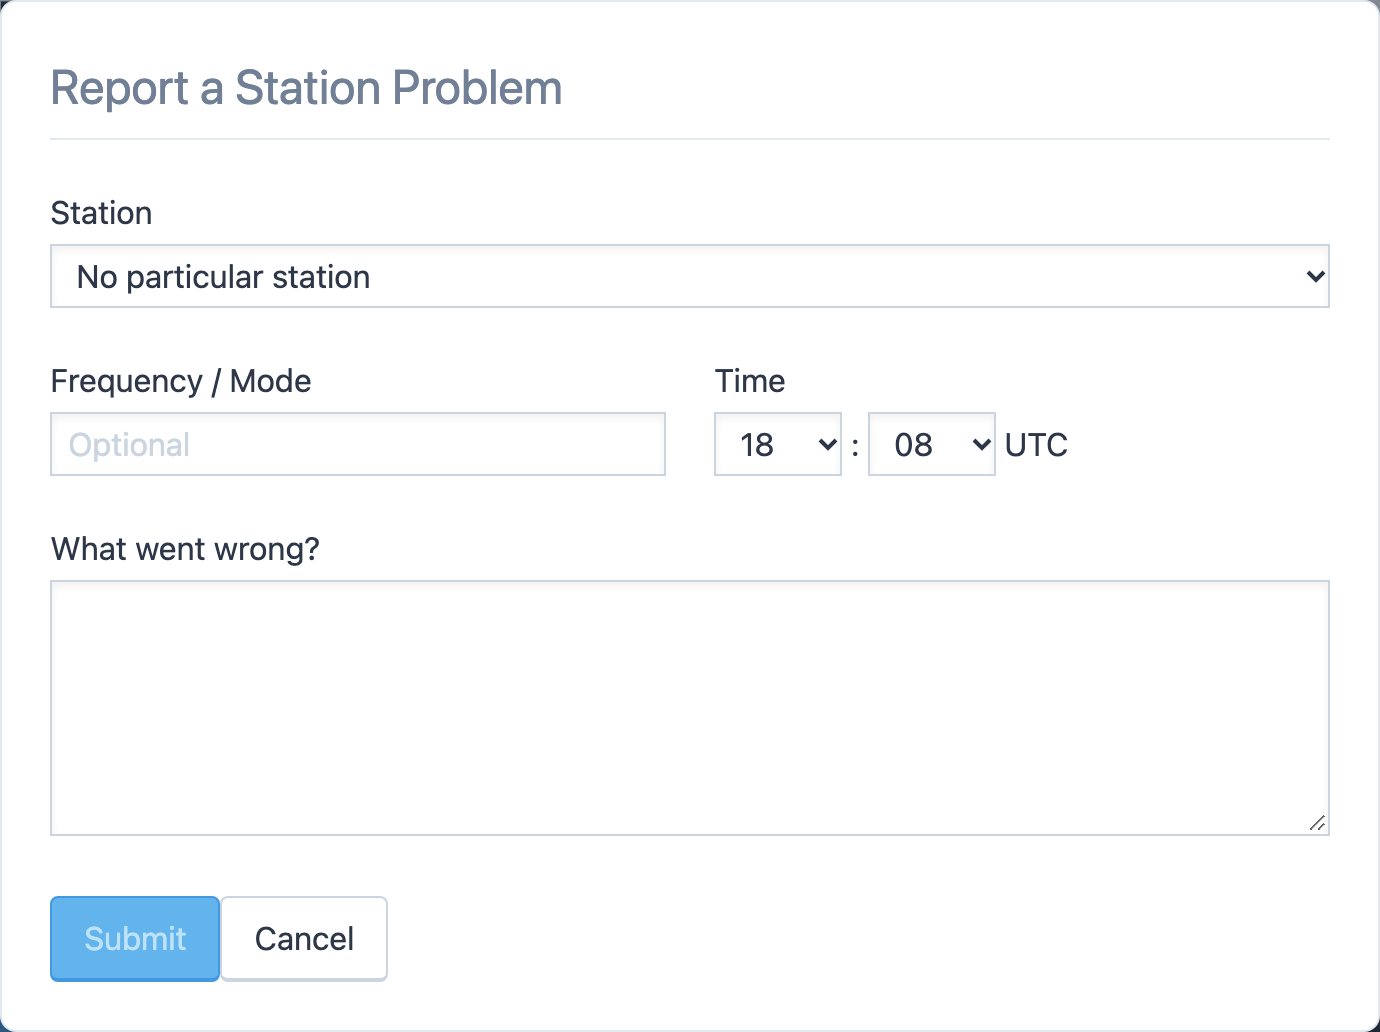
  • Help — Help Center, Tutorial Videos, Report a Station Problem and Contact Support.
  • UTC clock and solar indices — on wide screens, the current UTC time followed by A, K, SFI and SSN from the latest WWV bulletin.
  • Connected station — at the right, the name of the station you are connected to (if you are looking at a different one) and its Connect / Disconnect control, so you can always get back or hang up.

On narrow screens the menu buttons shrink to icons.

The station list

The left sidebar lists every station your membership includes. Stations you have starred appear first under Favorites; the rest are grouped by region. Each name carries a small status icon that matches the badge described in Connect to a station: available, in use, standby or unavailable. Click a station to look at it — looking is free, and you can see its description, status and current rates before you connect.

The station header

Above the panels sits the station's name, a star to add it to your favorites, and an info button that reveals the station's details, including its sunrise and sunset in UTC. On the right are the station's status badge and, once you connect, the connection timer and Disconnect button.

The panels

The middle of the screen is the station itself. What you see depends on the hardware at that station, but the panels are:

  • The panadapter and waterfall across the top, on stations whose radio provides one. Drag the handle below it to change its height. See The panadapter and waterfall.
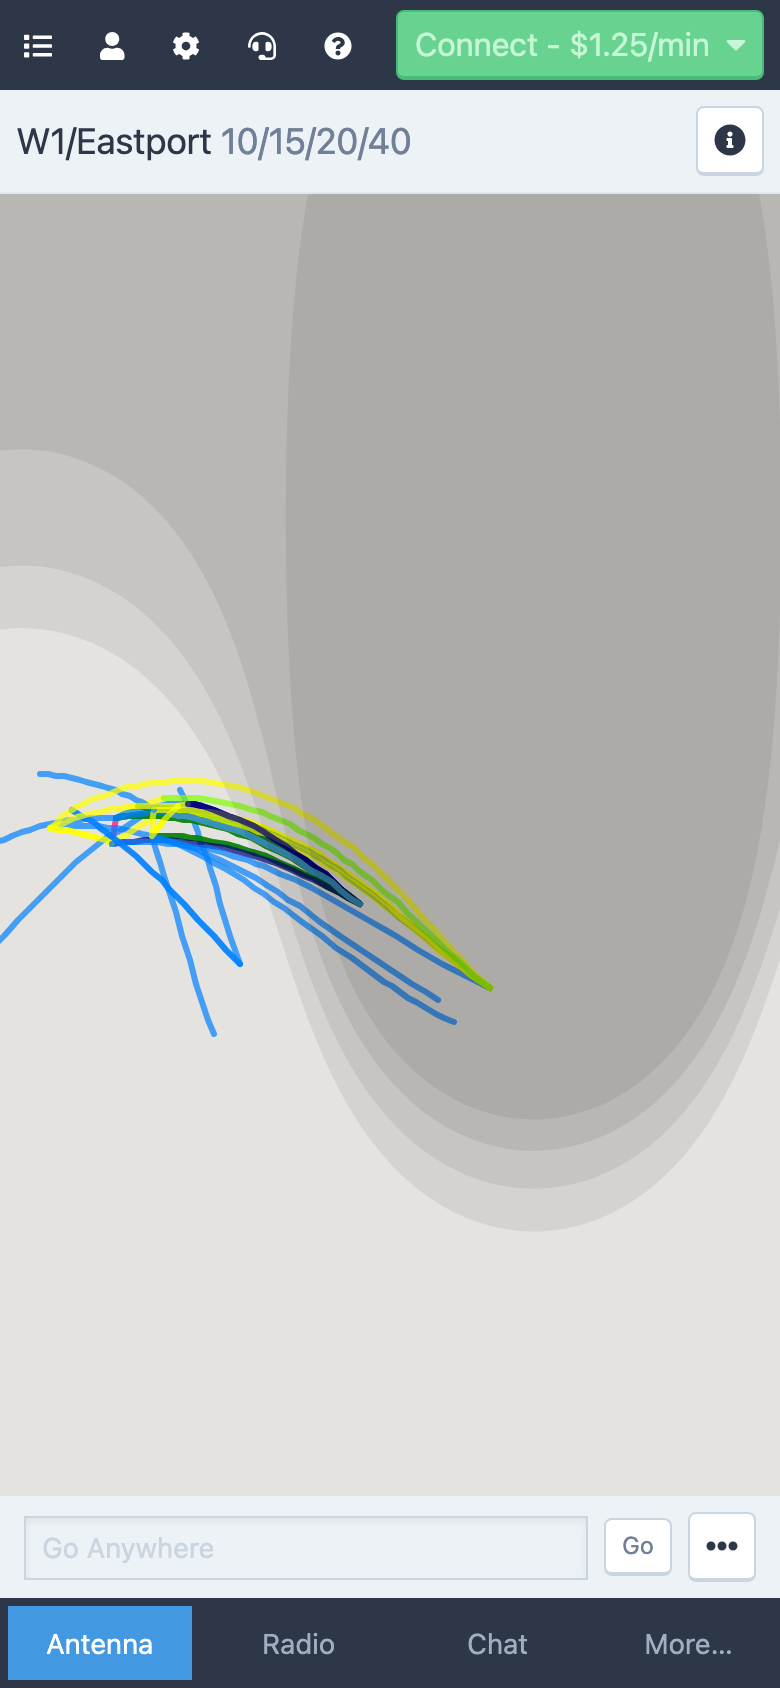
  • Map — the antenna panel: a map with the grayline, the station's beam heading, antenna switching, rotor presets and Go Anywhere. See Antennas and rotors.
  • VFOs — the radio panel: VFO A and B, the receive settings and the transmit controls. See Icom radios.
  • Transmit — PTT, VOX, power, the CW keyer and voice macros. See Transmitting.
  • Amplifier — the amplifier's level, readings and faults, on stations that have one. See Amplifiers.
  • Log Entry — the logging form. See Logging from the console.

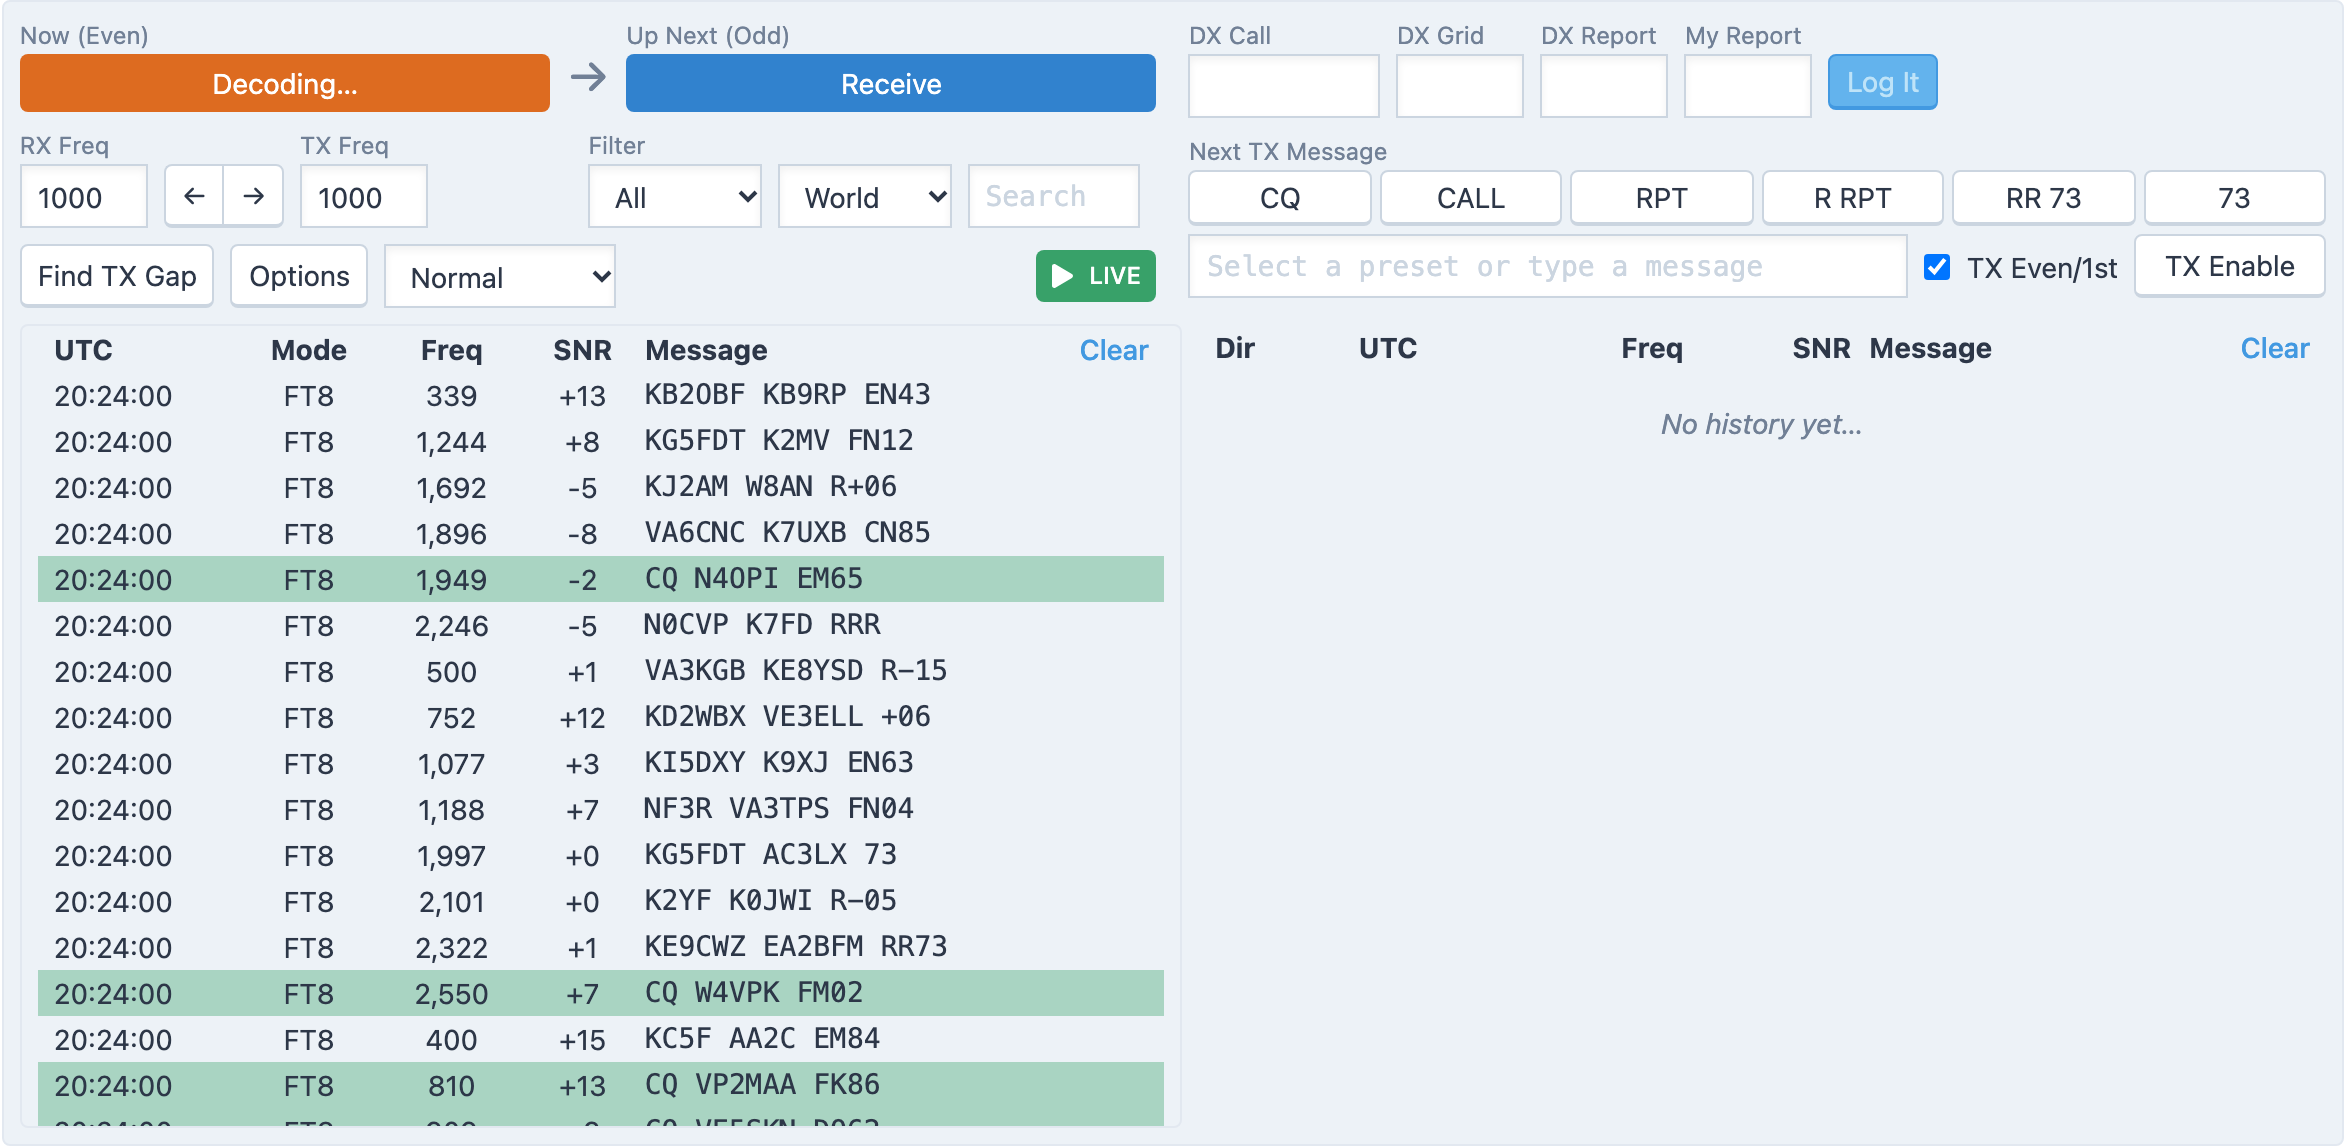
The FT8 panel appears between the waterfall and the panels when you connect with a digital preset; see FT8 in the console.

The toolbox

The toolbox is the tabbed panel at the bottom of the screen.

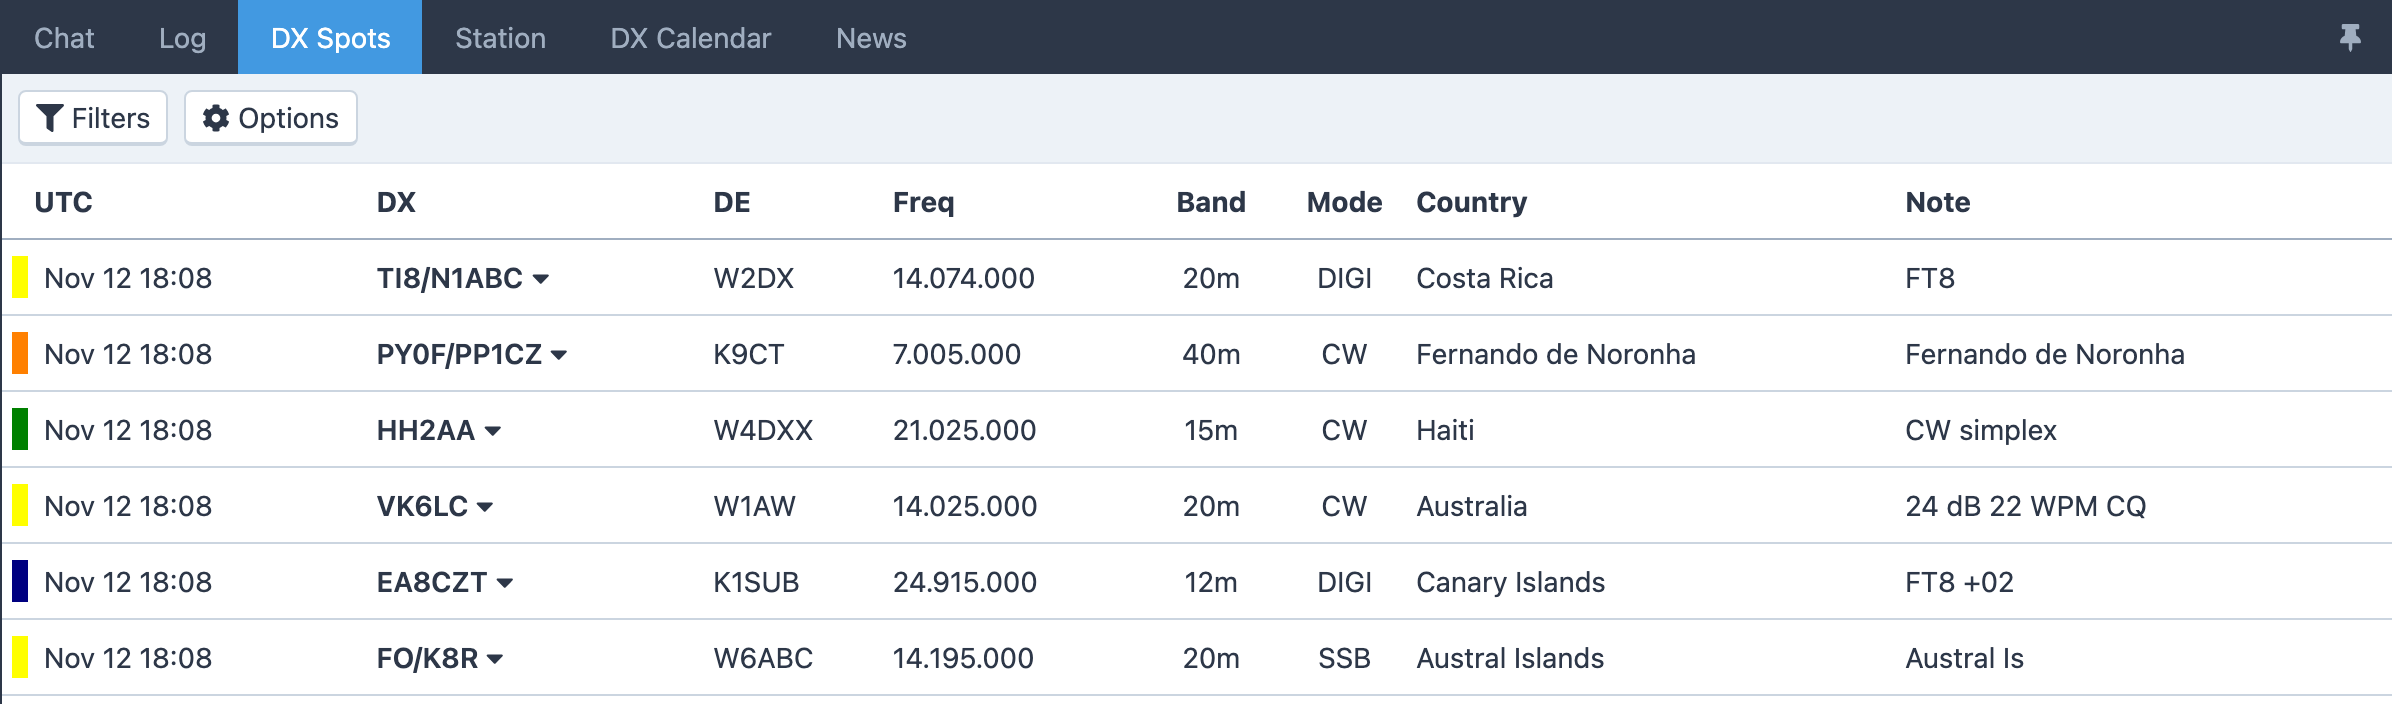
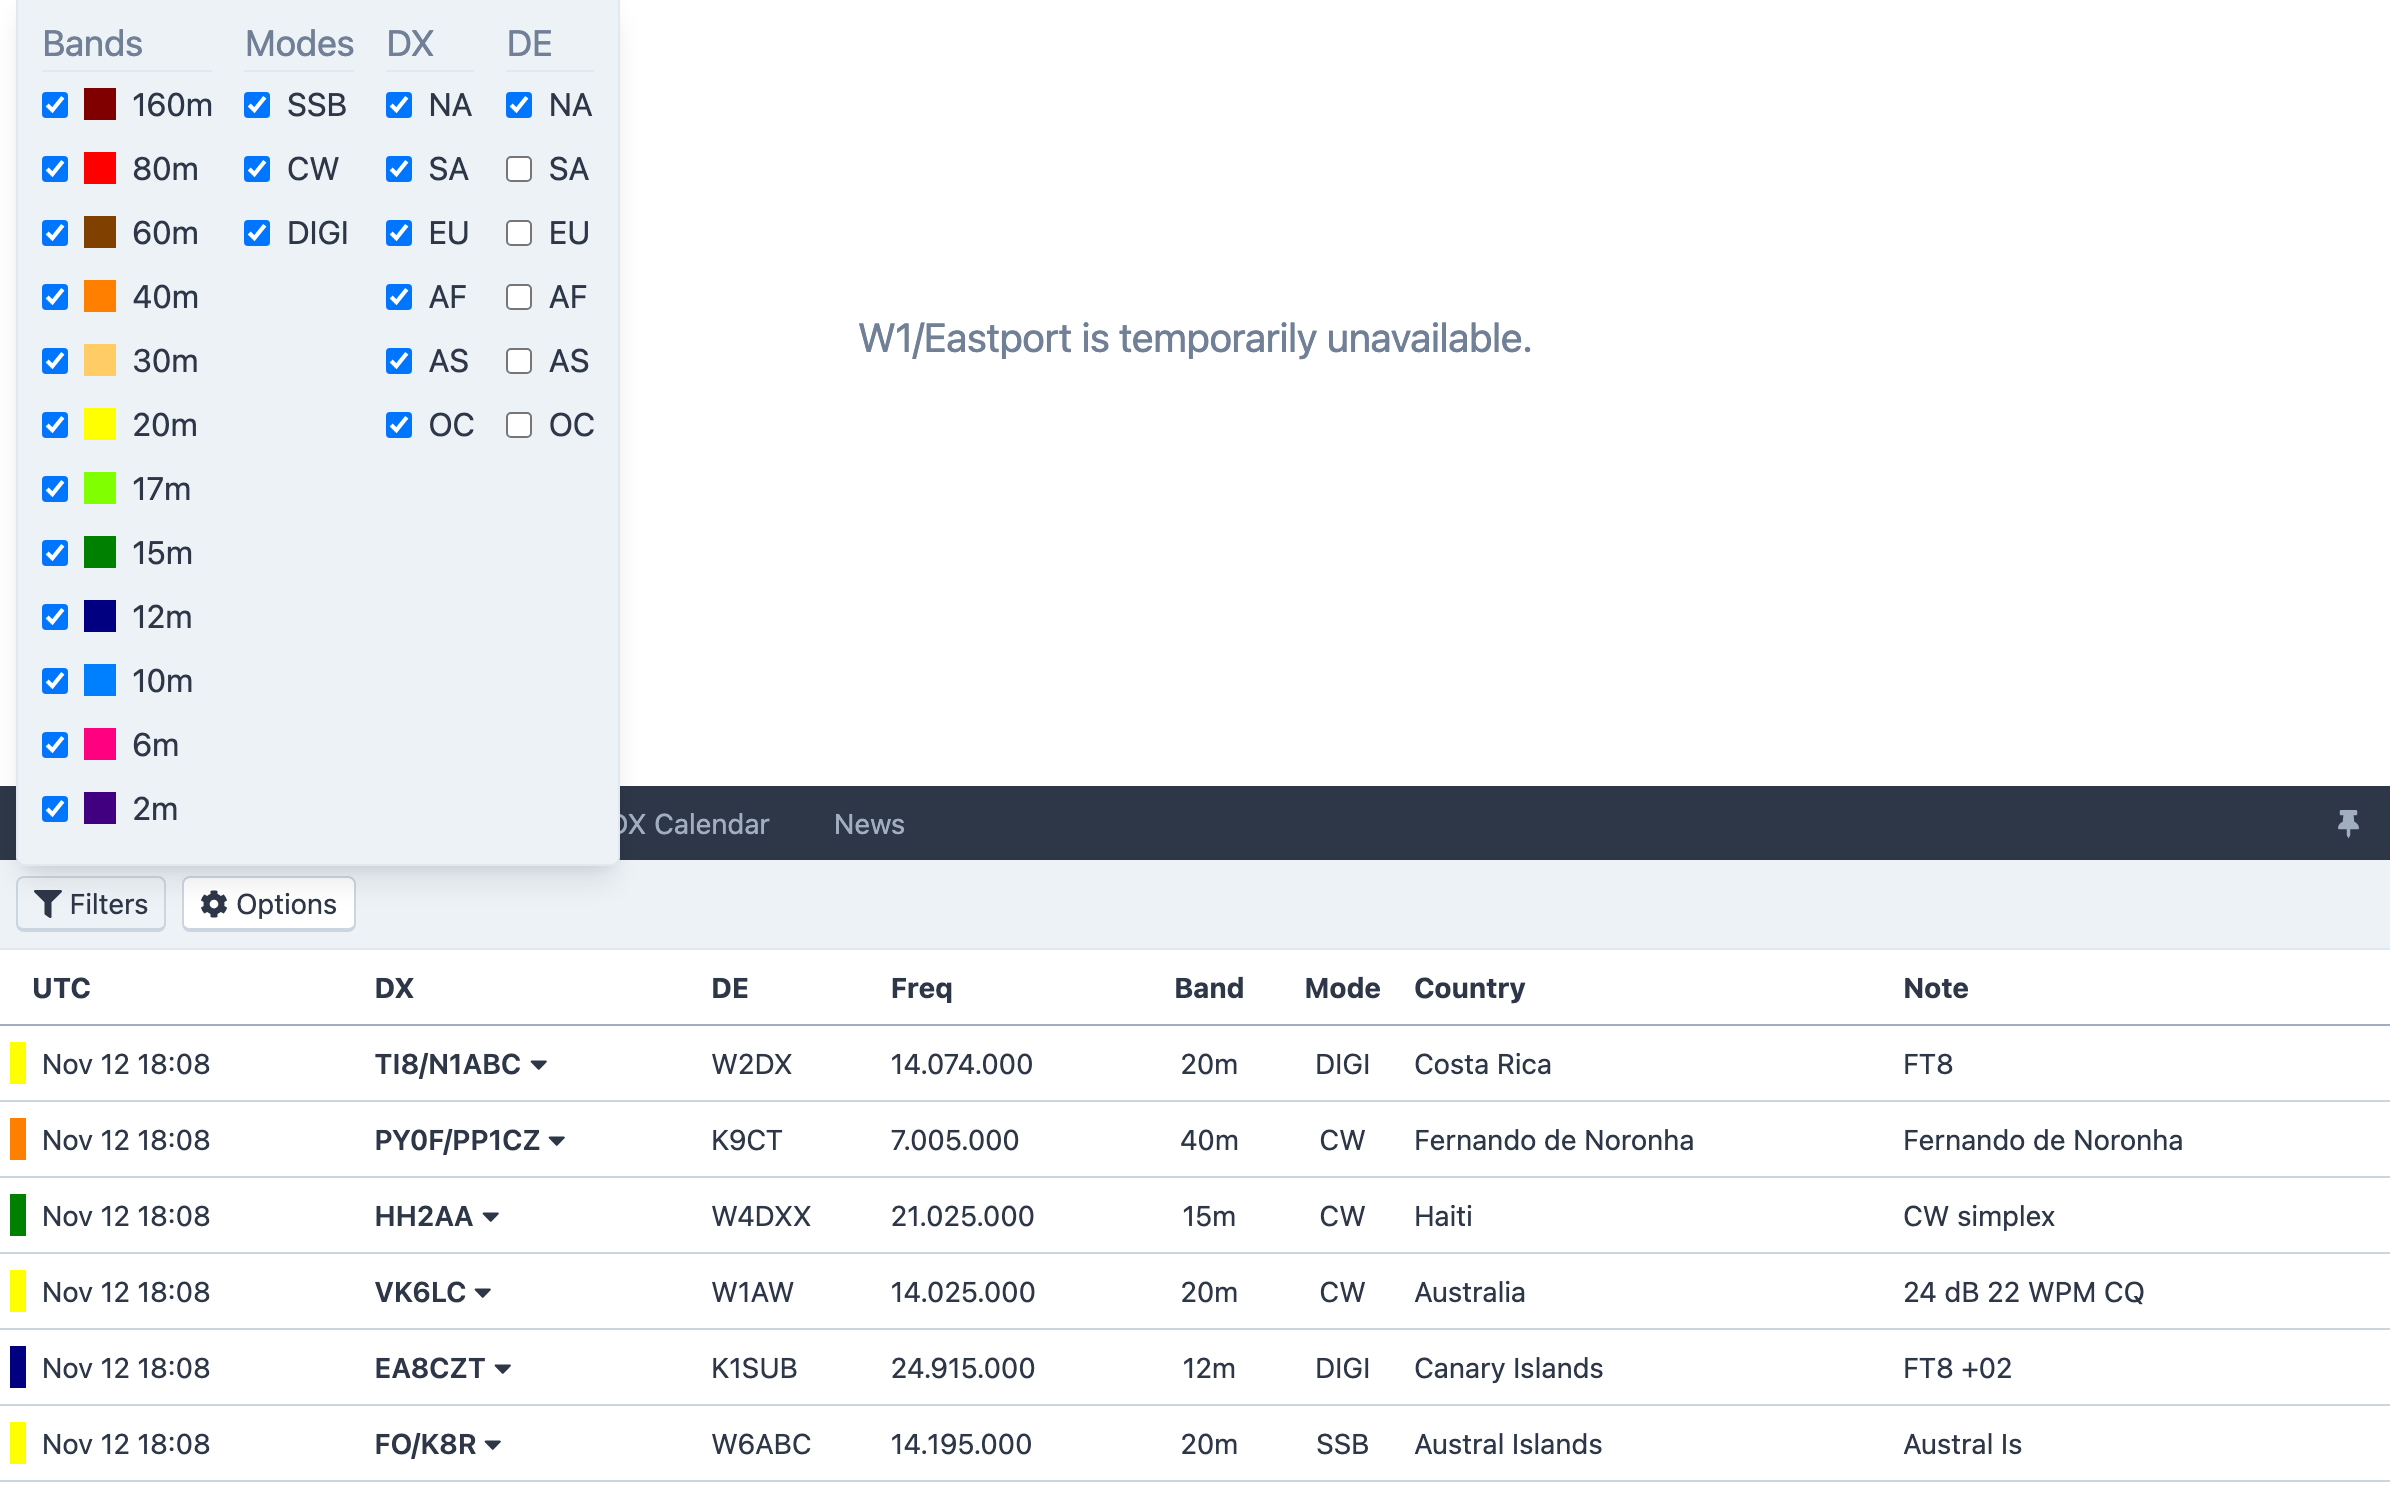
The toolbox, with the DX Spots tab open
TabWhat it holds
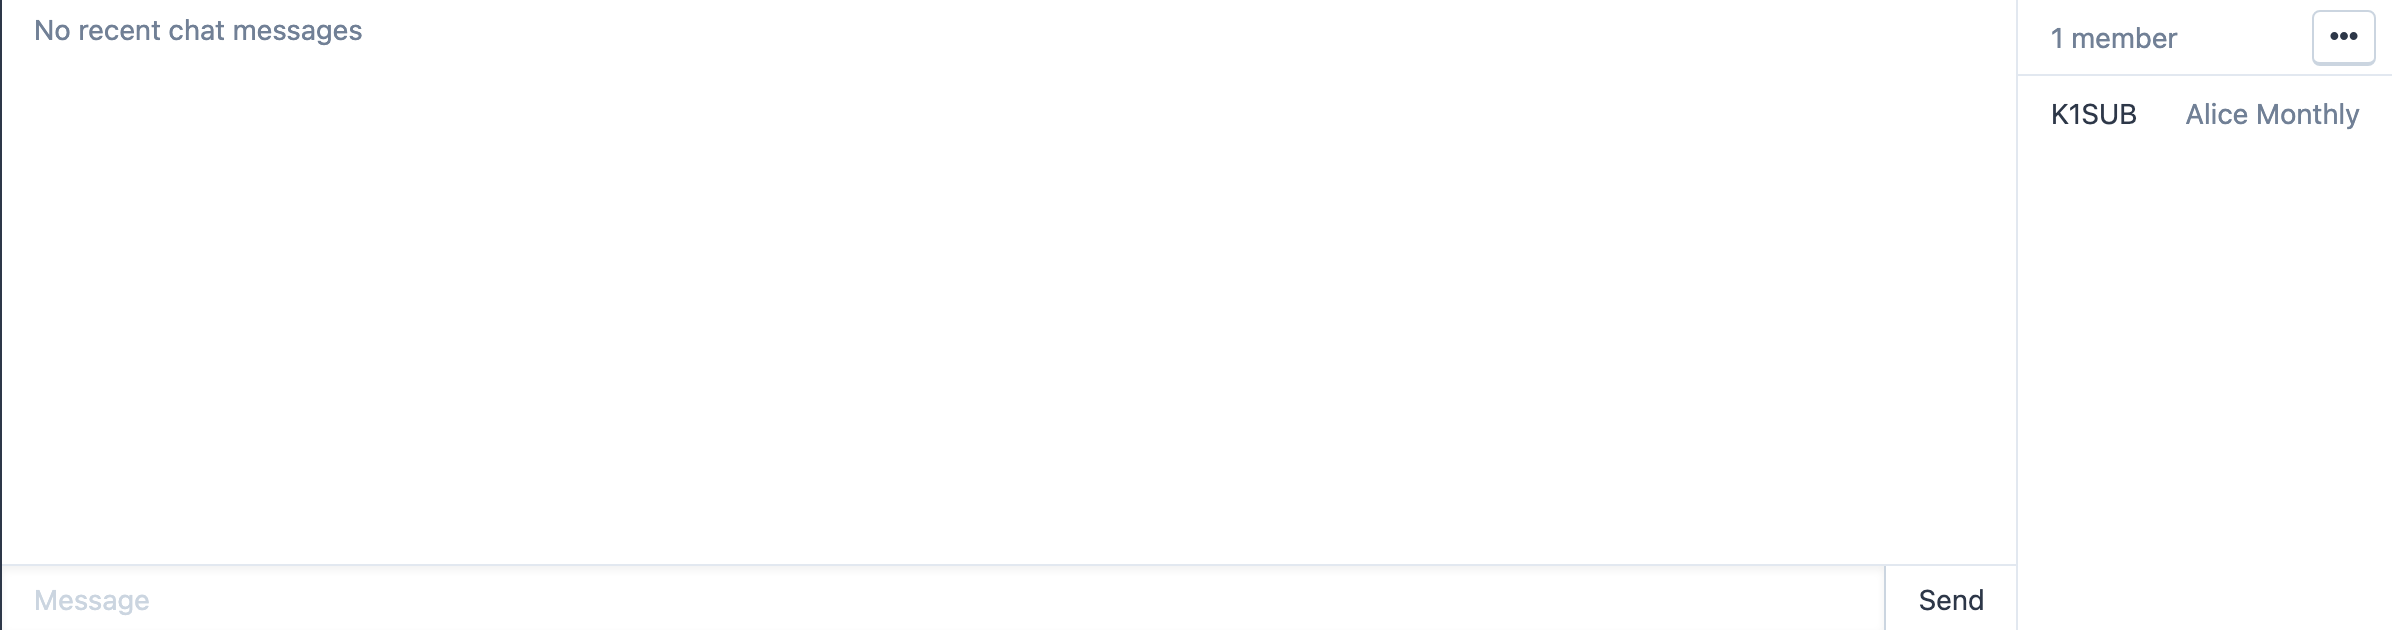
ChatTalk with the other operators who are online. Shows a count of unread messages.
LogYour most recent contacts, with quick editing.
DX SpotsDX cluster and RBN spots, with filters, and one-click tune and turn.
StationThe selected station's description.
DX CalendarAnnounced DX operations, with the ones being spotted right now marked.
NewsBulletins from RHR. Shows a count of unread bulletins.
SatellitesUpcoming passes, on stations with satellite capability.

Station administrators see extra tabs for their stations.

The buttons at the right of the tab bar control the toolbox itself: drag the grip to resize it (double-click to maximize), collapse or expand it, and pin or un-pin it from the bottom of the window. See Chat, news and the DX calendar and DX spots.

On a phone

On a small screen the panels become tabs along the bottom — Antenna, Radio, the current toolbox tab and More… — with a large touch PTT button above them. See Using a phone or tablet.

3.2

Connect to a station

Read a station's status, choose a rate, connect with or without a microphone, and disconnect when you're done.

Looking at a station is free: click any station in the list and you can see its description, who is using it and what it costs. Airtime starts only when you press Connect, and stops when you press Disconnect.

Reading the station's status

The badge at the top right of the station header (and the small icon beside each name in the station list) tells you whether you can connect:

BadgeMeaning
AvailableNobody is on the station.
In Use / In Use By callsignSomeone holds a transmit connection. You can still watch the station.
Standby / Standby By callsignSomeone holds a receive-only or standby connection. A transmit connection can still take the station (see below).
UnavailableThe station is offline or has been taken down for maintenance. The page says "… is temporarily unavailable" and may carry a note from RHR.

Click the info button next to the station name to show its details, including its sunrise and sunset in UTC. Click the star to add the station to your Favorites, which puts it at the top of the station list.

If a station is not included in your plan, a notice says This station is not available on your current plan, with links to learn more and to upgrade. See Membership and pricing.

Choosing a rate and connecting

The green button reads Connect followed by the station's per-minute rate, for example Connect - $0.59/min. Its wording changes with how you are connecting:

  • Connect — a normal connection with your microphone.
  • Connect (No Mic) — a receive-only connection, offered when your microphone is disabled (see Audio setup).

If the station offers more than one rate or more than one radio, the button opens a Select a Rate menu instead. Each rate shows its name, its cost per minute, and one of these notes:

  • TX connections have priority — this is a standby rate: someone connecting at a transmit rate can take the station from you.
  • Receive only — you can listen but not transmit.
  • Amplifier is enabled or Amplifier is disabled — whether the rate includes the amplifier. See Amplifiers.

If your membership allows more than one simultaneous connection, the menu also shows how many Connections Remaining you have.

The rate you pick is fixed for the whole connection, whether you transmit or only listen. See Airtime and rates.

While the connection comes up the button reads Authorizing…, Connecting… and Configuring… in turn. Please wait… means the station is reconfiguring its hardware, which takes a few seconds.

Connecting to a station, from the rate menu to the live panels

While you are connected

The station header shows a connection timer and a red Disconnect button. On wide screens a latency label appears beside them: the round-trip time to the station in milliseconds, green under 250 ms, yellow under 500 ms and red above that. Hover over it to see whether your audio is Direct (P2P) or Relayed (TURN) through RHR's relay servers. See Connection problems if the number is high.

If the console loses its link to RHR it shows Reconnecting... and picks up where it left off when the link returns.

Being bumped from a standby connection

If you connected at a receive-only or standby rate and another member takes the station with a transmit connection, your connection ends and a dialog appears: Someone else connected to station. It asks Would you like to connect to another station at the frequency and mode you were on, and lists the stations currently available, each with its own Connect button. Choose one or Close.

Watching a station you aren't connected to

Selecting a station without connecting shows you what's happening there: the operator's VFO A and VFO B with their frequencies and modes, and the output power. The Station tab in the toolbox has the description.

One tab at a time

If you open the console in a second browser tab or window while connected in the first, the second one shows This is not the tab you're looking for! and reminds you that you can control the station from the tab where you connected. Click OK and go back to that tab.

3.3

Audio setup

Run the Audio Setup Wizard, allow the microphone in your browser, choose your speakers and mic, and set the volume.

The console plays the station's receiver through your speakers or headset and sends your microphone to the transmitter, all inside the browser. The first time you open the console it offers the Audio Setup Wizard; you can run it again at any time from the Audio menu.

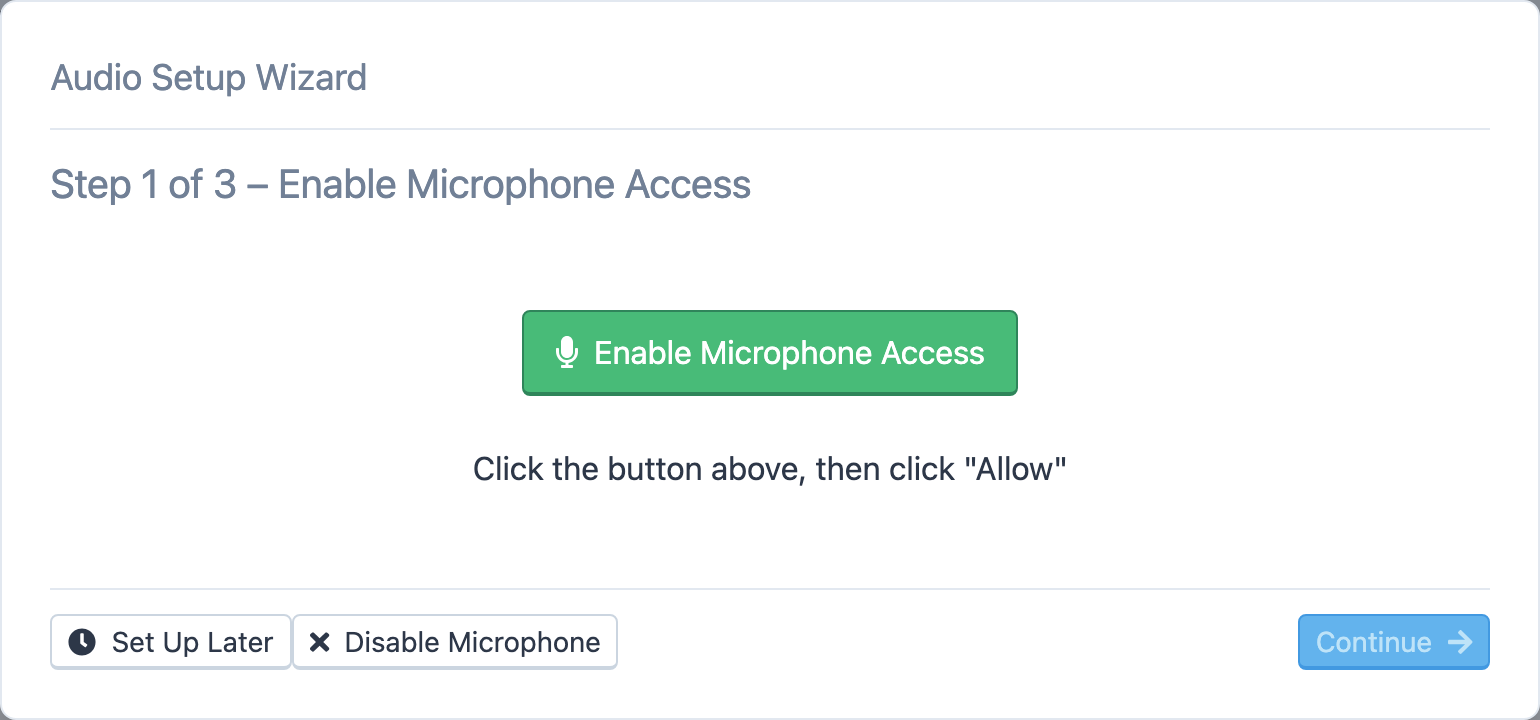
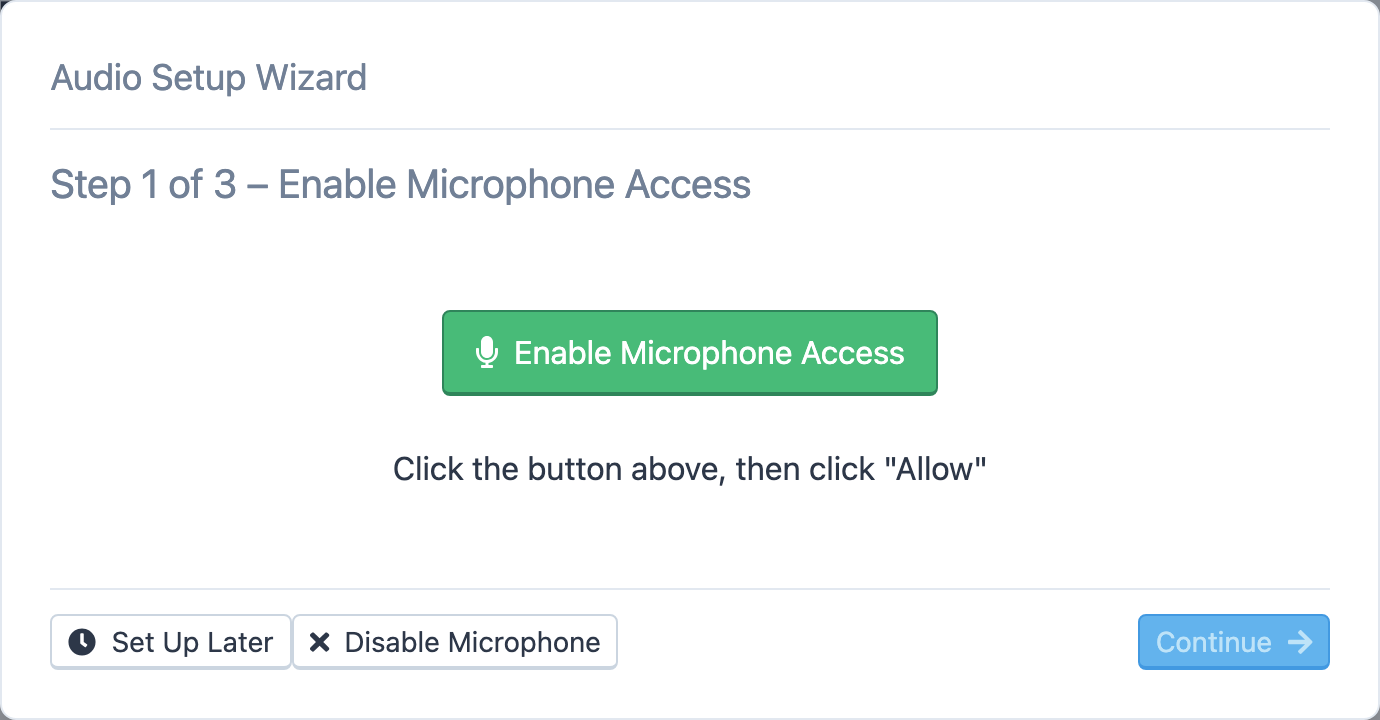
Step 1 of the Audio Setup Wizard

The Audio Setup Wizard

  1. Step 1 of 3 – Enable Microphone Access. Click Enable Microphone Access, then click Allow in your browser's prompt (in Firefox, also tick Remember this decision). When it works, the wizard says We found your microphone! If the browser has blocked the microphone, the wizard shows the steps for your browser — Chrome and Edge, Firefox, Safari on macOS and iOS, and the macOS system setting — to unblock it. The microphone is only available on a secure (HTTPS) page, which the console always is.
  2. Step 2 of 3 – Select Speakers. Pick the output device and click Play Test Sound. Some browsers don't let a page choose the speaker; the wizard says so, and you change the output device in your operating system instead.
  3. Step 3 of 3 – Select Microphone. Pick the microphone, watch the stereo level meters while you speak, and choose which channel to transmit: Transmit Left Channel, Transmit Right Channel or Transmit Both Channels. Tick Listen To Microphone (Testing) to hear yourself while you adjust. Click Reload if a device you just plugged in isn't listed.
  4. Click Done.

The buttons along the bottom let you leave early: Set Up Later closes the wizard and asks again next time; Disable Microphone turns the mic off so you can connect receive-only; Don't Ask Again stops the wizard from appearing on its own. Back and Continue move between steps.

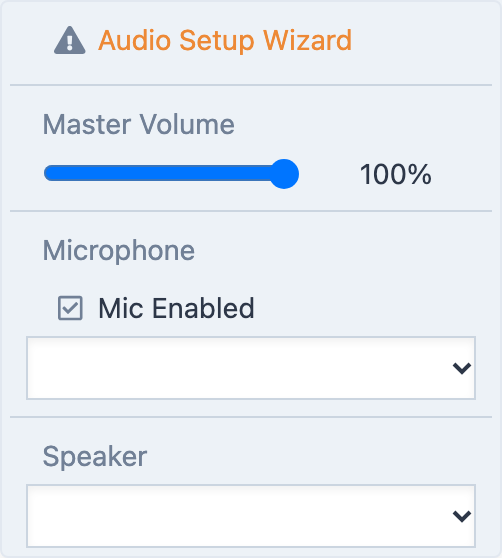
The Audio menu

The Audio menu in the header holds the day-to-day controls:

  • Master Volume — the receiver volume in your browser, as a percentage. At zero it shows Muted in orange, and the connect button turns orange too, so you don't sit on a silent station wondering why.
  • Microphone — the Mic Enabled checkbox, the device list and a live level meter.
  • Speaker — the output device list.
  • Audio Setup Wizard — run it again. It shows in orange with a warning icon while no devices have been set up.

The radio's own receive settings, such as the filter and noise reduction, are in the radio panel; see Icom radios.

The Audio menu
The Audio menu

Connecting without a microphone

With Mic Enabled off, the connect button reads Connect (No Mic) and you get a receive-only connection at the station's rate. Turn the mic back on and reconnect to transmit.

When to run the wizard again

Run it whenever you change headsets or move to another computer, and when a microphone meter shows no movement. The console remembers the devices you chose in this browser.

3.4

Tuning and the VFO

Type a frequency, pick a band and mode from the presets, and tune with knobs, buttons or a slider.

VFO A and VFO B share the same frequency row at the top of the radio panel. This article covers that row; the controls around it are in Icom radios.

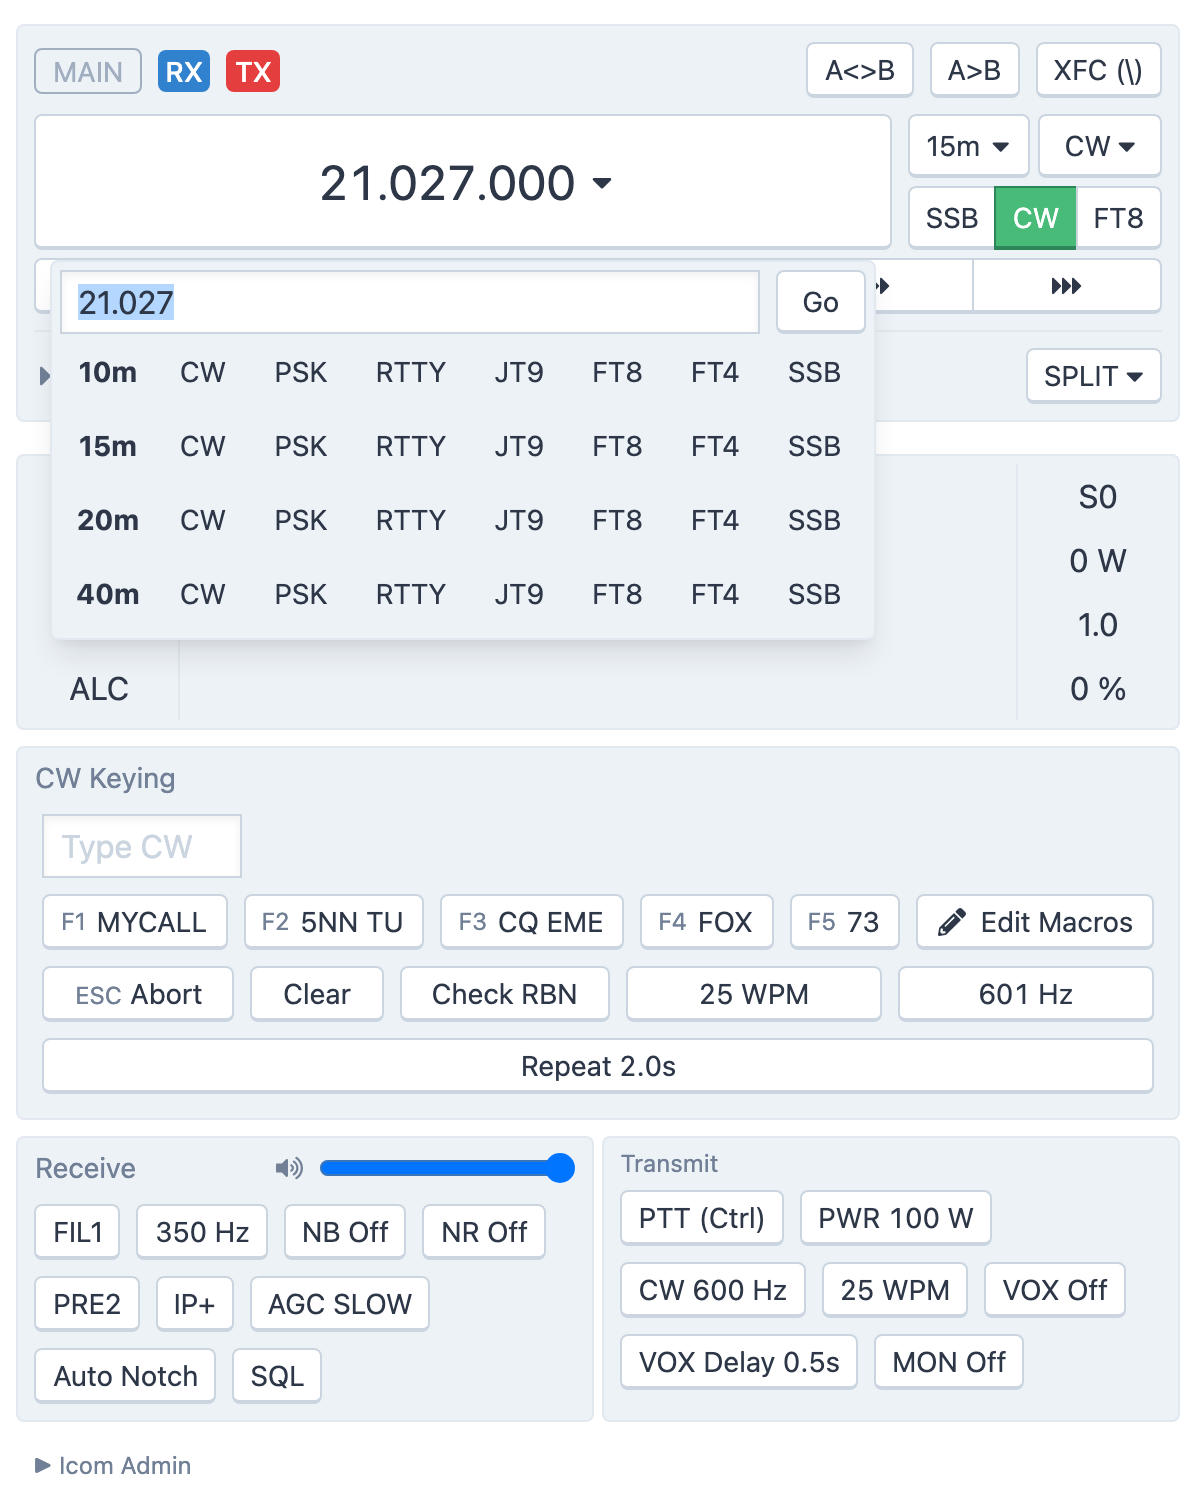
The VFO row with the Quick Tune popover open

Quick Tune

The large frequency readout is a button. Click it to open Tune VFO:

  • Type a frequency in the box (placeholder kHz or MHz) and press Enter or click Go. Numbers over 1000 are read as kHz, smaller ones as MHz, so 14074, 14074.0 and 14.074 all land on the same spot.
  • Or click a preset in the band-by-mode table below the box. A preset sets the frequency and the mode together. Choosing a digital preset such as FT8 also prepares the radio for digital operation.

The table only lists the bands the station's antennas cover.

Band and mode

To the right of the readout are two menus and three buttons:

  • Select Radio Band — jump to another band.
  • Select Radio Mode — the full list of modes the radio offers.
  • SSB, CW, FT8 — one-click modes. SSB picks the correct sideband for the frequency (LSB below 10 MHz, USB above), so you rarely need the mode menu. The active mode's button is green.

Tuning by hand

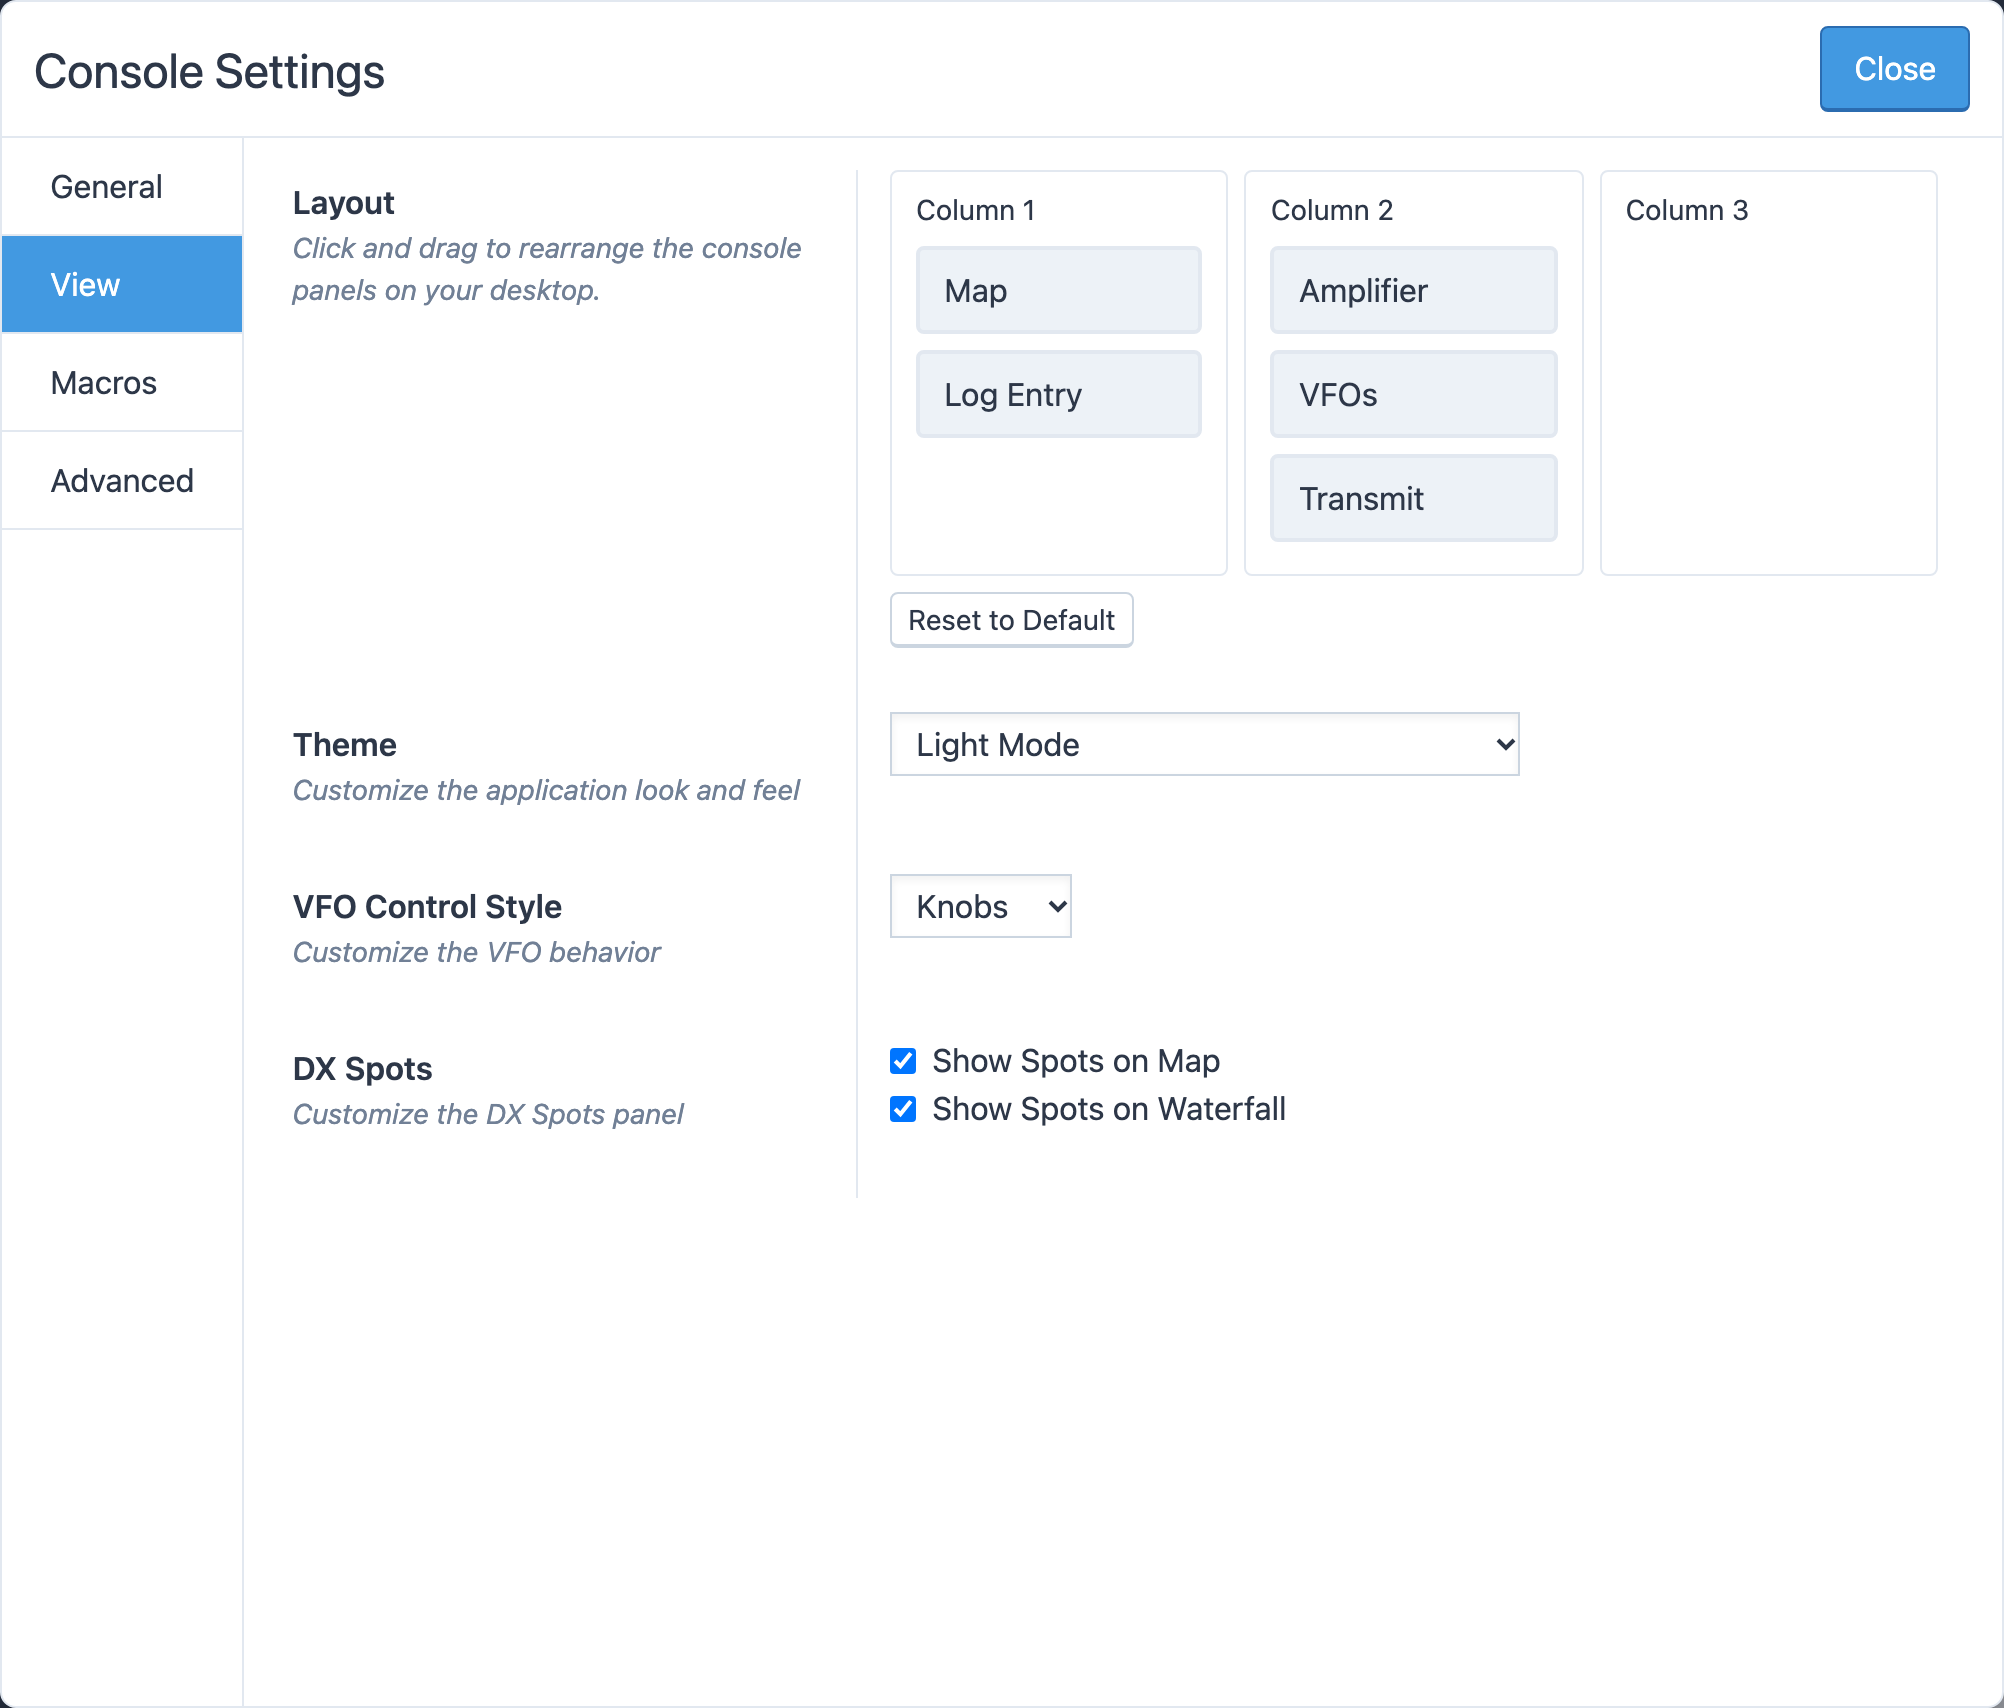
How you tune is up to you. Choose the style under Tools → Console Settings → View → VFO Control Style:

  • Knobs — a knob beside the readout. Drag it round, or roll the mouse wheel over it. It works with touch too.
  • Buttons — six arrow buttons below the readout, for 10, 100 and 1,000 Hz steps down and up. Hold a button to keep stepping; with the button focused, Space or Enter steps once.
  • Slider — a horizontal slider below the readout; the step size shows at its right.

You can also click and drag directly on the scope and waterfall; see The scope and waterfall.

Tuning with the knob

The two VFOs, split and the lock

The active VFO carries blue RX and red TX badges; the other VFO is collapsed to one line under it, and a click expands it so you can tune it too. A<>B swaps the VFOs and A>B copies A into B. SPLIT moves the transmitter to VFO B at an offset of +1, +5 or +10 kHz, and XFC lets you listen on it while you hold the button; see Icom radios.

A padlock in the readout means the VFO is locked and the frequency controls are disabled.

Out of band

If you tune outside the amateur bands the radio panel shows a warning. The station will not let you transmit there.

3.5

The scope and waterfall

Read the spectrum, click to tune, zoom and pan, set the waterfall speed and show DX spots on it.

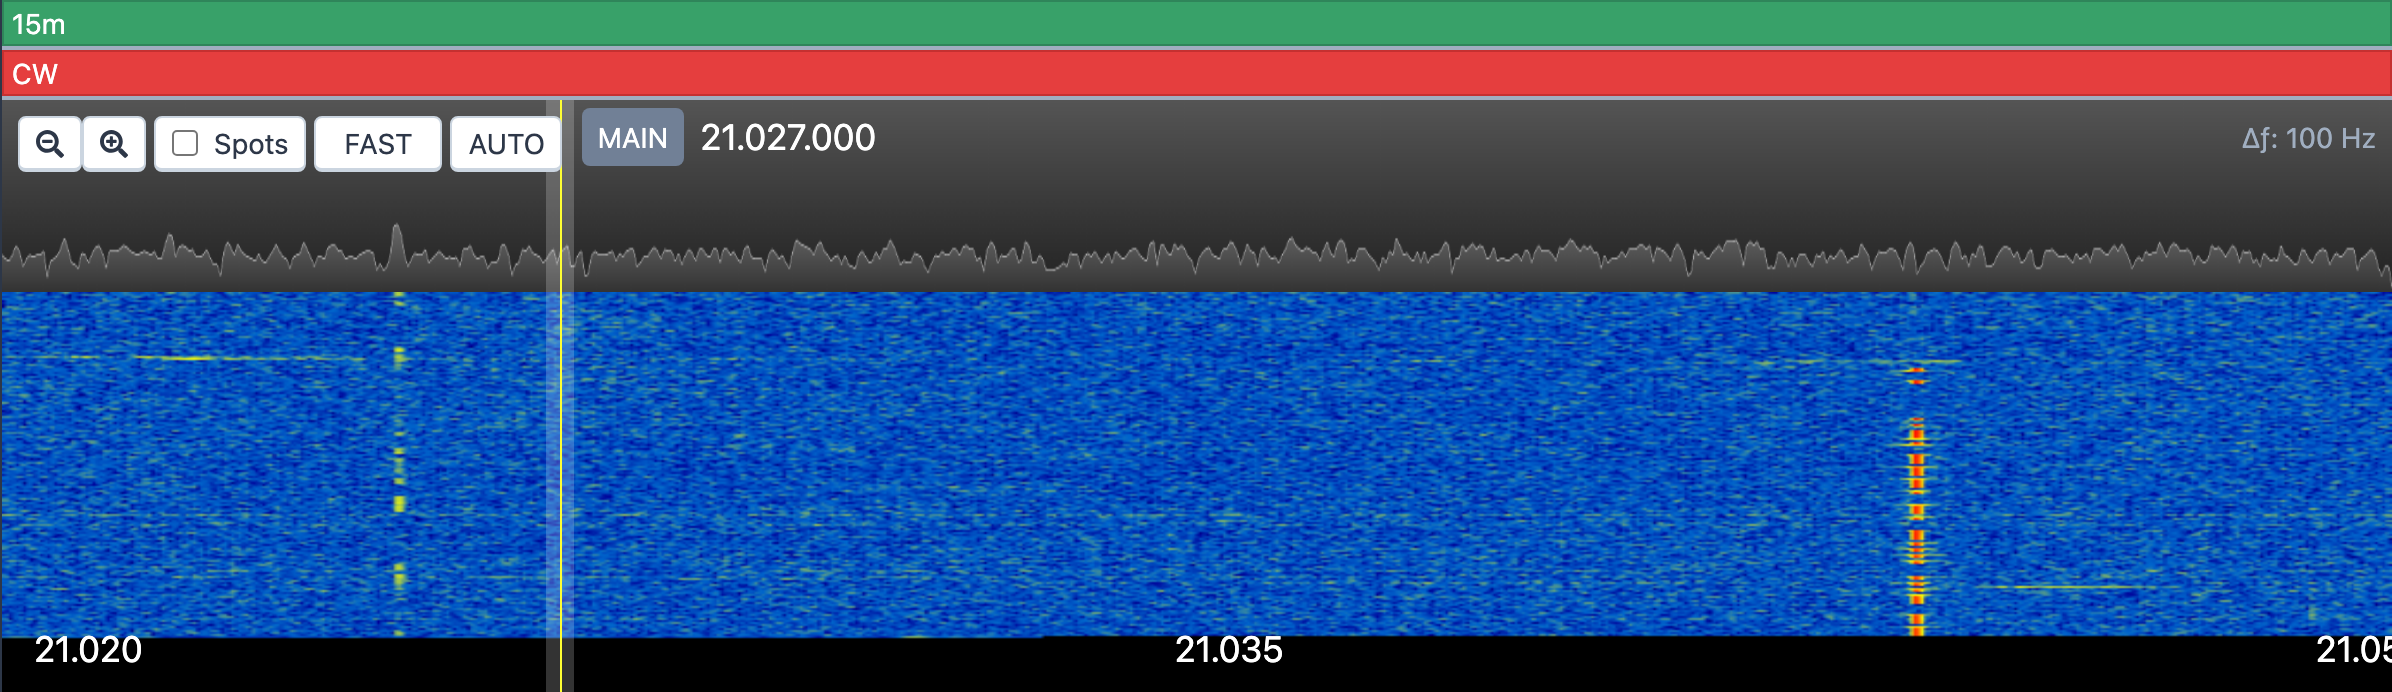
The console shows the radio's scope — the live spectrum — with a scrolling waterfall under it, across the top of the station above the panels. It follows the active VFO, so whatever you tune is in view.

The scope and waterfall with DX spot flags

Reading the display

The strip above the spectrum marks the band segments; click a marker to zoom to that segment. The active VFO is drawn as a vertical line at its frequency with its passband shaded. ∆ƒ in the top right is the tuning step the display is using at the current zoom; clicks and drags snap to it.

Tuning with the mouse

Click a signal to tune to it
  • Click anywhere on the spectrum to tune the VFO there. As you hover, a gray ghost shows where it will land.
  • Drag the VFO marker to retune it smoothly.
  • Drag the background to pan up or down the band, within the span the radio allows.
  • Roll the mouse wheel to zoom in and out around the pointer. The magnifier buttons in the top left zoom too.

On a touch screen, drag with one finger to pan and pinch with two to zoom.

Controls

The buttons in the top left:

  • The two magnifier buttons zoom out and in.
  • Spots draws DX cluster and RBN spots as flags on the waterfall. Click a flag to tune to it; right-click one for Hide for 1h, Hide for 24h or Hide for 48h. The same switch is under Tools → Console Settings → View → Show Spots on Waterfall. See DX spots.
  • Speed cycles the waterfall rate: SLOW, MID, FAST.
  • The reference level reads AUTO while the console sets it for you. Click it to set the level by hand, in dB, with the slider.

When the FT8 panel is active, the top right offers Locked to VFO / Unlocked. Locked keeps the display on the FT8 sub-band so the decodes line up with the waterfall; see FT8 in the console.

Drag the handle under the waterfall to change its height.

3.6

Icom radios

The Icom radio panel — VFO A and B, split, XFC, filters and receive settings, FM repeaters, and the transmit controls.

Icom stations show the radio's two VFOs much as the radio's own display does, with the receiver and transmitter settings in two groups below. The scope and waterfall are described in The panadapter and waterfall.

The Icom radio panel

VFO A and VFO B

The active VFO sits at the top of the panel with the frequency row from Tuning and the VFO. Its badges show which VFO is doing what: blue RX on the receiving VFO, red TX on the transmitting one. The other VFO is collapsed to one line under it; click the line to expand it and tune it directly.

  • A<>B swaps the two VFOs.
  • A>B copies VFO A's frequency and mode into VFO B.
  • XFC (\) — transmit frequency check. Hold the button, or hold the \ key, to listen on the transmit VFO and tune it; release to go back. Handy for finding the DX's listening frequency in a split pileup.
  • SPLIT — a menu with +1, +5 and +10 kHz (or the channels, on 60 m), plus On and Off. With split on, the TX badge moves to VFO B. The button turns orange while split is on.

Meters

SIG is the S-meter; PWR (watts), SWR and ALC (percent) appear while you transmit, as far as the radio reports them.

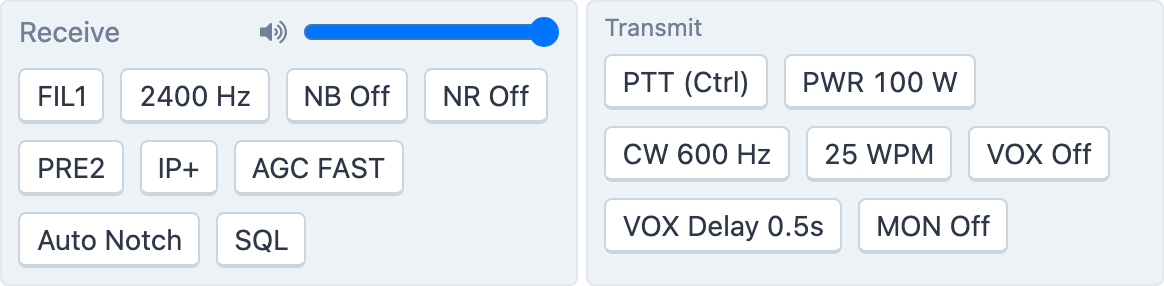
Receive

  • Master Volume — the receiver volume in your browser (the same control as the Audio menu).
  • FIL1, FIL2, FIL3 — click to cycle the radio's three filter presets, and BW to set the IF filter width in hertz, on radios that allow it.
  • NB and NR — the noise blanker and noise reduction, each with an on/off button and a level.
  • PRE OFF, PRE1, PRE2 — cycle the preamplifier.
  • IP+ — the radio's IP+ mode.
  • AGC SLOW, AGC MID, AGC FAST — cycle the AGC speed.
  • Auto Notch.
  • SQL — the squelch level.
  • RX ANT — switch to the receive antenna, on stations that have one.

FM repeaters

On FM, an FM Repeater group appears on radios with duplex control:

  • Repeaters — a list of the repeaters near the station. Pick one and the console sets the frequency, duplex direction, offset and tone for you.
  • DUP OFF, DUP-, DUP+ — the duplex direction.
  • OFFSET — the repeater offset, from the standard values.
  • TONE — turn the CTCSS tone on or off, and PL to choose its frequency.

Transmit

  • PTT — see Transmitting. The button is disabled while the power is set to zero.
  • PWR — RF power in watts.
  • CW … Hz — the CW pitch, 300 to 900 Hz.
  • … WPM — keyer speed, 6 to 48 WPM.
  • VOX with a sensitivity slider (Lower is more sensitive) and VOX Delay, 0.1 to 2.0 s. On Icom stations VOX runs in your browser: it keys the radio when your microphone level crosses the threshold, and lets go after the delay.
  • MON — the transmit monitor, with a level.

In CW a CW Keying group appears above the receive settings: the type-ahead keyer and macros described in CW.

3.7

Transmitting

Push to talk from the keyboard, mouse or touch screen, use VOX, set power and the monitor, read the meters and understand transmit lockouts.

Transmitting needs a connection at a rate that allows it (see Connect to a station) and a working microphone (see Audio setup). The transmit controls are the Transmit group at the bottom of the radio panel.

Before you key up, know how you will identify: see Identifying yourself on the air.

The Transmit group of the radio panel

Push to talk

  • The PTT button — press and hold it with the mouse, or touch and hold on a phone or tablet. Letting go, or moving the pointer off the button, stops transmitting. The button shows the key it is bound to, for example PTT (Ctrl).
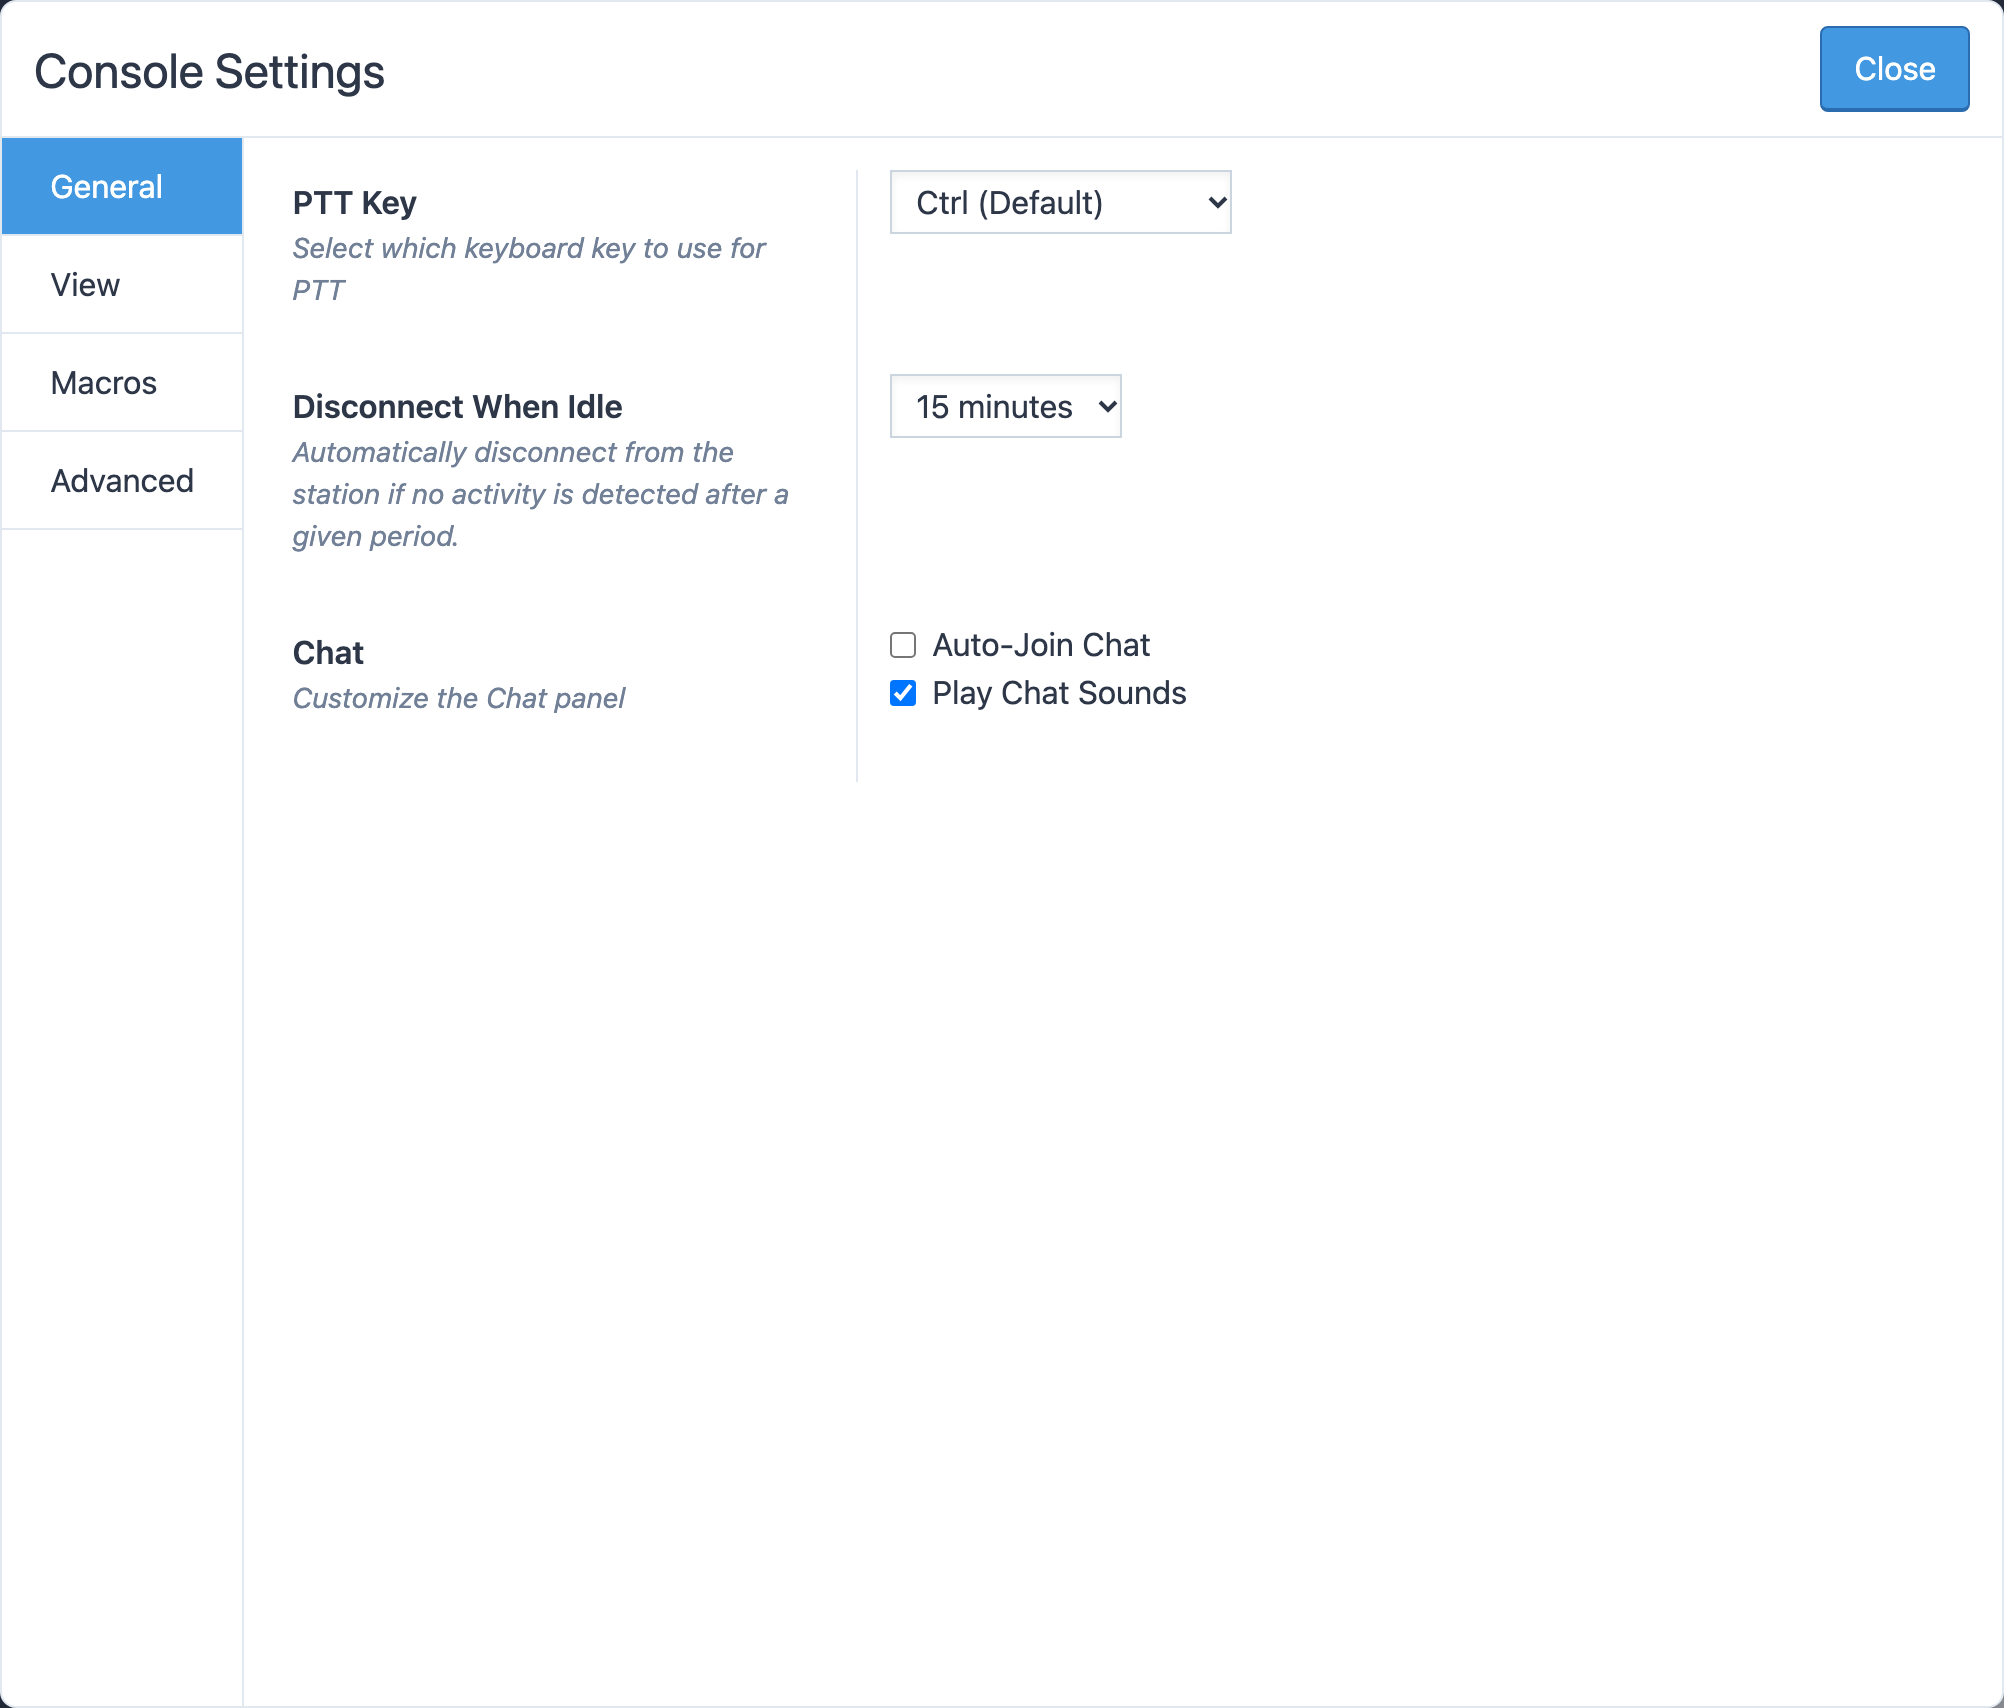
  • The PTT key — hold it anywhere in the console. Choose it under Tools → Console Settings → General → PTT Key: Ctrl (Default), Shift, Ctrl + Shift, Alt/Option + Shift or Alt/Option + Spacebar.
  • VOX — voice-operated keying, in the Transmit group. Lower the sensitivity slider to make it trigger more easily (Lower is more sensitive), and set VOX Delay, 0.1 to 2.0 s, for how long it holds after you stop talking. VOX runs in your browser: it keys the radio when your microphone level crosses the threshold.
  • Voice macros — recorded calls on F1 to F5; see Voice macros.

The PTT button is disabled while PWR is set to zero.

Power and audio

  • PWR — RF power in watts, up to the station's maximum for the rate you chose. The amplifier, where the station has one, is controlled from its own panel; see Amplifiers.
  • MON — the transmit monitor, with a level, so you hear your own audio and sidetone.
  • CW … Hz and … WPM — the CW pitch and keyer speed; see CW.

Meters

PWR (watts), SWR and ALC (percent) appear under the VFOs while you transmit, as far as the radio reports them. High SWR with the amplifier on usually means the wrong antenna is selected for the band; check the antenna panel.

Transmit lockouts

While the station can't key — while its tuner is moving, for example — a TX locked badge appears next to Transmit with the reason. It clears on its own when the station is ready. If you tune outside the amateur bands the radio panel warns you, and the station will not transmit there.

3.8

CW

Send CW from the keyboard as you type, with F1–F5 macros, speed and sidetone controls, and a one-click RBN check.

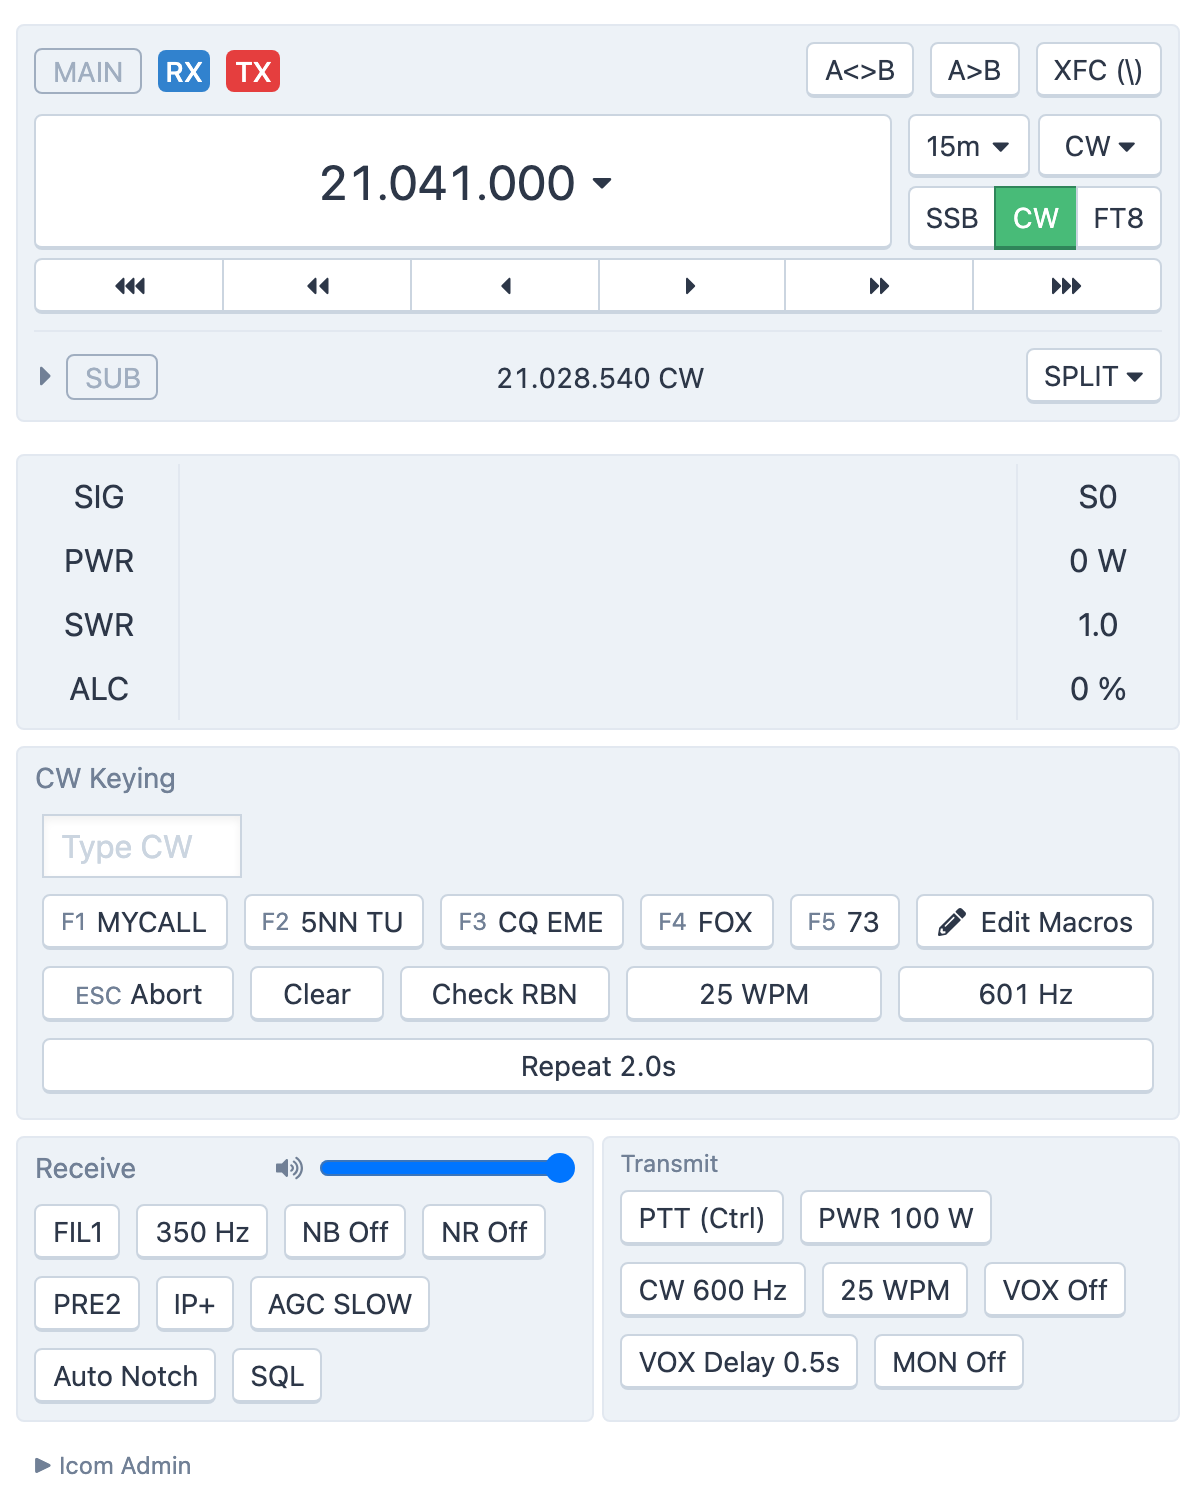
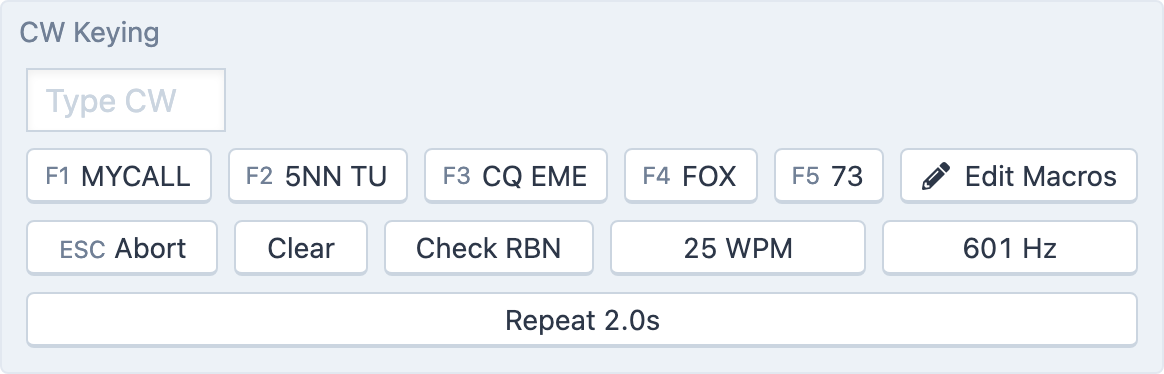
Put the radio in CW and the CW Keying group appears in the radio panel. The station keys the radio; you type.

The CW keyer and macro buttons

Sending as you type

Click in the Type CW box and type. Each character is sent as you press it, and the text you've sent builds up in gray beside the box with a blinking cursor while the station is still sending. Letters are sent in upper case.

  • ESC Abort or the Esc key stops sending at once.
  • Clear wipes the sent-text display.
  • … WPM sets the speed, 5 to 50 WPM (6 to 48 on Icom radios).
  • … Hz sets the sidetone pitch, 400 to 800 Hz (300 to 900 on Icom radios).
  • Repeat …s sets the interval used when a macro repeats, 1.0 to 10.0 seconds.

The transmit monitor level, MON in the Transmit group, controls how loud you hear your own sending.

Macros

Five macro buttons sit under the box, labelled F1 to F5. Click one or press its function key to send it. Hold Shift while pressing the function key and the macro repeats at the Repeat interval until you press Esc; the repeating macro's button turns green.

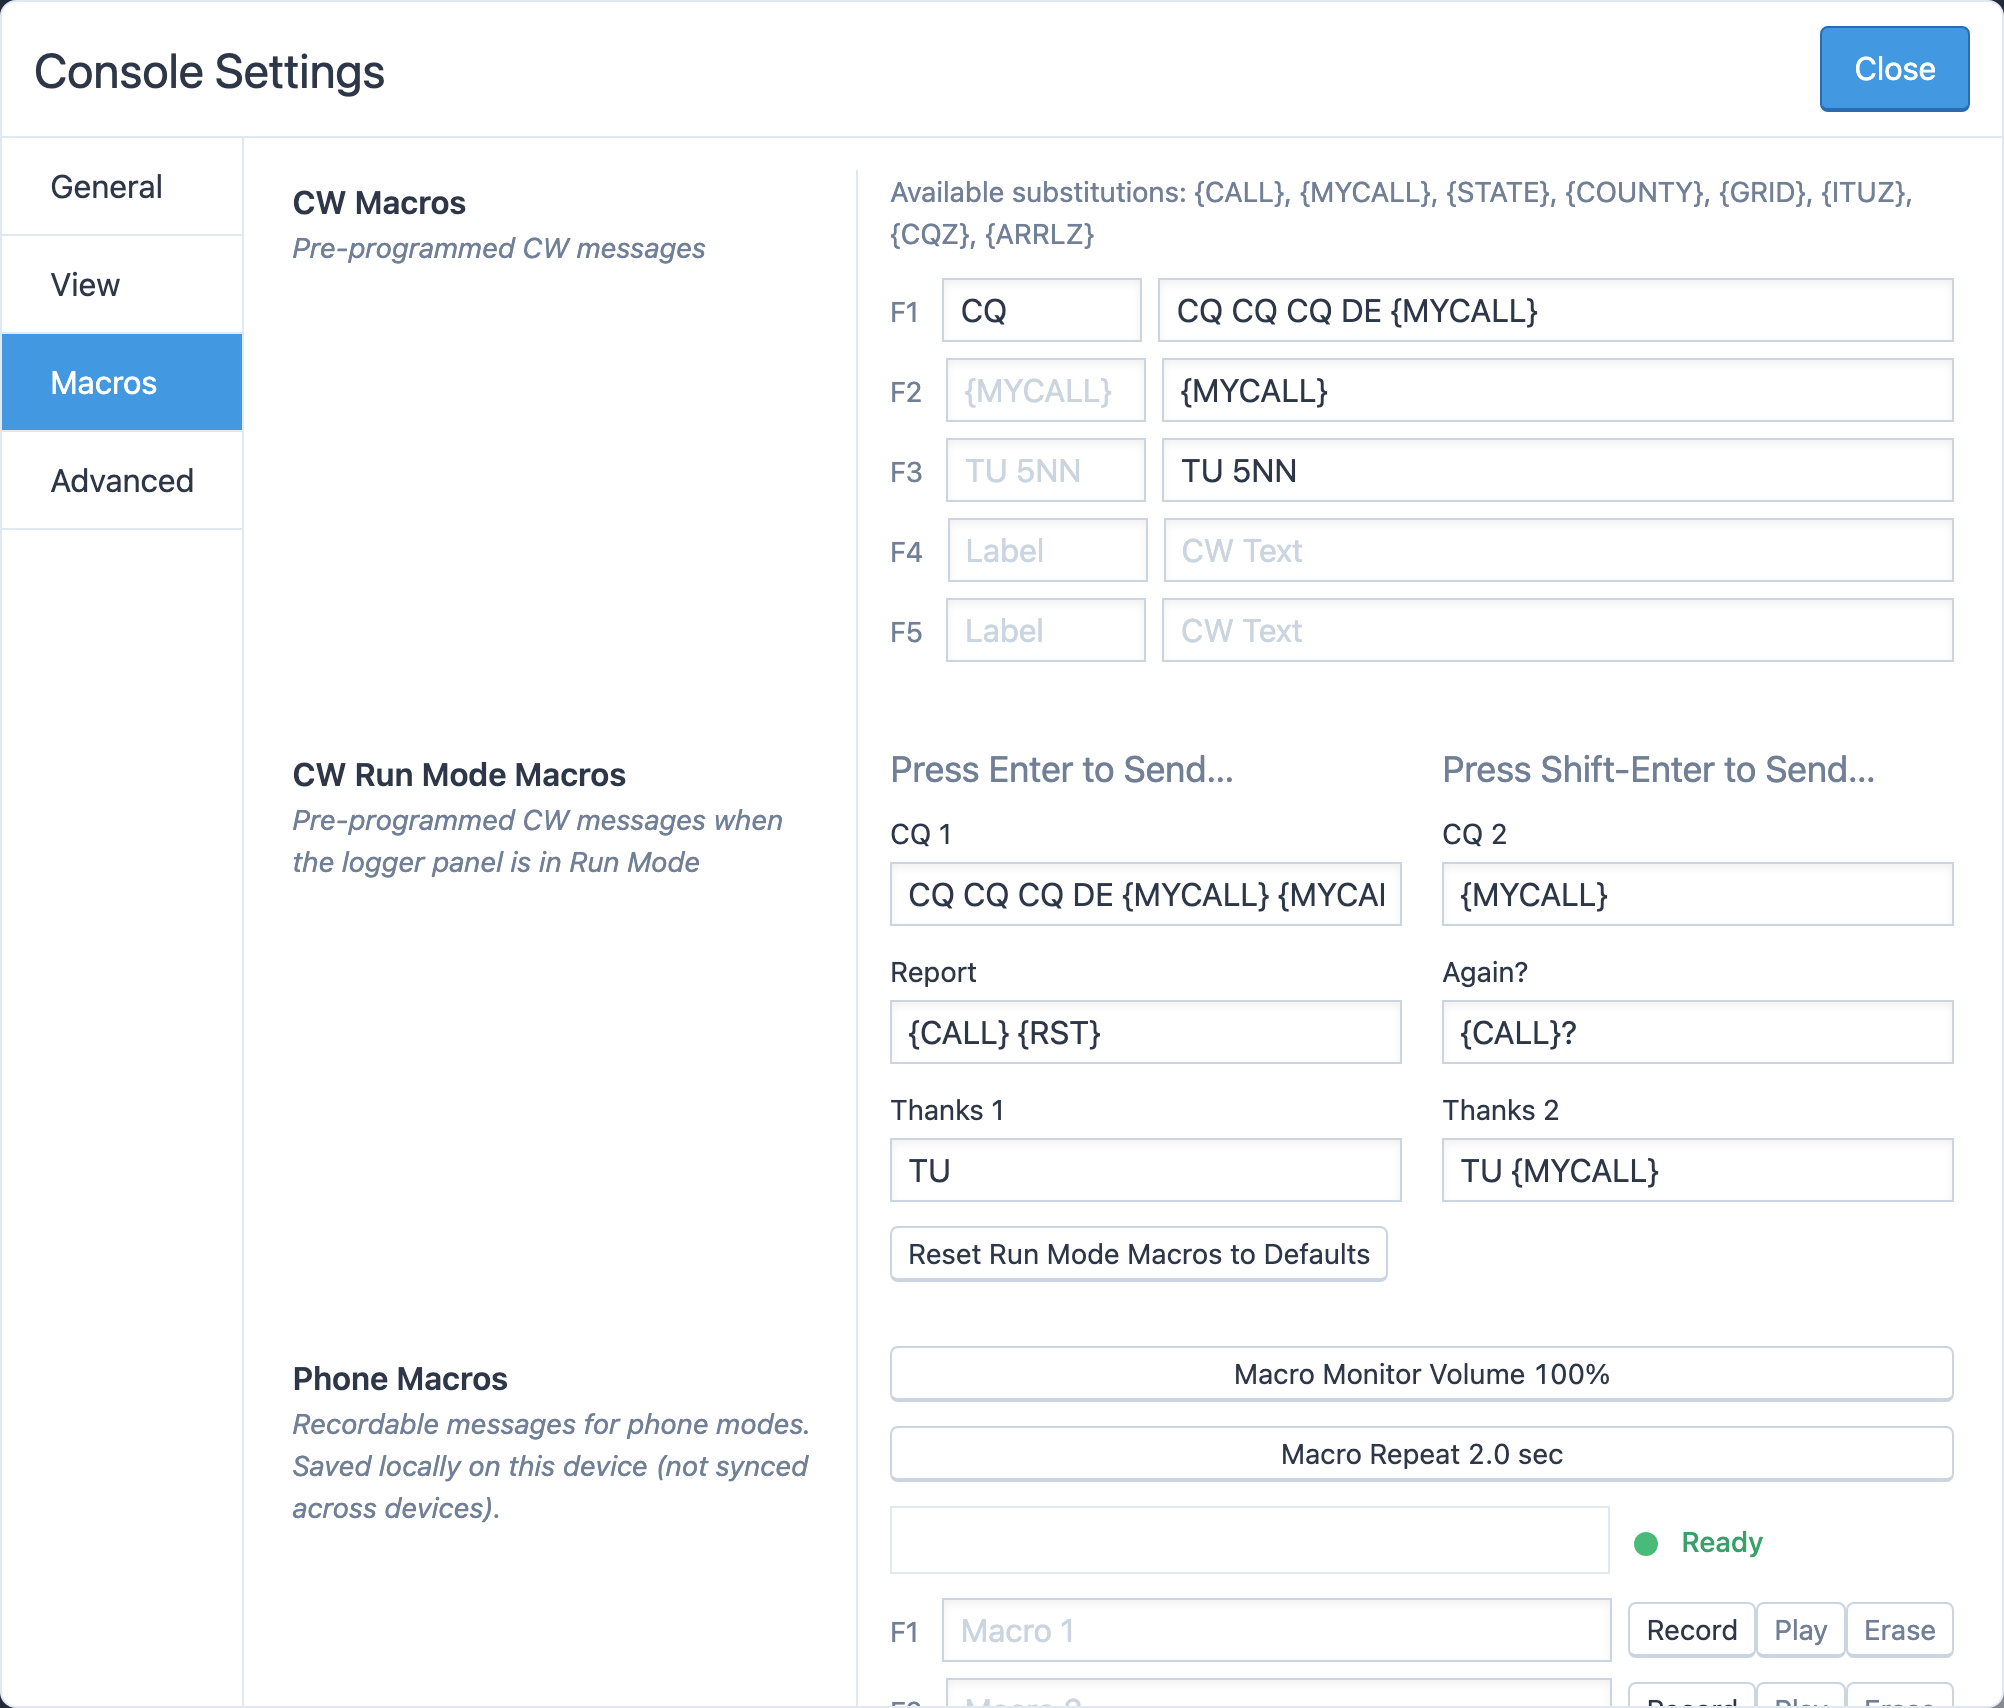
Edit Macros opens Tools → Console Settings → Macros, where each macro has a short Label and its CW Text. The text can contain substitutions that are filled in when you send:

SubstitutionBecomes
{MYCALL}Your callsign, as the logbook will record it (with the station's prefix where required)
{CALL}The callsign in the Log Entry panel
{STATE}, {COUNTY}, {GRID}The station's state, county and grid square
{ITUZ}, {CQZ}, {ARRLZ}The station's ITU zone, CQ zone and ARRL section

Macros with no text are hidden from the panel. A separate set of CW Run Mode Macros drives the Log Entry panel's run mode, where Enter and Shift-Enter send the right message for the stage of the QSO; see Run mode and ESM.

Check RBN

Check RBN sends TEST TEST <yourcall> <yourcall> <yourcall> K and switches the toolbox to DX Spots filtered to the Reverse Beacon Network skimmers that heard you, so you can see where your signal is landing before you call. A banner reads Showing my RBN spots only.; Reset clears the spots and Done returns to the normal spot list. See DX spots.

Using a paddle or key

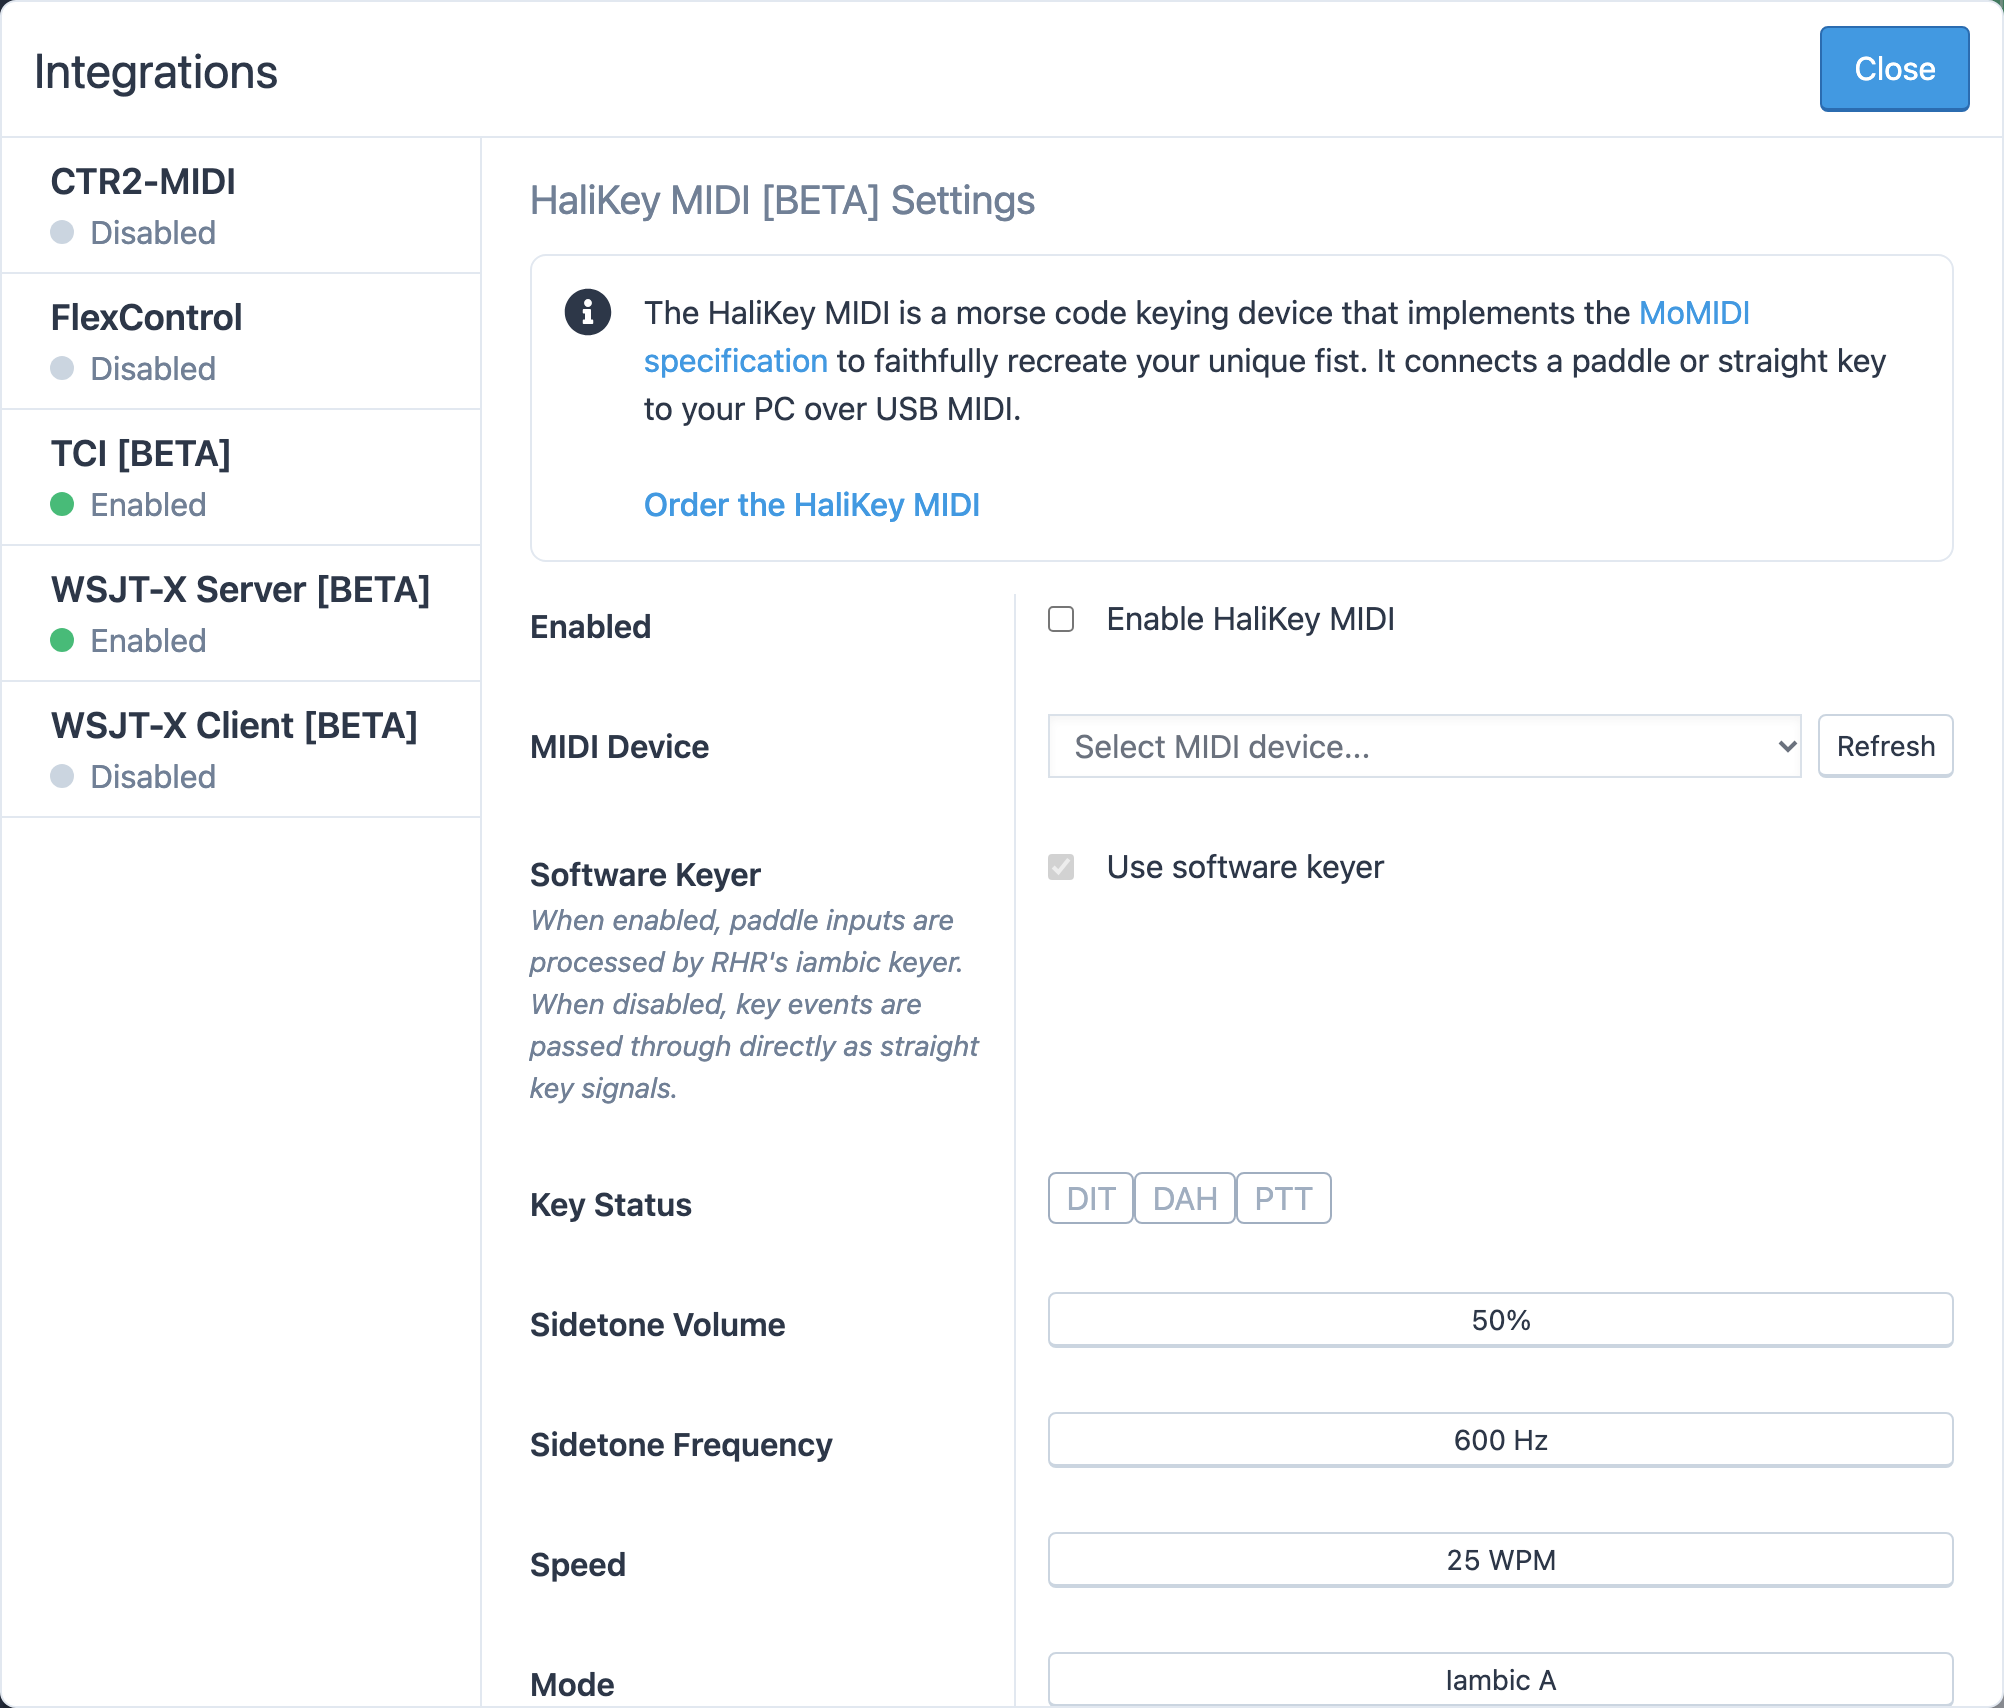
If you'd rather send by hand, the console takes a paddle or straight key over USB MIDI and keys the station with its built-in iambic keyer. See HaliKey and MIDI keys, and CTR2-MIDI for a controller with a built-in keyer and a tuning knob.

3.9

Voice macros

Record your CQ and exchanges once and play them with F1–F5, with auto-repeat for calling CQ.

On phone — SSB, AM or FM — the Phone Macros group appears above the transmit controls. Each macro is a recording from your microphone that the console plays into the transmitter while keying it, so you can call CQ for an hour without saying a word.

Recording

  1. Open Tools → Console Settings → Macros and scroll to Phone Macros.
  2. Watch the microphone meter and the status beside it: Ready means your mic is open. Mic unavailable means the microphone is disabled or blocked; fix it in Audio setup first.
  3. On the row for F1 (or any key), type a label if you like, then click Record. The status reads Starting mic… and then Recording F1.
  4. Speak your message and click Stop.
  5. Click Play to check it, or Erase to start over.
Recording a phone macro in Console Settings

Recordings are saved in this browser on this device only. They don't follow you to another computer, and clearing the browser's site data removes them.

Two sliders apply to every macro:

  • Macro Monitor Volume — how loudly you hear the macro in your own speakers while it plays. At zero the panel shows a warning so you know why it's silent.
  • Macro Repeat — the pause between repeats, 1.0 to 10.0 seconds.

Playing

In the Phone Macros group, each recorded macro is a button labelled with its key and your label (or Macro 1, Macro 2, …). Click it, or press F1 to F5, and the console keys the transmitter, plays the recording and unkeys. The playing macro's button turns green.

Hold Shift while pressing the function key to repeat the macro every Repeat interval — the usual way to run a CQ. Press Esc to stop, either mid-message or between repeats.

The same group carries its own Macro Mon and Repeat controls so you can adjust them without opening settings.

3.10

Antennas and rotors

Use the map panel to choose antennas, turn the beam with Go Anywhere or a preset, and track the moon on EME stations.

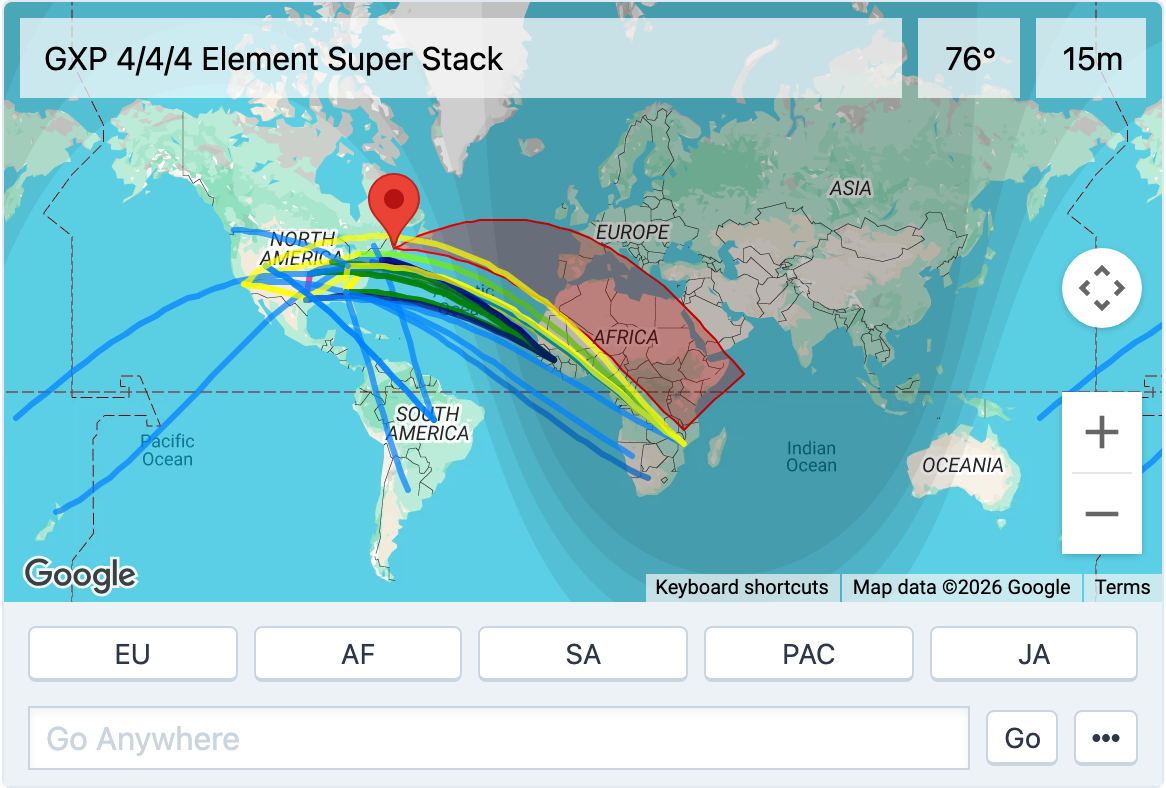
The Map panel is where you point the station. It shows the world as the station sees it, with the controls for its antennas and rotors underneath.

The antenna panel with the map and Go Anywhere

The map

The map is centered on the station and draws:

  • the grayline — the day/night terminator, for working the gray-line enhancement;
  • the station's active antennas as beam patterns in the direction they point;
  • DX spots as markers, when Show Spots on Map is on (in the DX Spots tab's Options menu or under Tools → Console Settings → View);
  • the target you last asked Go Anywhere to find;
  • the position, footprint and ground track of the satellite you are tracking, on satellite stations.

Over the top of the map are the names of the antennas active on your current band, each rotor's heading and the band. If you don't need the map, open the … menu beside Go and tick Hide Map; the controls stay.

Choosing antennas

Stations with more than one antenna on a band show a row of Antenna Switch buttons; the active antenna is green. Where a switch only selects receive antennas it is labelled as such. Stations whose antennas are fixed for each band have no buttons — the station picks the antenna when you change band.

Turning the rotor

  • Rotor Presets — buttons such as EU or JA, set up by the station owner for the usual directions. The preset nearest the current heading is green.
  • Go Anywhere — type a bearing (0 to 359) to turn straight to it, or type a callsign, a grid square or a place name and press Enter or Go. The console looks it up, drops a marker on the map and turns the rotor to the short-path heading. If the lookup fails the box turns red.
  • Go (Long Path) — in the … menu: look up the same target and turn to the long-path heading, 180° away.
  • Stop Rotor — also in the … menu, on rotors that support stopping mid-turn.
Typing a callsign in Go Anywhere and watching the beam turn

The heading labels over the map update as the rotor turns. On stations where more than one rotor serves the band, all of them turn together.

The quickest way to point at a spot is Tune and Turn in the DX Spots tab, which tunes the radio and turns the beam in one click; see DX spots.

Tracking the moon

On stations equipped for EME, a Track Moon checkbox appears beside Go Anywhere when you are on a band the moon-tracking antennas cover. It shows the moon's current azimuth and elevation, is grayed while the moon is below the horizon, and when ticked keeps the antennas following the moon for you. See Satellites and EME.

3.11

Amplifiers

Set the amplifier's level, read its power, SWR and temperature, and clear a fault.

Stations with an amplifier show an Amplifier panel while you are connected at a rate that can transmit. Whether the amplifier is actually available depends on the rate you chose: the rate menu says Amplifier is enabled or Amplifier is disabled for each one, and QRO rates cost more per minute. See Connect to a station and Airtime and rates.

The amplifier panel
The amplifier panel

The panel

The amplifier's name is at the left. At the right, while the amplifier is on:

  • its temperature, in °F;
  • a Preamp button, on amplifiers that have one;
  • the level button — click it to open Select Amplifier Level. Depending on the amplifier the choices are full, mid, low and standby; full, half and standby; or just full and standby. The button is green at full and orange otherwise. In standby the amplifier passes your signal through unamplified.

Some stations have an amplifier the console cannot switch. Those show a fixed label instead: High Power when it is in line, Barefoot when it isn't.

While the amplifier is heating up the button reads Warmup in … with a countdown, and while it cools down after switching off, Cooldown in …. When it is off, the panel shows OFF.

Across the bottom is a bar graph of the output power, with the power in watts and the SWR beside it. The SWR turns red at 3.0 or above.

If your rate doesn't include the amplifier, the level button is disabled.

Faults

If the amplifier trips — high SWR, overdrive, too hot — a red Fault button appears and a dialog opens: The amplifier encountered a fault. with the amplifier's own message, if it gave one. Click Clear Fault to reset it, then fix the cause before you transmit again: usually a mistuned antenna, too much drive, or the wrong band on the antenna switch.

Some amplifiers raise a warning rather than a fault: Warning – title, with an explanation and an I Understand button.

If a fault or warning keeps coming back, disconnect and report a station problem rather than clearing it over and over.

3.12

DX spots

The DX cluster and RBN in the console — filter spots, see what you still need, and tune and turn the beam in one click.

The DX Spots tab in the toolbox is a live DX cluster feed with Reverse Beacon Network (RBN) skimmer spots mixed in. The same spots can be drawn on the waterfall and on the antenna map, so you can see activity where you are tuning and where the beam points.

The DX Spots tab
The DX Spots tab

The table

Newest spots are at the top, and a fresh spot is highlighted for a moment as it arrives. Each row has:

ColumnMeaning
UTCWhen it was spotted. The colored bar beside the time is the band's color, matching the band markers on the panadapter.
MULT!Shown in red when the spot is a new multiplier in your current contest. See Contest logging.
DXThe spotted station. Click it for the menu below.
DEWho spotted it — a skimmer, for RBN spots.
Freq, Band, ModeWhere it is.
CountryThe DX's entity.
NoteThe spotter's comment. RBN spots carry an RBN tag and the skimmer's report.

Click a DX callsign for:

  • Tune and Turn — tune the radio to the spot and point the beam at it. Where the mode is ambiguous the menu offers one entry per mode, such as Tune and Turn (CW).
  • Tune Only — tune without moving the rotor.
  • View on QRZ.com and View on DXHeat.

The tune options need you to be connected to the station you are looking at.

What you still need

If you sync your logbook with Club Log (see Club Log sync), three more columns appear — Band, Mode and Slot — marking each spot against your log:

  • C — confirmed on that band, in that mode, or in that band-and-mode slot;
  • W — worked but not confirmed;
  • • — not yet worked: a new one;
  • ATNO — an all-time new one, an entity you have never worked.

Filters

The DX Spot Filters menu

Filters opens DX Spot Filters with four groups of checkboxes: Bands (160 m through 2 m), Modes (SSB, CW, DIGI), DX and DE continents (NA, SA, EU, AF, AS, OC). Untick what you don't want to see. The filter applies to the table, the waterfall and the map alike.

Options holds:

  • Show On Map — draw the spots on the antenna map, with a marker for the one you are hovering over in the table.
  • Show My RBN Only — show only the RBN skimmers that have heard you. Check RBN in the CW panel turns this on for you after sending a test call; see CW. While it is on, a banner reads Showing my RBN spots only., with Reset to clear the list and Done to return to all spots.

Spots on the waterfall

Tick Spots in the panadapter's corner (or Show Spots on Waterfall under Tools → Console Settings → View) and each spot becomes a flag at its frequency. Click a flag to tune to it; right-click to hide that spot for 1, 24 or 48 hours. See The panadapter and waterfall.

Solar indices

Propagation context is in the header on wide screens: the UTC time, then A, K, SFI (solar flux) and SSN (sunspot number) from the latest WWV bulletin. Each shows – until the first bulletin arrives.

3.13

Chat, news and the DX calendar

Talk with other operators, read RHR's bulletins, and keep the announced DX operations one tab away.

Three of the toolbox tabs aren't about the station at all. They keep you in touch with the other operators, with RHR, and with what's on the air this month.

Chat

The Chat tab
The Chat tab

The Chat tab is a single room for everyone signed in to the console. Before you join it explains the rules: Other users will see your callsign and first name in the chat. Station operation will always remain anonymous. — so chatting never reveals which station you are on. Click Join Chat, or tick Automatically join chat to join every time you open the console.

Once in, type in the Message box and press Enter or Send. The member list on the right shows who is in the room by callsign and first name; on a narrow screen it is replaced by a count. The tab's title shows the number of unread messages, and a sound plays for new messages if you want it.

The … menu in the chat has Auto-Join, Sounds and Leave Chat. The same two switches are under Tools → Console Settings → General → Chat as Auto-Join Chat and Play Chat Sounds.

The name other operators see is your callsign. You can set a different display name under Account → Settings → Preferences → Chat Name; see Profile and preferences.

News

The News tab lists RHR's bulletins — station changes, new features, outages and events — newest first, with the date of each. The tab title shows how many you haven't read. Click the button under a new bulletin to mark it read; it says Roger That!, Five By Nine!, Roger Roger! or Affirmative!, depending on the bulletin. Important bulletins may also pop up as a notice when you open the console; click Okay to dismiss them.

DX Calendar

The DX Calendar tab lists announced DX operations from NG3K's Announced DX Operations page (there is a link to the source at the right). Operations that are on the air today come first under On the air now, then the rest by month.

  • Search filters by callsign, entity or anything in the notes.
  • Spotted only keeps only the operations that appear in your current DX spots — the ones you could work right now.
  • The Spots column shows the recent spots for each operation; click one to tune to it.
  • Click a callsign for Look Up on Map, which drops its location on the antenna map, View on QRZ.com, View on DXHeat, and Visit Website when the operation has one.
  • Dates, When (how long it has left, or when it starts), QSL and Info are from the announcement.

3.14

Satellites and EME

Work the birds with automatic Doppler correction, and track the moon on EME stations.

A few stations are built for space: steerable az/el antennas with satellite tracking, or big VHF arrays for moonbounce. On those stations the console adds the controls described here. On every other station they simply aren't shown.

Satellites

The Satellites tab in the toolbox lists the upcoming passes over the station: Satellite, Next Pass (how long until it rises, or that it is up now), Length and Max El. On a station without satellite capability the tab says so.

Click a pass to start tracking that satellite; click it again to stop. A crosshair marks the one being tracked, the station's antennas follow it, and the antenna map shows the satellite's position, footprint and ground track.

Log satellite contacts with the Satellites fieldset in the Log Entry panel, which records the satellite's name; see Logging from the console.

EME

On EME stations the antenna panel grows a Track Moon checkbox showing the moon's azimuth and elevation. It is grayed while the moon is below the station's horizon. Tick it and the antennas follow the moon; untick it to take the rotor back. See Antennas and rotors.

Most moonbounce today is digital. The console decodes Q65 at the station, with the submode selectable in the FT8 panel; see FT4 and Q65.

3.15

Console settings

Every option in Tools → Console Settings — PTT key, idle disconnect, themes, VFO style, spots display, macros and network relay.

Open Tools → Console Settings, or go straight to a section with its URL: /console/settings/console/general, /view, /macros or /advanced. Settings are saved to your account, so they follow you between browsers — except voice-macro recordings, which stay on the device. Press Esc to close the window.

Console Settings, General

General

  • PTT Key — the key you hold to transmit: Ctrl (Default), Shift, Ctrl + Shift, Alt + Shift or Alt + Spacebar (Option in place of Alt on a Mac). See Transmitting.
  • Disconnect When Idle — how long the console waits with no activity before asking Are you still there? and then disconnecting: 5, 15, 30 or 45 minutes, 1, 2, 4, 8, 12 or 24 hours, or Never. The dialog plays an alert sound, and offers I'm Still Here, Disconnect Me, and a checkbox Don't ask me again - I will power off when I'm done that silences the check for the rest of that connection — airtime included.
  • Chat — Auto-Join Chat and Play Chat Sounds. See Chat, news and the DX calendar.

View

Console Settings, View
  • Theme — Light Mode, Light Mode + Deuteranopia/Protanopia, Dark Mode, Dark Mode + Deuteranopia/Protanopia. The colorblind variants replace the red/green status colors.
  • VFO Control Style — Knobs, Buttons or Slider. See Tuning and the VFO.
  • DX Spots — Show Spots on Map and Show Spots on Waterfall. See DX spots.

Macros

CW Macros (F1–F5, with labels, text and substitutions), CW Run Mode Macros (the Enter and Shift-Enter messages for run mode, with Reset Run Mode Macros to Defaults) and Phone Macros (recordings, Macro Monitor Volume and Macro Repeat). See CW, Run mode and ESM and Voice macros.

Advanced

  • Networking — Force RTC network relay sends your audio through RHR's relay servers even when a direct path exists; Block RTC network relay refuses the relay and insists on a direct path. Leave both off unless Connection problems sends you here; a direct connection is normally lower latency, but some networks only work relayed.
  • Audio System — read-only diagnostics: the audio sample rate and whether the console could open your microphone and list your devices. Useful when writing to support about an audio problem.

3.16

Keyboard shortcuts

Every keyboard shortcut in the console, from connecting and PTT to macros, logging and tuning.

Press Ctrl-Shift-/ anywhere in the console to see the Keyboard Shortcuts list. This page is the same list with the keys that live elsewhere in the console added.

The Keyboard Shortcuts dialog

Moving around

KeysAction
Ctrl-Shift-AFocus the Amplifier panel
Ctrl-Shift-CConnect to the station
Ctrl-Shift-DDisconnect from the station
Ctrl-Shift-LFocus the Logbook (Log Entry) panel
Ctrl-Shift-MFocus the main menu
Ctrl-Shift-RFocus Go Anywhere
Ctrl-Shift-SFocus the station list
Ctrl-Shift-TFocus the Transmit panel
Ctrl-Shift-/Show the keyboard shortcuts

These use the Ctrl key on every platform, including Macs. On a phone layout, a shortcut first switches to the tab that holds its panel.

Transmitting

KeysAction
Hold the PTT keyTransmit. Ctrl by default; choose Shift, Ctrl + Shift, Alt/Option + Shift or Alt/Option + Spacebar under Tools → Console Settings → General → PTT Key.
F1 … F5Send a CW macro (in CW) or play a voice macro (on phone)
Shift-F1 … Shift-F5Send or play the macro, repeating at the Repeat interval
EscStop CW, stop a voice macro, abort an FT8 transmission, or close the settings window
Hold \XFC on Icom stations: listen on and tune the transmit VFO (not while typing in a text box)

Tuning

KeysAction
Enter in Tune VFOGo to the typed frequency
Space or Enter on a tuning buttonStep once (Buttons VFO style)

Logging

In the Log Entry panel:

KeysAction
EnterSave the contact. In run mode and contest fieldsets, send the next message instead (ESM).
Shift-EnterThe alternate run-mode message
TabNext field
Space in CallsignJump to the next field
Alt-← / Alt-→Tune down or up 10 Hz; with Shift, 100 Hz
EscCancel a quick edit, or stop CW

See Logging from the console and Run mode and ESM.

FT8

ActionEffect
Click a decodeSet the receive frequency to it and pick up the call
Double-click a decodeReply and arm the transmitter
EscAbort the transmission

See Making FT8 contacts.

3.17

Using a phone or tablet

The console on a small screen — the tab bar, the touch PTT button, touch tuning and what to expect.

The console runs in the browser on a phone or tablet with no app to install. On a screen narrower than a laptop's it rearranges itself into tabs, and the controls grow to suit fingers.

The console on a phone, with the tab bar and the PTT button

The layout

  • The header keeps the same menus as the desktop, shrunk to icons: the station list, your account, Tools, Audio and Help.
  • The station header is compact: the station's name and an info button that opens its details, status and connect control in a sheet.
  • The tab bar along the bottom replaces the panels: Antenna (the map, antenna switch, rotor presets and Go Anywhere), Radio (the waterfall, the VFOs, transmit controls and amplifier), the current toolbox tab, and More…, which lists Settings, Chat, Log, DX Spots, Station, DX Calendar, News and Satellites.
  • The PTT bar sits above the tabs while you are connected. Press and hold it to transmit.

Menus open as full-screen sheets, and settings open the same Console Settings as on the desktop.

Touch gestures

  • Drag the knob to tune, or switch to Buttons under Tools → Console Settings → View → VFO Control Style for big step buttons.
  • On the panadapter, tap a signal to tune to it, drag with one finger to pan and pinch with two to zoom.
  • Press and hold PTT, the XFC button on Icom stations, or any hold-to-act control; lifting your finger releases it.

Audio on a phone

Run the Audio Setup Wizard from the Audio menu the first time. On iOS Safari, allow the microphone when asked; if you declined, tap the aA icon in the address bar, choose Website Settings and set Microphone to Allow, then reload. Some mobile browsers don't let a page pick the speaker or microphone; the wizard says so, and you use the phone's own output and input instead. Keep the screen awake while you operate — the browser pauses audio when the phone locks.

What's different

  • The UTC clock and solar indices, the latency label and the toolbox resize handle are hidden on small screens.
  • There are no keyboard shortcuts without a keyboard; a tablet with a keyboard attached has them all.
  • Voice macro recordings stay on the device they were recorded on.

Chapter 4

FT8, FT4 & Q65

Digital modes decoded at the station, with no software to install.

4.1

FT8 in the console

Decode FT8 at the station and work it from the console, with no software, audio cables or virtual sound cards.

Every RHR station decodes FT8, FT4 and Q65 itself. The decodes stream into the console, and your replies are sent from the station, so there is nothing to install and no audio to route. This article covers the FT8 panel; Making FT8 contacts covers working a QSO. If you would rather run your own copy of WSJT-X, see WSJT-X with LocalMate.

Opening the FT8 panel

The panel appears when you are connected to a station and the radio is in a digital mode. The quickest way there:

  1. Connect to the station.
  2. Click the frequency on the VFO to open Tune VFO.
  3. In the preset table, click FT8 on the band you want.

The radio tunes to the band's FT8 frequency and switches mode, and the FT8 panel opens below the radio controls and follows the active VFO.

The FT8 panel below the radio controls

What you are looking at

Now and Up Next show the current 15-second period and the one after it, each marked Even or Odd. A blue Receiving… turns orange for Decoding… at the end of each period, and red when you transmit, showing the message being sent.

RX Freq and TX Freq are your audio offsets in Hz within the 3 kHz passband. The ← and → buttons copy one onto the other. Find TX Gap picks the widest empty spot between 300 and 3000 Hz in the latest decode period and makes it your TX Freq.

The badge on the right says LIVE while new decodes scroll in. When you move the mouse over the list or scroll down it, the list freezes so rows do not move under your cursor, the badge changes to PAUSED · N new, and clicking the badge jumps back to the latest decodes.

The decode list

Each row shows UTC, Mode, Freq, SNR and the Message. A red line separates one period from the next. CQ calls and messages addressed to you are highlighted; messages the console cannot act on are greyed out. Clear empties the list.

Narrow the list with the two selects and the search box above it:

  • Filter: All, CQ only, Calling me only, Me only (anything that mentions your callsign) or DX only (only the station you are working). Fox callers only appears in Fox mode.
  • Continent: World, or one or two continents such as EU only or NA/SA only, based on the sender's prefix.
  • Search matches any text in the message, for example a callsign or grid.

When nothing matches, Show All Decodes resets the filter.

History

The table on the right is your own QSO history for this session: the messages you sent (→) and the ones sent to you (←), with their UTC, Freq and SNR. Clicking a history row works like clicking a decode. Clear empties it.

4.2

Making FT8 contacts

Reply to a decode, let the console sequence the QSO, and log it with one click.

With the FT8 panel open and a logbook selected in the Log Entry panel, a contact takes two clicks: one to answer, one to log. Before you transmit, check that the logbook shown in Log Entry is the right one; FT8 contacts are written to it.

Answering a CQ

  1. Click a decode. The console sets your transmit period to the opposite of the caller's, sets RX Freq to their frequency, fills in DX Call, DX Grid and the reports, and selects the right Next TX Message.
  2. Double-click instead to do all of that and turn on TX Enable. The console transmits in the next period.

Everything else is automatic when Auto Sequence is on (it is by default): each time the other station answers as expected, the console advances to the next message, updates the reports, and adds both sides to the History table. When a 73 arrives the QSO is complete.

Click a CQ decode: the console tunes to it and fills in the contact form. Double-click to reply as well.

Calling CQ

  1. Set TX Freq where you want to transmit, or click Find TX Gap.
  2. Choose TX Even/1st to transmit at :00 and :30, or clear it to transmit at :15 and :45.
  3. Click CQ under Next TX Message, then turn on TX Enable.

With …and Auto Reply on, the console answers the first caller it decodes (picking one at random if several call at once). With …and Auto CQ Again on, it calls CQ again after each completed QSO so you have time to log. That is not fully automatic: if nobody answers for a while, transmit is disabled and the watchdog dialog appears.

Choosing messages by hand

The Next TX Message buttons are the six standard messages: CQ, CALL (your call and grid), RPT (a report), R RPT, RR 73 and 73. Clicking one sets the text in the message box; you can also type a free-text message there. The box turns red with Invalid message format when FT8 cannot encode what you typed.

Esc stops a transmission in progress and turns off TX Enable.

Logging

When a 73 is received and Prompt to Log is on, the Log QSO? dialog shows the callsign, both reports and the grid. Click Log It to save the contact to the selected logbook, or Cancel. You can also log at any time with the Log It button next to the contact form, or by pressing Enter in one of its fields. Logged confirms the save; Incomplete means DX Call is empty.

Options

Options opens FT4/FT8 Options:

OptionDefaultWhat it does
Auto SequenceonSend the next message when the expected reply arrives.
…and Auto ReplyonAfter your CQ, answer a caller automatically.
…and Auto CQ AgainonCall CQ again after a QSO; TX is disabled if nothing happens.
Auto SimplexoffClicking a decode also moves your TX Freq onto the caller's frequency.
Prompt to LogonShow Log QSO? when a 73 is received.

Reset to Defaults restores this table.

The transmit watchdog

If the console has sent the same message ten periods in a row, or Auto CQ Again has heard nothing for its waiting time, it stops transmitting and shows Transmit watchdog was triggered. Click Re-enable TX to carry on, or Close to stay in receive.

4.3

Fox and Hound

Work a DXpedition in Hound or SuperHound mode, or run one as the Fox on stations that allow it.

The special-activity select next to Options switches the FT8 panel between Normal, Hound, SuperHound and, on stations set up for it, Fox.

Hound: working a DXpedition

Choose Hound when the DX station is running Fox mode. The console then follows the Fox/Hound rules for you:

  • Your TX Freq is kept above 1000 Hz (it jumps to 1500 if it was lower) and your RX Freq below 1000 Hz, where the Fox transmits.
  • You transmit in the odd periods (:15 and :45). TX Even/1st is locked.
  • Only CALL and R RPT are offered under Next TX Message, and when you send your R+report the console moves your transmission onto the Fox's frequency, as the protocol requires.
  • Find TX Gap only looks above 1000 Hz.
  • After the Fox sends your RR73 the console stops transmitting; it does not send a 73.

Click the Fox's CQ (or any decode from it) to call. Decodes in which the Fox answers you, including the combined "RR73; …" messages a Fox sends to two hounds at once, advance the sequence and complete the QSO like a normal contact.

SuperHound is for a Fox that is not enforcing the 1000 Hz split. It locks you to the odd periods but leaves your frequencies alone.

Fox: running a DXpedition

Fox appears in the select only on stations where it has been enabled. Choosing it shows You are enabling fox mode 🦊, which reminds you that Fox mode is meant for rare DX, that you must not run as a Fox inside the standard FT8 sub-bands, and that completed contacts are logged automatically to the selected logbook without a prompt. Click Enable Fox Mode or Cancel.

In Fox mode the panel changes:

  • Streams (1 to 10, default 5) is how many hounds you work at once, each on its own frequency. Tries (1 to 10, default 4) is how many periods a stream repeats before a hound is dropped.
  • The Fox Queue replaces the contact form. The decode filter switches to Fox callers only; click a caller to add them to the queue. Click a callsign in the queue to move it to the front, or its × to remove it.
  • The streams table on the right shows each stream's Freq, TX Message, the hound's Callsign and the try count (#).
  • Now shows Transmit N streams while you are sending.

Turn on TX Enable above the queue to start. Each completed contact is logged on its own; if a save fails the panel shows Contact upload failure (will retry) and keeps trying.

4.4

FT4 and Q65

The same panel also works FT4 and Q65, including the Q65 submodes used for EME.

The digital panel is not only for FT8. The station decodes FT4 and Q65 too, and the panel adapts to whichever mode the radio is in.

FT4

Open Tune VFO by clicking the frequency and pick FT4 on a band that has a preset (80 m through 10 m except 60 m, plus 6 m and 2 m). The panel works exactly as it does for FT8, with FT4's 7.5-second periods, and the Mode column of the decode list reads FT4. Contacts are logged as FT4.

Q65

Q65 is the slow, weak-signal mode used for EME and other difficult paths. Put the radio into Q65 and the panel replaces the Normal/Hound/Fox select with a submode select. The submodes run from Q65-15A to Q65-300E; the number is the period in seconds and the letter the tone spacing. The default is Q65-60A, the usual choice for 2 m EME.

Changing the submode restarts decoding at the station in the new submode, so pick it before you start a sequence. Hound and Fox do not apply to Q65.

For pointing the antennas at the moon, see Satellites and EME.

4.5

The FT8 skimmer

Every RHR station reports the FT8 stations it hears; browse them on the skimmer page or take the feed over Telnet.

Whenever a station is idle it scans the HF bands and decodes FT8, and what it hears is pooled across the whole RHR network. You can use that two ways.

The skimmer page

Tools → FT8 Skimmer in the console opens the skimmer page, a map and list of the DX stations heard in the last 24 hours. It is also at /skimmer and needs no sign-in. Use the filters to narrow it by time interval, by the RHR station or country that heard them, by callsign, and with DX only to drop domestic stations; Refresh every 5m keeps the page current. When a filter matches very many stations the page shows a sample spread across the interval. The band bar at the bottom shows how busy each band is.

The FT8 Activity panel on your account overview is a summary of the same data for the past 24 hours.

The Telnet feed

The skimmer's spots are also served over Telnet, in the same format as a DX cluster, so your logger or award-tracking software can show them in real time.

  1. In the console, open Tools → FT8 Skimmer Telnet.
  2. Note the Host and Port (7373), or click Copy URL to Clipboard for the telnet:// address.
  3. Add it to your software as a cluster node.

The same host and port are listed under Telnet Access in the skimmer page's information dialog.

Chapter 5

Logbook

Logging QSOs, browsing and exporting them, and syncing with LoTW and Club Log.

5.1

The RHR logbook

How your contacts are stored, which logbook they go to, and where they sync.

Every contact you make on RHR is saved in your RHR logbook, whether you typed it into the console, clicked Log It in the FT8 panel, or imported it from WSJT-X through LocalMate. You can browse, edit and export it at /logbook, and it can upload to Club Log and Logbook of The World for you.

One logbook per country

A logbook belongs to one DXCC entity and one callsign. Because RHR stations are in several countries, your account gets a default logbook for each entity its stations cover, created the first time you need it:

  • At a US station the logbook uses your own callsign.
  • At a station abroad it uses the callsign you are required to sign there, for example 9A/yourcall in Croatia, and HH2AA in Haiti.

The console's Log Entry panel only offers logbooks for the country of the station you are looking at, and selects one for you when you move to a station in another country, so in normal use you never choose one. You can add logbooks of your own, for example one per contest, with New Logbook on the logbook pages; see Browse and edit contacts.

Where contacts come from

Where to see them

The console's Log tab shows your latest 50 contacts with quick editing. The logbook pages show everything: the sidebar lists each logbook with its contact count, grouped by country, with your totals and confirmed-country count at the top.

Where they go

Link the accounts on the Sync tab and new contacts upload on their own: to Club Log immediately, and to LoTW twice a day, signed with the certificate you upload. Confirmations flow back the other way and show up as the LOTW and CL columns next to each contact and on the DXCC page.

5.2

Logging from the console

The Log Entry panel, its keyboard flow, and the Log tab for quick edits.

The Log Entry panel sits with the station's controls and follows the radio: the frequency and mode of each contact come from the transmit VFO, and the station is recorded with it. The Log tab in the toolbox shows what you have logged.

The Log Entry panel in DXing mode

Choosing a logbook, mode and fieldset

The three buttons at the top of the panel are menus:

  • Select a Logbook lists your logbooks for the station's country, and one of them is selected for you when you switch to a station in another country. New Logbook… and Manage Logbooks… open the logbook pages in a new tab.
  • The mode button shows the mode that will be logged. It follows the radio, so you rarely touch it. Phone modes, data modes and CW are listed first, with everything else under Other Modes. No Mode means the radio's mode has no match and you should pick one.
  • The fieldset button chooses the fields you fill in: DXing, Contesting, Run CW, and the contest fieldsets described in Contest logging. Satellites is chosen for you when you track a satellite.

Entering a contact

DXing has Callsign, RST Rcvd, RST Sent, Grid and Notes. Contesting has Callsign, Exch Rcvd and Exch Sent. Satellites has Callsign, Grid and Satellite.

  1. Type the callsign.
  2. Tab moves to the next field (Shift-Tab goes back); in DXing, Space jumps straight from Callsign to Notes.
  3. Press Enter, or click the check button, to save. The button turns green when the entry is complete enough to save.

The form clears for the next contact. If something is wrong the panel shows Error: with the reason, for example when no logbook is selected.

After you disconnect

The panel keeps the last station and frequency so you can log a contact you finished just before disconnecting. Two yellow labels show the station name and frequency that will be recorded when they differ from what you are looking at now; after that one contact the radio data is cleared.

The Log tab

The Log tab in the toolbox lists your latest 50 contacts across all logbooks, with UTC, Callsign, Band, MHz, Mode, Station, Sent, Received and Logbook. Click a callsign, or the sent or received column, for a menu:

  • Quick Edit turns the row into fields for the callsign, reports and exchanges. Enter or Save keeps the change; Esc or Cancel drops it.
  • View Contact opens the contact's page in a new tab.

View all contacts at the bottom opens the full logbook.

5.3

Browse and edit contacts

Filter your contacts, fix or delete them, move them between logbooks, and manage the logbooks themselves.

The Browse tab at /logbook shows all your contacts, newest first, with a date header for each day. Click a logbook in the sidebar to see just that one; its header shows the callsign and country, and Logbook Settings opens its settings.

Browsing contacts with the filters open

Filtering

The filters above the table narrow what you see, and they also drive the export at the bottom of the page:

  • DX Callsign and My Callsign
  • Start Date and End Date, as YYYY-MM-DD
  • Band, Mode and Station
  • LOTW Status: Not Submitted, Submitted, Accepted or Confirmed
  • Club Log Status: Not Submitted, Submitted or Error

Click Filter to apply. The filters stay in the page address, so you can bookmark a view.

Reading the table

Each row has the UTC time, the DX callsign, DE (the callsign you used), Band, Mode, Station, and two sync columns. LOTW shows three pills: UP once the contact has been uploaded, OK once LoTW has accepted it, and QSL once the other station has confirmed; a red UP means the upload failed, and hovering shows why. CL is the Club Log status. Details → opens the contact.

Editing a contact

The contact page shows every field, its Club Log and LoTW status, and when it was exported from RHR. Edit contact details lets you change the callsign, time, frequency and band, mode, reports, exchanges, grid, your callsign, satellite details and notes. From the contact page you can also resubmit it to Club Log or LoTW, or delete it.

For a quick fix to the callsign or an exchange, use Quick Edit in the console's Log tab instead.

Acting on several contacts

Tick the boxes on the left (hold Shift to select a range), choose an action from Checked QSOs... and click Apply:

  • Resubmit to LoTW and Resubmit to Club Log
  • Move to... another of your logbooks
  • Delete, after a confirmation. Deleting cannot be undone.

Managing logbooks

New Logbook asks for a Logbook Name, the Callsign Used and the DXCC Country, and whether to Make this my default logbook for that country's contacts. A logbook's settings page changes its name and callsign and lets you make it the default.

To delete a logbook open its settings. An empty logbook deletes at once. One with contacts asks whether to Permanently delete them or Move them to another logbook. A default logbook cannot be deleted until another logbook is made the default for that country.

5.4

Export ADIF and CSV

Download your contacts for another logger or an award program, all at once or only the new ones.

Exports are at the bottom of the Browse page, under the contact table. Whatever filters are applied above are applied to the export, and the heading tells you how many contacts it will contain: Export 1,234 contacts.

  1. Open /logbook, or one logbook from the sidebar.
  2. Set the filters you want, for example a date range or one band, and click Filter.
  3. Scroll to the export panel and set its two options.
  4. Click Download ADIF or Download CSV.

Options

ADIF field for RHR station name is the ADIF field the station's name is written into, so your logger can tell which RHR station you were at. Leave it empty to leave the station out. RHR remembers your last choice.

Only download new (unexported) contacts skips anything you have already downloaded. Every contact remembers when it was last exported from RHR; you can see the date on the contact's page.

5.5

Import ADIF

Bring an existing log into RHR as its own logbook, on accounts with the Import tab.

The Import tab on the logbook pages is switched on per account. If you do not see it next to Browse, DXCC, Sync and Export, contact support and ask for it.

Uploading a file

  1. Open Import and choose an .adi or .adif file of up to 50 MB.
  2. Click Analyze Log File. The page shows the analysis progress and updates itself; you can leave and come back.

Reviewing the analysis

When the analysis is complete the page shows the file's ADIF Headers and a Summary: the number of contacts and of duplicates among them, the first and last contact, and which ADIF fields were found and how often. If the file could not be read, the errors are listed instead.

Completing the import

Under Import Options give the New logbook name, the Callsign used for these contacts and their Country, then click Import N contacts (duplicates are not counted). The contacts are imported in the background; the page says Log will be imported soon. and they appear in the new logbook shortly after.

Discard Import throws the upload away.

5.6

Club Log sync

Link your Club Log account so every new contact is uploaded at once and your DXCC charts come back nightly.

Club Log sync does two things: it uploads each new contact to Club Log as soon as you log it, and it downloads your DXCC charts so the console and the DXCC page can mark what you have worked and confirmed. It is set up on the Sync tab at /logbook/sync.

Linking your account

  1. Click Add Club Log Account.
  2. Enter your Club Log Account E-mail, the Club Log Callsign to link and your Club Log Password.
  3. Click Link to Club Log.

RHR checks the credentials with Club Log and, if they are accepted, downloads your DXCC charts straight away. Only one callsign from your Club Log account can be linked. Edit Club Log Account and Remove Club Log Account are on the Sync tab afterwards.

QSO upload

With QSO Upload switched on, the panel reads QSOs will be immediately submitted to Club Log, and every contact you log is uploaded in the background; edits and deletions are sent too. If some contacts have not been submitted, for example ones logged while upload was off, the panel says how many and offers Upload N QSOs to Club Log.

If Club Log rejects your credentials, upload is turned off and the reason is shown in orange under QSOs will not be submitted to Club Log. Fix the account details and switch it back on.

Each contact's CL column on the Browse page shows its status, and the Club Log Status filter finds contacts that are Not Submitted, Submitted or in Error. Resubmit one from its contact page, or several with Checked QSOs... → Resubmit to Club Log.

DXCC chart download

With DXCC Chart Download on, your charts are fetched from Club Log every night at 03:00 UTC. Fetch DXCC Stats Now refreshes them immediately, for example after you have uploaded a batch of confirmations elsewhere. The Sync tab shows when they were last downloaded.

5.7

LoTW sync

Link Logbook of The World, add your TQSL certificate, and let RHR sign and upload your contacts twice a day.

RHR can sign your contacts with your own TQSL certificate and upload them to Logbook of The World, then fetch the QSLs that come back. It is set up on the Sync tab at /logbook/sync.

The LoTW section of the Sync tab

Linking your account

  1. Under Logbook of The World, click Add LoTW Account.
  2. Enter your LOTW Username and LOTW Password and click Link to LOTW. RHR checks them with LoTW before saving.

Adding a certificate

Uploads are signed with a callsign certificate exported from TQSL. Until you add one the Sync tab warns Add a certificate for new contacts to be uploaded to LoTW.

Importing a TQSL certificate
  1. Click Add a Certificate.
  2. In TQSL, open the Callsign Certificate tab and select the certificate for the callsign you use on RHR.
  3. Choose Save the Callsign Certificate for CALL. When TQSL asks for a password, leave it blank.
  4. Upload the .p12 file it saved and click Import Certificate.

Repeat for each callsign you log with, such as 9A/yourcall for Croatia. Expired certificates are refused. If you already have a certificate for that callsign, RHR shows both and asks whether to Replace Certificate; contacts LoTW had not yet accepted are queued for upload again with the new one.

The certificate table lists each Callsign, its valid dates, Serial, and Download and Remove links; an expired one is marked Expired! in red. Keep your own copy of each .p12.

Uploads and downloads

With QSO Upload on, new contacts are sent at 02:00 and 14:00 UTC. The panel shows how many are waiting and offers Upload N QSOs to LoTW to send them now. With QSL Download on, confirmations are fetched at 03:00 and 15:00 UTC; Fetch QSLs Now does it immediately. A download error is shown in red with its time and message.

On the Browse page each contact's LOTW column has three pills: UP when uploaded, OK when LoTW has accepted it, QSL when the other station has confirmed. The LOTW Status filter selects Not Submitted, Submitted, Accepted or Confirmed contacts, and Checked QSOs... → Resubmit to LoTW sends chosen contacts again.

When LoTW is down

During an LoTW outage RHR pauses sync and shows an orange banner, LOTW sync is temporarily disabled due to a service outage, with a link to LoTW's status page. Nothing is lost; uploads resume when sync is turned back on.

5.8

DXCC tracking

Your worked and confirmed countries, from Club Log, on the DXCC page and marked on every DX spot.

RHR does not compute DXCC itself. It uses the charts Club Log builds from your uploaded log, so Club Log sync must be linked first; without it the DXCC tab only offers Enable Club Log sync →.

The DXCC page

The DXCC tab at /logbook/dxcc shows DXCC Stats: how many countries you have worked and confirmed, and a table of every entity by band. Each cell is W (worked), C (confirmed) or V (verified by an award check), or a dot for nothing yet. Entities you have never worked at all, your all-time new ones, are in red. The select at the top switches between Any mode, Phone, CW and Data; See full charts on Club Log → opens the source.

The sidebar's N countries link is the number confirmed, and it leads here.

On the spots

The same data marks the DX Spots tab in the console. When slot marking is on, each spot's Band, Mode and Slot columns show C for confirmed, W for worked, and ATNO for an entity you have never worked. See DX spots.

The charts refresh from Club Log nightly, or when you click Fetch DXCC Stats Now on the Sync tab, so a new confirmation can take until the next morning to show up.

Chapter 6

Contesting

Contest fieldsets, run mode, Enter Sends Message and multi-op teams.

6.1

Contest logging

The contest fieldsets in the Log Entry panel, with dupe checks, live score and a Cabrillo download.

The Log Entry panel has a fieldset for each supported contest. Pick one from the fieldset menu and the panel becomes a contest logger: the exchange is checked as you type, dupes and multipliers are flagged, the score updates with every contact, and you can download a Cabrillo file when it is over.

The Log Entry panel in a contest fieldset

The fieldsets

FieldsetReceived exchangeSent exchange
CQ WW CW, CQ WW SSBCQ zone (RX)Your zone (TX)
IARUITU zone or society (RX)Your zone (TX)
WPX CW - Single Op, WPX SSB - Single OpSerial (RX Serial)Serial (TX Serial)
WPX CW - Multi Op, WPX SSB - Multi OpSerialSerial, per band
SP DXProvince (RX Province)Serial (TX Serial)

The plain Contesting fieldset (Callsign, Exch Rcvd, Exch Sent) is for any other contest; it has none of the scoring below.

The Band shown comes from the radio. The sent exchange is filled in for you: zones from the station's location, or whatever you enter under Options → My Exchange, and WPX serials from RHR, so several operators never send the same number. RST is logged as 599 or 59 automatically.

While you operate

  • The callsign turns red for a new multiplier (green when it counts for two at once, such as a new zone and a new country in CQ WW), blue for a new station on this band, and grey for a dupe. A ⚠️ next to the exchange means it is not valid for the contest.
  • Check Log shows Super Check Partial matches for what you have typed so far, from the master callsign list and your own log.
  • History lists your earlier contacts with this callsign; a dupe on the current band is marked DUPE! in red.
  • Summary shows, per band and in total, QSOs, Points, Mults, DXCC and your 10 min Rate and 60 min Rate. The band you are on is highlighted.
  • In the DX Spots tab, spots that would be a new multiplier are flagged in the MULT! column.
  • Press ` (backtick) or Ctrl-W to wipe the entry without logging it.

In the CW fieldsets Enter also sends CW; see Run mode and ESM.

Options

Options at the bottom of the fieldset holds:

  • Operator, in the Multi Op fieldsets, recorded on each contact and used for the per-operator table in Summary.
  • My Exchange and My Continent (and My DXCC for CQ WW), when the station's own values are not what you want to send or score with.
  • Mult Bell, which rings when you log a new multiplier (a 🛎 shows in the Summary).
  • Download Cabrillo Log, which saves CONTEST-YEAR-CALL.txt with every contact in the logbook. Log file requires editing before submission: the header's category, club, name and address lines are placeholders you must fill in before you send it to the sponsor.

In the WPX fieldsets the panel also shows Posting to scoreboard as CALL while it reports your score to the online scoreboard each minute.

6.2

Run mode and ESM

Run a CW pileup from the keyboard: Enter sends the right message for where you are in the QSO.

In the CW fieldsets the console sends CW for you as you log, in the style of N1MM+'s Enter Sends Message. You never leave the callsign field.

Run CW, for everyday pileups

The Run CW fieldset is for running outside a contest. It has Callsign, RST Rcvd and RST Sent, and under them the two messages Enter and Shift-Enter will send right now, which change as the QSO moves on:

QSO stageEnterShift-Enter
Callsign emptyCQ 1 (a long CQ)CQ 2 (a short one)
Callsign typed, cursor still in CallsignReport (his call and your report), then move to RST RcvdAgain?
Report enteredThanks 1, and log the contactThanks 2, and log the contact

The messages are yours to edit under Tools → Console Settings → Macros → CW Run Mode Macros, with substitutions such as {CALL} and {MYCALL}; Reset Run Mode Macros to Defaults restores the standard set.

While running:

  • Esc stops the CW being sent.
  • Alt-← and Alt-→ tune 10 Hz down or up; add Shift for 100 Hz.
  • Check Log shows Super Check Partial matches for a partial call.

ESM in contests

The CQ WW CW, WPX CW and IARU (in CW) fieldsets use ESM. The two lines under the fields show what Enter and Shift + Enter send next, with a caret marking the one that fires (hold Shift to see it move). The button beside them toggles RUN (green) and S&P (orange).

Running:

  1. Enter with an empty callsign sends TEST and your call.
  2. Type the caller; Enter sends their call, 5NN and your exchange, and moves to the exchange field. Shift-Enter asks ? instead.
  3. Type the exchange; Enter sends TU and your call and logs the contact.

Search and pounce:

  1. Enter sends your callsign.
  2. When they answer, type the exchange; Enter sends 5NN and yours.
  3. Enter again (Log It) logs the contact; Shift-Enter repeats your exchange.

The phone fieldsets have the same flow without the CW: Enter moves through the fields and logs.

6.3

Multi-op teams

Several operators, several stations, one log, and an interlock that keeps one signal per band.

In the WPX CW - Multi Op and WPX SSB - Multi Op fieldsets the console joins a team. Every console signed in to the same RHR account and connected to a station appears on it, so a group of operators can run several RHR stations as one multi-op entry. Each operator enters their own callsign under Options → Operator.

The team panel

A panel titled with the team's name appears above the station controls:

  • A badge for your band reads TX OK in green when you are free to transmit. While another station on your band is transmitting it turns orange: TX WAIT if you must wait for them, or TX IN USE if you hold priority and may interrupt.
  • The Priority checkbox claims priority on your band (see below).
  • The table lists every station on the team in frequency order: a TX badge that lights red while it transmits, 🔒 when it shares your band, ❗️ when it holds priority, then its frequency and mode, the station name and the operator.

Leaving the Multi Op fieldset leaves the team.

The transmit interlock

Stations on the same band form a group, and only one of them may transmit at a time. When you press PTT, start CW or begin an FT8 transmission, the console asks for the group's transmit lock. If another station already holds it, your transmission is cut off at once and you hear a denied tone; the badge shows TX WAIT until they finish.

A station with Priority is allowed to interrupt. If the priority station starts transmitting while you are, your transmission is aborted so theirs can go out. Use it for the run station; leave it off for the multiplier station.

Scoring

Multi-op serial numbers are issued per band, and the Summary gains an Operator table with each operator's QSOs, points and multipliers. The Cabrillo download lists every operator in its OPERATORS line.

Chapter 7

LocalMate & integrations

Your own ham software and hardware: WSJT-X, N1MM+, TCI, MIDI keys and knobs.

7.1

LocalMate

The small helper app that connects ham radio software on your computer to the console.

LocalMate is a free helper app from Remote Ham Radio that runs in the background on your computer. It gives the software you already use a way to reach the radio you are operating in the console: TCI clients such as WSJT-X and JTDX, your own copy of WSJT-X, loggers and spotting tools such as JTAlert and GridTracker, and N1MM+.

You do not need LocalMate to operate. The console works on its own, including FT8, FT4 and Q65, which are decoded at the station. You also do not need it for a FlexControl knob, a CTR2-MIDI controller or a HaliKey, which connect straight to the browser. Install LocalMate only when you want a program on your computer to talk to the radio.

Download and install

  1. Sign in and open Download. You can also open it from the console's Tools menu.
  2. Under RHR LocalMate, choose Download for macOS (Universal) or Download for Windows (x64).
  3. Unzip the download.
    • macOS (12 or newer): drag RHR LocalMate to your Applications folder and open it.
    • Windows (10 or newer, 64-bit): move localmate.exe somewhere permanent, such as a folder in your Documents, and run it.

LocalMate has no window of its own when it starts. On macOS it appears as an icon in the menu bar, with no Dock icon; on Windows it appears in the system tray.

The tray menu

Click the LocalMate icon to see:

  • A status line. It reads LocalMate Server Running until you connect to a station, then the station's name and grid, and how many clients are connected.
  • Settings... opens the settings window.
  • Quit stops LocalMate. The console's integrations stop working until you start it again.

The icon changes while a console session is active.

The settings window

The window has two settings. Everything else is set in the console.

SettingDefaultWhat it does
Run on StartupoffStarts LocalMate when you sign in to your computer.
LocalMate Port40001The port the console and TCI clients connect to. Change it only if another program already uses 40001, then enter the same port in the console. Click Save.

Closing the window hides it; LocalMate keeps running.

Connect from the console

  1. In the console, open Tools → Integrations.
  2. At the top of any tab, under LocalMate, check that LocalMate Port matches the port in LocalMate's settings window (normally 40001).
  3. Click Connect. The status changes to Connected with LocalMate's version number.
The LocalMate section at the top of every Integrations tab

The console connects on its own when it loads, so after the first time you will usually find it already connected. The status line shows one of:

  • Connected (v…): ready. Once a client such as WSJT-X connects, a count appears, for example 1 TCI client connected.
  • Connecting…
  • Disconnected
  • Error: Connection failed — is LocalMate running?: start LocalMate, or check the port.

Each tab's settings appear only while LocalMate is connected; otherwise the tab says Start LocalMate to configure … settings.

One console at a time

LocalMate serves one console session. If you open the console in a second tab or browser, that tab cannot use LocalMate until the first one disconnects or closes. Software on your computer can only reach the radio while you are connected to a station in the console; between connections, clients are refused.

Updates

LocalMate does not update itself. When a newer version is available, the Integrations page shows an orange banner, A LocalMate update is available, with a Download now link. Quit LocalMate, replace it with the new download and start it again. Your settings are kept.

LocalMate stores its settings in ~/Library/Application Support/LocalMate/ on macOS and %APPDATA%\LocalMate\ on Windows.

7.2

TCI radio control

Control the radio you are operating from WSJT-X, JTDX and other TCI software through LocalMate.

TCI (Transceiver Control Interface) is a protocol originally made for software-defined radios. On RHR it controls every radio on the network: a single connection carries rig control and audio in both directions, so there are no virtual serial ports or virtual sound cards to set up.

TCI is the officially supported way to control the radio from software on your computer. Other methods are no longer supported.

What you need

  • LocalMate, running and connected in Tools → Integrations.
  • A program that speaks TCI, for example JTDX or a build of WSJT-X with TCI support. Expert Electronics keeps a list of apps with TCI support.
  • A station connection. Software can only reach the radio while you are connected in the console.

Turn it on

  1. Open Tools → Integrations and choose the TCI tab.
  2. Make sure LocalMate shows Connected.
  3. Check Accept TCI clients. It is on by default.

The TCI Port field shows the port your software should use. It is always the same as the LocalMate Port, normally 40001, and cannot be changed here.

Set up your software

In the program's TCI or rig settings, enter the address of your own computer and the LocalMate port:

ws://127.0.0.1:40001

Some programs ask for the host and port separately: host 127.0.0.1 (or localhost), port 40001. Use plain ws://, not wss://.

Connect to a station in the console, then connect the program. The console's Integrations page shows 1 TCI client connected once it is through.

What TCI controls

The console translates TCI for the radio you are on. Your software can:

  • read and set the frequency and mode;
  • key the transmitter, with TX audio streamed from the program and RX audio streamed back to it;
  • send CW text and real-time keying;
  • see the modes the radio supports.

Modes the radio does not have are left out, and reverse-sideband CW and RTTY are treated as the normal mode.

Audio levels

Two sliders on the TCI tab set the audio exchanged with your software, from Mute (−60 dB) to +20 dB. 0 dB is unchanged.

  • TCI RX Audio Gain is the receive audio sent to the program. Raise it if its waterfall is faint; lower it if the program reports clipping.
  • TCI TX Audio Gain is the program's audio sent to the transmitter. Watch the radio's ALC meter in the console and keep it out of the red.

Rig control for your own WSJT-X

If you run WSJT-X on your computer, TCI gives it rig control and audio. To also set its grid square automatically and import its contacts into your RHR logbook, turn on the WSJT-X Server integration as well; see WSJT-X with LocalMate.

7.3

WSJT-X with LocalMate

Run your own WSJT-X against an RHR station, or send the console's FT8 decodes and contacts to JTAlert, GridTracker and loggers.

The console decodes FT8, FT4 and Q65 at the station with nothing to install; see FT8 in the console. LocalMate adds two options for people who prefer their own software. They use the WSJT-X UDP protocol that JTAlert, GridTracker and most loggers already understand.

Tab in Tools → IntegrationsUse it whenDirection
WSJT-X ServerYou run the WSJT-X application yourself.WSJT-X → console
WSJT-X ClientYou operate FT8 in the console and want other software to see the decodes and contacts.console → your software

Only one of the two can be on. Turning one on turns the other off.

Both need LocalMate running and connected.

WSJT-X Server: running your own WSJT-X

For rig control and audio, WSJT-X talks to the radio over TCI, so set up TCI first. The WSJT-X Server integration then listens for the messages WSJT-X broadcasts over UDP and does two things with them: keeps WSJT-X's grid square set to the station you are on, and, if you choose, copies the contacts you log in WSJT-X into your RHR logbook.

  1. In WSJT-X, open Settings → Reporting. Under UDP Server, set the server to 127.0.0.1 and the port to 2237, and enable the outgoing messages.
  2. For automatic grid squares, also open Settings → General and check AutoGrid.
  3. In the console, open Tools → Integrations → WSJT-X Server.
  4. Check WSJT-X UDP Server. It is on by default.
  5. Leave Server Port at 2237 unless you changed it in WSJT-X; click Update after editing it.
  6. Check AutoGrid to set WSJT-X's grid to the station's location whenever you connect.
  7. Check Logging to import contacts logged in WSJT-X into the logbook selected in the console's Log Entry panel.

Each station has its own grid square, so a contact you make from Maine and one from Croatia carry the right location without you editing WSJT-X between them.

WSJT-X Client: feeding JTAlert, GridTracker and loggers

When you operate FT8 inside the console, this integration broadcasts each decode, the console's status and every logged contact over UDP, exactly as WSJT-X would. Software that listens for WSJT-X picks them up without knowing RHR is involved.

  1. Open Tools → Integrations → WSJT-X Client.
  2. Check Send to UDP server.
  3. Set Destination Host to the computer running the software, usually 127.0.0.1 for this one.
  4. Set Destination Port to the port the software listens on. WSJT-X's default, which most programs copy, is 2237. Click Update.
  5. In JTAlert, GridTracker or your logger, point it at the same port and start it.

Only one program can listen on a UDP port. If you run two, use a program such as GridTracker that can forward messages onward, or give each its own port and switch Destination Port when you change programs.

Which one do I want?

  • You like WSJT-X's own window, its wide-graph and its sequencing: WSJT-X Server, with TCI.
  • You like the console's FT8 panel and want alerts, maps or an external log: WSJT-X Client.

7.4

N1MM+ and other loggers

Let N1MM+ follow and control the radio you are operating, as if a Kenwood transceiver were attached.

The N1MM+ integration lets N1MM+, or any logger that can control a Kenwood radio over TCP, follow and control the radio you are operating in the console. Band and mode tracking, frequency entry and the CW messages on N1MM+'s F-keys all work as if a Kenwood transceiver were plugged into your computer. LocalMate accepts the logger's connection; the console answers as a Kenwood TS-2000 and drives the real radio.

Turn it on

  1. Start LocalMate and open the console's Tools → Integrations → N1MM+ tab. LocalMate must show Connected.
  2. Check Accept N1MM+ connections. It is off by default.
  3. Leave Port at 2001 unless another program uses it. This port is separate from the LocalMate port. Click Update after changing it.
  4. Note the address under In N1MM+, normally 127.0.0.1:2001.

Set up N1MM+

  1. In N1MM+, open Config → Configure Ports, Mode Control, Audio, Other….

  2. On the Hardware tab, pick a free row. Set the radio to Kenwood and the port to TCP.

  3. In the TCP Port field, enter the address and port together, exactly as shown in the console:

    127.0.0.1:2001

    Not just 127.0.0.1, and not the LocalMate port.

  4. Click OK.

Connect to a station in the console. N1MM+'s entry window shows the radio's frequency and mode within a moment, and the Integrations page shows 1 N1MM+ client connected.

What works

  • The entry window follows the radio's frequency and mode, including the console's band changes.
  • Typing a frequency in the entry window tunes the radio; N1MM+'s band and mode buttons change it.
  • N1MM+'s F-key messages are sent as CW through the station's keyer, at N1MM+'s speed setting.
  • PTT from N1MM+ keys the transmitter.

N1MM+ sees one radio: the radio you are connected to. There is no second VFO or second radio for SO2R, and the connection drops when you disconnect from the station.

Other loggers

Any program that controls a Kenwood radio over a TCP connection can use the same setting: radio Kenwood, address 127.0.0.1, port 2001. Programs that only offer serial ports cannot connect.

7.5

FlexControl knob

Tune and run the station with FlexRadio's USB knob, paired straight to your browser.

The FlexControl is a USB tuning knob with three programmable buttons and a push-button knob. In the console it tunes every brand of radio on the network, not only Flex, and it connects directly to the browser. LocalMate is not needed.

Browsers

The knob uses the browser's serial port support. Use Chrome, Edge or another Chromium browser, or Firefox 141 or newer. Safari cannot connect to it, and the settings tab says so: Web Serial is not supported in this browser.

Pair the knob

  1. Plug the FlexControl in.
  2. Open Tools → Integrations and choose FlexControl.
  3. Check Enable FlexControl.
  4. Under Serial Port, click Pair Device. The browser lists serial devices; choose the FlexControl and confirm.
The FlexControl tab under Tools → Integrations

Connection shows Connected when the knob is talking to the console. The browser remembers the pairing, so from now on the knob connects as soon as you open the console. Re-pair Device picks a different device, and Unpair forgets it.

If Connection shows Error, another program may have the knob open. Close it and click Retry.

What the knob does

Each control has an action. The defaults:

ControlDefault action
KnobVFO, 10 Hz per step
Knob Press (Short)Toggle PTT
Knob Press (Long)Disconnect from Station
AUX 1 (Short)Band Down
AUX 1 (Long)CW Mode
AUX 2 (Short)Band Up
AUX 2 (Long)SSB Mode
AUX 3 (Short)Toggle NR
AUX 3 (Long)Toggle NB

Turning faster tunes in bigger steps.

Change the actions

Under Knob and Buttons, pick an action for each control. A short press and a long press of the same button can do different things. The actions available to buttons are PTT, Toggle PTT, Toggle NR, Toggle NB, Toggle Vox, CW Mode, SSB Mode, FT8 Mode, FT4 Mode, DIGU Mode, DIGL Mode, AM Mode, FM Mode, Band Up, Band Down and Disconnect from Station. The knob can be the VFO, with a step of 10, 20, 50, 100, 200, 500 or 1000 Hz, or a level: Slice Volume, NR Level, NB Level, Vox Level or CW WPM.

Reset to Defaults restores the table above.

Event Log

The Event Log at the bottom of the tab lists every turn and press the console receives from the knob, with a time stamp. If a button seems dead, press it and watch the log: an entry means the knob works and the action is the problem; no entry means the connection is.

7.6

CTR2-MIDI controller

Set up the CTR2-MIDI's knob, six buttons and key jack to run the station and send CW.

The CTR2-MIDI, made by Lynovation (KU7Q), is a small desk controller with a rotary encoder knob, six programmable push buttons and a 3.5 mm jack for a paddle, straight key or footswitch. It connects over USB as a standard MIDI device, so it works straight from the browser with nothing to install.

Browsers

The controller uses the browser's MIDI support: Chrome, Edge or Firefox. Safari does not support MIDI, and the tab says MIDI devices are not supported in this browser.

Connect it

  1. Plug the CTR2-MIDI in.
  2. Open Tools → Integrations and choose CTR2-MIDI.
  3. Check Enable CTR2-MIDI. The browser asks for permission to use MIDI devices the first time; allow it.
  4. Under MIDI Device, choose CTR2-MIDI, marked (recommended). Click Refresh if the list is empty.
The CTR2-MIDI tab, with the knob and button actions

If the controller is unplugged later, the tab shows Device not found with a Try again button.

The knob

The knob has four modes: Home, and Mode 1 to Mode 3. Press the knob to go to the next mode; press and hold it for two seconds to jump back to Home. In Home mode the knob is a VFO; in the other modes it adjusts a level from 0 to 100%. Holding the knob down while turning gives each mode a second action.

KnobDefault action
Knob (Home)VFO, 10 Hz per step
Knob (Home, Pressed)Slice Volume
Knob (Mode 1)NR Level
Knob (Mode 1, Pressed)NB Level
Knob (Mode 2)Vox Level
Knob (Mode 3)CW WPM

The buttons

Each button has a short-press action and a long-press action.

ButtonShort pressLong press
1CW ModeToggle NR
2SSB ModeToggle NB
3FT8 ModeFT4 Mode
4Toggle PTTToggle Vox
5Band Down
6Band UpDisconnect from Station

Pick different actions under Buttons. The choices are the same as for the FlexControl: PTT and toggles, mode buttons, band up and down, and disconnect. Reset to Defaults restores the tables on this page.

The key jack

The 3.5 mm jack has two modes, Normal and Extended. To switch, put the knob in Home mode and hold it for two seconds; the green LED lights in Extended mode. Each mode's left and right inputs have their own action:

InputDefault action
Left PaddleKeyer Dit
Right PaddleKeyer Dah
Left Paddle (Extended)Straight Key
Right Paddle (Extended)PTT

With the defaults, a paddle in Normal mode drives the console's built-in iambic keyer, and in Extended mode the left input is a straight key and the right one is a footswitch for PTT. The keyer's speed, mode, weight and sidetone are set in the same tab; see HaliKey and MIDI keys for what each setting does.

7.7

HaliKey and MIDI keys

Send CW with your own paddle or straight key over USB MIDI, with the console's built-in iambic keyer.

You can send CW on RHR with a real key. A small USB adapter turns your paddle or straight key into a MIDI device, the browser reads it directly, and the console times the dits and dahs and keys the station. No software to install, and it works on every station.

Two adapters are supported:

  • The HaliKey MIDI, which implements the MoMIDI specification. MoMIDI carries the exact timing of each key closure, so your fist arrives intact.
  • The CTR2-MIDI, whose key jack does the same job alongside its knob and buttons.

Both need Chrome, Edge or Firefox. Safari has no MIDI support.

Set up a HaliKey

  1. Plug your paddle or key into the HaliKey, and the HaliKey into a USB port.
  2. Open Tools → Integrations and choose HaliKey MIDI.
  3. Check Enable HaliKey MIDI and allow the browser to use MIDI devices when it asks.
  4. Under MIDI Device, pick HaliKey (recommended). Click Refresh if it is missing.
  5. Decide who does the timing:
    • Use software keyer checked (paddles): the console's iambic keyer turns your paddle's dit and dah contacts into properly timed elements.
    • Use software keyer unchecked (straight key, bug or an external keyer): the key's closures are sent to the station exactly as you make them.
The HaliKey MIDI tab and keyer settings

Key Status shows the dit, dah and key inputs light up as you press them, which is the quickest check that everything is connected.

Keyer settings

SettingRangeNotes
Sidetone Volume0–100%The tone you hear in your speakers as you send. The station's monitor is separate.
Sidetone Frequency400–800 Hz
Speed5–40 WPMSoftware keyer only.
ModeIambic A or Iambic BIambic B adds one more element after you release squeezed paddles.
Weight−50% to +50%Heavier makes every dit and dah longer while keeping the spacing. Default is 0.
Dah Length2.0–4.0 dits3.0 Dits (Default) is standard.

The same settings appear on the CTR2-MIDI tab.

Using it

Connect to a station and switch the radio to CW. Your key works alongside the console's type-ahead CW and macros. The sidetone comes from your computer, so it has no delay; the signal you hear on the station's monitor arrives a little later because it has travelled to the station and back.

7.8

Integration changes in 2026

The desktop app retires on January 1, 2027. What replaces it, and what to do if you use serial devices or DXmate.

The RHR desktop app, the installable program that wrapped the console and connected it to serial devices and DXmate, is being phased out during 2026. It stops working on January 1, 2027. Everything it did is now done either by the console in a normal browser or by LocalMate, a far smaller helper.

What to switch to

If you used the desktop app for…Use this instead
OperatingThe console in Chrome, Edge, Firefox or Safari, at my.remotehamradio.com/console. Nothing to install.
WSJT-X, JTDX, loggers or other software controlling the radioLocalMate with TCI.
Your own WSJT-X's grid and logging, or feeding JTAlert and GridTrackerLocalMate's WSJT-X Server and Client.
N1MM+LocalMate's N1MM+ integration.
A FlexControl knob over serialThe FlexControl paired directly in the browser.
A paddle or key through DXmate or a serial keyerA USB MIDI key adapter: HaliKey MIDI or CTR2-MIDI.
A CTR2-MIDIThe CTR2-MIDI in the browser; it is unchanged.

TCI is the officially supported way for software to control the radio. Other methods, including virtual serial ports from the desktop app, are no longer supported.

DXmate

DXmate, the legacy CW and audio interface box, also depended on the desktop app. Replace it with a HaliKey MIDI or CTR2-MIDI for keying; your microphone and speakers plug into the computer and are selected in the console's Audio Setup Wizard.

Migration checklist

  1. Open the console in a browser and sign in. Run Audio → Audio Setup Wizard to pick your microphone and speakers.
  2. If software on your computer needs the radio, download LocalMate, start it, and connect to it from Tools → Integrations.
  3. Point WSJT-X, JTDX or your logger at TCI: ws://127.0.0.1:40001. Set up the WSJT-X Server or N1MM+ tabs if you use them.
  4. Pair your FlexControl, CTR2-MIDI or HaliKey from Tools → Integrations.
  5. Check your CW macros and phone macros in Tools → Console Settings → Macros. Phone macro recordings are saved in the browser you record them in, so record them again in the browser you will use.
  6. Uninstall the desktop app. The console works the same in the browser, and the desktop app now shows a reminder each time it starts.

If something you relied on has no row in the table above, contact support before the app retires.

Chapter 8

Troubleshooting

When something doesn't work, and what to check first.

8.1

Connection problems

What to do when the console will not connect, keeps reconnecting, or the audio stutters.

Two different connections keep the console working: one to RHR's servers, which carries the station list, controls and chat, and one to the station itself, which carries the radio's audio. This article covers both. If you can connect but are refused, see Why can't I connect?.

"Reconnecting..."

A grey overlay with Reconnecting... means the console lost its connection to RHR's servers. It retries on its own; nothing you do in the meantime is sent. If it does not clear within a minute:

  1. Check that other websites load.
  2. Reload the page. If you were connected to a station, check the station header afterwards and reconnect if needed; see Connect to a station.
  3. If it happens often, turn off any VPN and try a wired connection.

Audio drops, stutters or lags

While connected, the station header shows the round-trip time to the station in milliseconds, green under 250 ms, yellow under 500 ms and red above. Hover over it to see Direct (P2P) or Relayed (TURN).

  • Relayed (TURN) means your network blocks a direct connection, so the audio goes through an RHR relay server. It works, but with more delay. Home routers and mobile hotspots sometimes need it; a corporate or hotel network usually does.
  • A high or jumping round-trip time usually means Wi-Fi or a busy connection. Move to Ethernet, or closer to the access point, and pause large downloads and video streams.

In Tools → Console Settings → Advanced, under Networking, two checkboxes change how the audio connection is made:

  • Force RTC network relay always uses the relay. Try it if the direct connection sets up but the audio never arrives or breaks up badly.
  • Block RTC network relay never uses the relay. Leave it off unless support asks you to turn it on.

Connect to the station again after changing either one.

The Networking options under Console Settings → Advanced

Firewalls and VPNs

The console needs:

  • outgoing HTTPS and WebSocket connections to my.remotehamradio.com;
  • outgoing UDP for the audio, as any video-calling app does. If UDP is blocked, the relay takes over and adds delay.

VPNs, ad blockers and privacy extensions can block the audio connection or the microphone. If the console misbehaves, try it with the VPN off and in a private window, where extensions are usually disabled.

"This browser is not supported"

The console needs a current version of Chrome, Edge, Firefox or Safari (macOS and iOS). Older browsers, and some embedded browsers in other apps, lack the audio features it relies on. The dialog also appears if the page was not loaded over HTTPS, since browsers allow the microphone only on secure pages; check that the address starts with https://.

"This is not the tab you're looking for!"

You are connected to a station in another tab or browser window. Operate it there, or disconnect in that tab first. A connection belongs to the tab that started it.

"… is temporarily unavailable."

The station is offline or taken out of service. There is nothing to fix on your end; pick another station. Sometimes a note under the message explains why.

When to report a problem

If one station connects but sounds wrong, will not key or shows the wrong frequency, while other stations work, the fault is at the station. Use Help → Report a Station Problem; see Report a station problem.

8.2

Microphone and audio problems

Fix a microphone the console cannot reach, no receive audio, or a transmit level that is too low or too hot.

Audio on RHR is plain browser audio: the console plays the station through the speakers you choose and sends your microphone to it. Most problems are permissions or the wrong device selected. Start with Audio → Audio Setup Wizard, which walks through access, speakers and microphone in three steps; this article explains what to do when a step fails.

The console cannot access the microphone

Step 1 of the wizard, Enable Microphone Access, asks the browser for permission. If you denied it once, the browser remembers, and the wizard shows We couldn't access your microphone. with instructions for your browser:

  • Chrome and Edge: click the settings icon at the left of the address bar, turn Microphone on, reload the page and click Enable Microphone Access again.
  • Firefox: click the icon at the left of the address bar, remove the Use the Microphone – Blocked entry, click the button again, check Remember this decision and click Allow.
  • Safari on a Mac: choose Safari → Settings for This Website and set Microphone to Allow, then reload.
  • Safari on iPhone or iPad: tap aA in the address bar, tap Website Settings, set Microphone to Allow, then reload.
  • macOS, any browser: if the browser itself has no microphone access, open System Settings → Privacy & Security → Microphone, turn the browser on, and quit and restart the browser.
Step 1 of the Audio Setup Wizard

Browsers allow the microphone only on secure pages. If the address does not start with https://, the console cannot get a microphone at all and says so.

The microphone is busy or missing

If permission is granted but there is still no level on the meter in Step 3, another program probably has the microphone: a video call, a recording app, or another console tab. Close it and reopen the wizard. If you plugged the microphone in after the browser started, reload the page.

In Step 3, pick the right device in the list; USB headsets often appear twice, once for the microphone and once for a line input. The stereo meters move when you speak. Choose Transmit Left Channel, Right or Both to match the channel your microphone actually uses. Listen To Microphone (Testing) plays you back through your speakers so you can hear what the station will hear.

No receive audio

  • In the Audio menu, check Master Volume. At the far left it reads Muted.
  • In Step 2 of the wizard, Select Speakers, pick the device you are listening on and click Play Test Sound. Some browsers cannot switch speakers; the wizard tells you to change the output device in your operating system instead.
  • Check the browser tab is not muted, and that the operating system's output device and volume are what you expect.
  • Make sure you are connected to a station. Audio only flows while connected, and the radio panel's Master Volume can be turned all the way down.
  • Tools → Console Settings → Advanced shows the Audio System status: the sample rate, whether the microphone stream and device list were obtained, and which failed.

Transmit audio too low or distorted

Watch the ALC meter on the transmit panel while you speak. Set the microphone level in your operating system's sound settings so ALC moves without pinning, then adjust the console's compressor or processor setting for the radio you are on. Shouting into a microphone set too hot overdrives the radio and splatters; raising the level does not make you louder.

Operating without a microphone

If you are only listening, or your microphone will not cooperate, choose Disable Microphone in the wizard, or connect with Connect (No Mic) from the station's connect menu. CW and digital modes work without a microphone; only phone needs one.

8.3

LocalMate problems

Fixes for LocalMate not connecting, ports in use, software refused, and contacts that did not import.

Problems with LocalMate show up in two places: in the LocalMate status line at the top of every Tools → Integrations tab, and in the program you are trying to connect. Work through the sections in order.

"Error: Connection failed — is LocalMate running?"

The console could not reach LocalMate.

  1. Look for LocalMate's icon in the menu bar (macOS) or system tray (Windows). If it is not there, start LocalMate.
  2. Click the icon and choose Settings.... Compare LocalMate Port with the LocalMate Port field in the console. They must match; 40001 is the default.
  3. Click Connect in the console.

If LocalMate is running but the status never changes, its server did not start. The usual cause is one of the next two sections.

No internet on the first run

LocalMate fetches a security certificate from RHR the first time it runs, and renews it when fewer than 30 days remain. Without it the browser refuses to connect and LocalMate cannot start its server. Make sure the computer is online, then quit LocalMate and start it again. Afterwards it works offline from the certificate it saved.

A port is already in use

LocalMate listens on three ports: 40001 for the console and TCI clients, 2237 for WSJT-X messages and 2001 for N1MM+. If another program holds one of them, that feature silently does nothing.

  • Port 40001 is rarely contested. If it is, change LocalMate Port in LocalMate's settings window and in the console.
  • Port 2237 is WSJT-X's own UDP port. If you run WSJT-X and a program such as JTAlert or GridTracker that also listens on 2237, only one of them gets the messages. Give the second program a different port, and set the matching Server Port or Destination Port in the console.
  • Port 2001 is a common CAT port. Change Port on the N1MM+ tab if another program uses it, and enter the new address in N1MM+.

"LocalMate is already running"

LocalMate runs once per computer. If this message appears when you open it, the first copy is already in the menu bar or tray; click that icon instead.

My software cannot connect

  • You are not connected to a station. LocalMate only accepts TCI and N1MM+ connections while the console is connected to a station. Connect first, then start or reconnect the program.
  • Another console tab has the session. Only one console tab or browser can use LocalMate at a time. Close the others, or disconnect LocalMate in them.
  • The address is wrong. TCI apps use ws://127.0.0.1:40001, plain ws://. N1MM+ needs the address and port in one field, exactly 127.0.0.1:2001, with the radio set to Kenwood and the port to TCP.
  • N1MM+ was started first. In N1MM+, choose Tools → Rescan/Reset Radios after you connect to the station.
  • The tab's checkbox is off. Check Accept TCI clients, WSJT-X UDP Server, Send to UDP server or Accept N1MM+ connections as appropriate. Remember that WSJT-X Server and WSJT-X Client cannot both be on.

When a program is connected, the status line counts it: 1 TCI client connected, 1 N1MM+ client connected.

WSJT-X did not get the grid square

AutoGrid must be on in two places: the console's WSJT-X Server tab, and WSJT-X itself under Settings → General → AutoGrid. The grid is sent when you connect to a station, so connect in the console before you expect it to change.

A WSJT-X contact was not logged

Logging on the WSJT-X Server tab adds contacts to the logbook currently selected in the console's Log Entry panel. If none is selected, the console shows WSJT-X contact with … was not logged — no RHR logbook selected. Pick a logbook and log the contact by hand this once; later contacts import on their own.

The update banner

An orange A LocalMate update is available banner on the Integrations page means your copy is older than the current release. Quit LocalMate, download the new version from the link and start it. LocalMate does not update itself.

Where LocalMate keeps its files

Settings and the saved certificate are in ~/Library/Application Support/LocalMate/ on macOS and %APPDATA%\LocalMate\ on Windows. Deleting that folder resets LocalMate; it fetches a new certificate on the next start.

8.4

Why can't I connect?

The messages the console shows when a connection is refused, and what each one needs you to do.

When you click Connect and the console refuses, it tells you why in a notice. The reasons fall into three groups: your account, the station, and where else you are connected.

Account messages

"Your license is required. Please visit your account and upload your license to continue." The deadline for verifying your license has passed without a verified license on file. Upload it at Account → Settings; see Verify your license. Station access returns once it is approved.

"Until your amateur license is verified, your account can operate only on airtime credit, and you don't have enough left to continue." New members operate on their included airtime credit until the license is approved. The message continues either We're reviewing the license you uploaded…, in which case wait for the approval e-mail, or Please upload your license, in which case upload it. Buying more airtime also lets you continue; see Airtime credit and auto-reload.

"Your account is overdue. Please visit your account page to pay off your balance." A monthly airtime charge has gone unpaid for 30 days. Go to Account → Payments and choose Make a Payment; see Paying for airtime.

"Your latest payment has failed. Please visit your account page to update your payment information." A charge to your card was declined. Update the card under Account → Settings, Payment Method. Your account page shows the failed attempt.

"Please purchase additional airtime to continue." Your account runs on a prepaid balance, and it is too low for this connection. Buy airtime on the Account page under Reload Airtime, or turn on auto-reload.

"Auto-reload failed. Please visit your account and verify payment information to continue." Auto-reload tried to top up your balance and the card was declined. Fix the payment method, then connect again.

"This station is not available on your current plan." Your membership does not include this station. The notice links to the plans; see Membership and pricing. CEPT members can receive on every station but transmit only on stations in CEPT countries; see CEPT members.

"Your account has been permanently deactivated." Shown at sign-in. Contact support@remotehamradio.com if you believe this is a mistake.

Station messages

The station shows "In Use" or "In Use By …". Someone else is operating it. Favorites and the station list show availability at a glance; pick another station or wait. Some stations offer a receive-only or Standby rate you can use alongside the operator.

You were disconnected and see "Someone else connected to …". You were on a standby or receive-only rate, and the note TX connections have priority applied: a member connecting to transmit takes the station. The dialog lists stations available now, with a Connect button for each.

"… is temporarily unavailable." The station is offline. See Connection problems.

"Please wait…" that never ends. The station's hardware is being reconfigured for your connection. If it has not finished after a minute, disconnect, reload the page and try again, then report it if it repeats.

Already connected elsewhere

"This is not the tab you're looking for!" You already have a connection in another tab or browser. Control the station there, or disconnect it first.

The connect menu shows "0 Connections Remaining". Your membership allows a set number of simultaneous station connections, normally one. Disconnect from the other station first.

Chapter 9

Contact us

Questions, station problems, billing, and offering a station.

9.1

Contact us

How to reach RHR with a question, which way to use for what, and what to include so we can help the first time.

This article lists the ways to reach us and what to put in your message so we can answer it without a round of follow-up questions.

Which way to use

  • A station is misbehaving (no audio, will not key, wrong frequency, an antenna or amplifier fault): use Help → Report a Station Problem in the console. The report carries the station and time with it. See Report a station problem.
  • Anything else, from a question about the console to a feature you cannot find: use Help → Contact Support in the console, which opens a window where you can send us a message.
  • You cannot get into the console, or would rather write from your own mail program: send e-mail to support@remotehamradio.com.

We reply by e-mail, to the address on your account or the one you wrote from. Replying to our e-mail continues the same conversation.

General inquiries

You don't need an account to write to us. For anything that isn't about your own account or a station you're operating, send e-mail to support@remotehamradio.com. That includes:

  • Questions about RHR before you join, such as which stations and bands are available or what membership includes. The pricing page and the station list answer many of them.
  • Suggestions and feedback about the console, the stations or this help center.
  • Clubs, schools and groups who want to operate together, and press or partnership questions.
  • Offering a station, which is covered in Offer a station.

Put the subject of your question in the e-mail's subject line, and include your callsign if you have one.

Before you write

Many questions are answered in this help center. Search the help center, or start from one of these:

What to include

The more of this you give us the first time, the faster the answer:

  • Your callsign, if you are writing from an address we may not know.
  • For a problem on the air: the station, the UTC time, and the frequency and mode.
  • What you did, what you expected, and what happened instead, in order.
  • Your browser and operating system, and whether you use LocalMate or a controller.
  • A screenshot of any message the console showed. The exact wording matters.
  • For audio problems, the round-trip time and Direct or Relayed shown in the station header; see Connection problems.

9.2

Report a station problem

Tell us about a station that is misbehaving, from the console, with the details we need to find and fix the fault.

When a station sounds wrong, will not key, shows the wrong frequency or reports a fault, tell us from the console. The report reaches the people who can look at the station, with your callsign, the station and the time attached, so they can match it to the station's own logs.

Is it the station?

Before you report, try another station if you can. If the same thing happens everywhere, the problem is more likely at your end: see Connection problems and Microphone and audio problems. If only one station misbehaves while the others work, report it.

Send a report

Report while you are connected, or right after, so the details are filled in for you.

  1. Open Help → Report a Station Problem.
  2. Check Station. It is filled in with the station you are connected to; change it if needed, or choose No particular station.
  3. Check Frequency / Mode. It is filled in from your transmit frequency; correct it if the problem was elsewhere.
  4. Set Time to when the problem happened, in UTC. It starts at the current time.
  5. Describe the problem under What went wrong?.
  6. Click Submit.
The Report a Station Problem dialog

Report Submitted confirms it. If we need more from you, we reply by e-mail.

What makes a good report

  • What you did, what you expected, and what you saw or heard instead.
  • Which VFO, and which antenna, amplifier or tuner setting, if it matters.
  • Whether other stations worked for you at the same time.
  • The exact wording of any message the console showed.

9.3

Account and billing questions

Where to change your account and payments yourself, and what to send us when you need a person to look at a charge or your account.

Most changes to your account and payments you can make yourself, straight away, from your account page. This article points to each one, and says what to send us when you need a person instead.

Things you can do yourself

When to write to us

Write to support@remotehamradio.com, or use Help → Contact Support in the console, when:

  • A charge looks wrong, or you were charged twice.
  • A payment failed and retrying it from your account did not work.
  • You need your callsign changed, or two accounts merged.
  • A license is still waiting for review after you added it.
  • You cannot sign in, and resetting your password did not help.

What to include

  • Your callsign, and the e-mail address on your account if you are writing from a different one.
  • For a charge: its date and amount, and the receipt if you have it.
  • For a connection you think was billed wrongly: the station and the UTC time.
  • What you expected, and what you see instead.

9.4

Offer a station

How to put your station on the RHR network, or donate one to the Youth Network.

If you have a station you would like other members to operate, there are two ways to offer it.

Host a station on the network

Send e-mail to support@remotehamradio.com with:

  • Your name and callsign.
  • Where the station is.
  • The radio, antennas, amplifier and any other equipment.
  • The internet connection at the site.

We reply by e-mail to talk through getting it on the network. Once it is, your account shows the station's health, usage and payout; see Station owners.

Youth Network stations are run by young operators, and some are donated by elmers. To offer one, fill in the Donate your station form:

  1. Enter your Name, Callsign and Email, and optionally a Phone number.
  2. Describe the station under Your station: where it is, the radio, antennas, amplifier and other equipment.
  3. Click Send.

Thank you! confirms that we have the details, and we will be in touch. See Youth Network for what the program is.